.png)
Menu configuration(table)
Peppr uses a hierarchical system to organize your menu offerings. In this section, you can set up menus, Sub-menu, sets, items, etc. Only after setting up these things will the menu be displayed on the quick order interface.
Menus are the highest level of the hierarchy and typically map out the different categories of offerings you serve (e.g., Food, Drink, Lunch, Dinner, Happy Hour, Bar).
Sub-menus are the second tier of the hierarchy and typically fall within menus (e.g., Appetizers, Salads, Sandwiches, Desserts).
Sets are smaller groups within a sub-menu, which will be provided with several items in it. The price of the set will be more favorable and cheaper than the sum of the separate items.
Lastly, items will fall into our sub-menu and sets.
If you want to add/edit functions mentioned above, you can do in Peppr as follows:
1.Menu
Main steps | Sub-steps/Notice | Images |
|---|---|---|
① Go to Menu in the navigation bar and click Create Menu to create a new menu. | 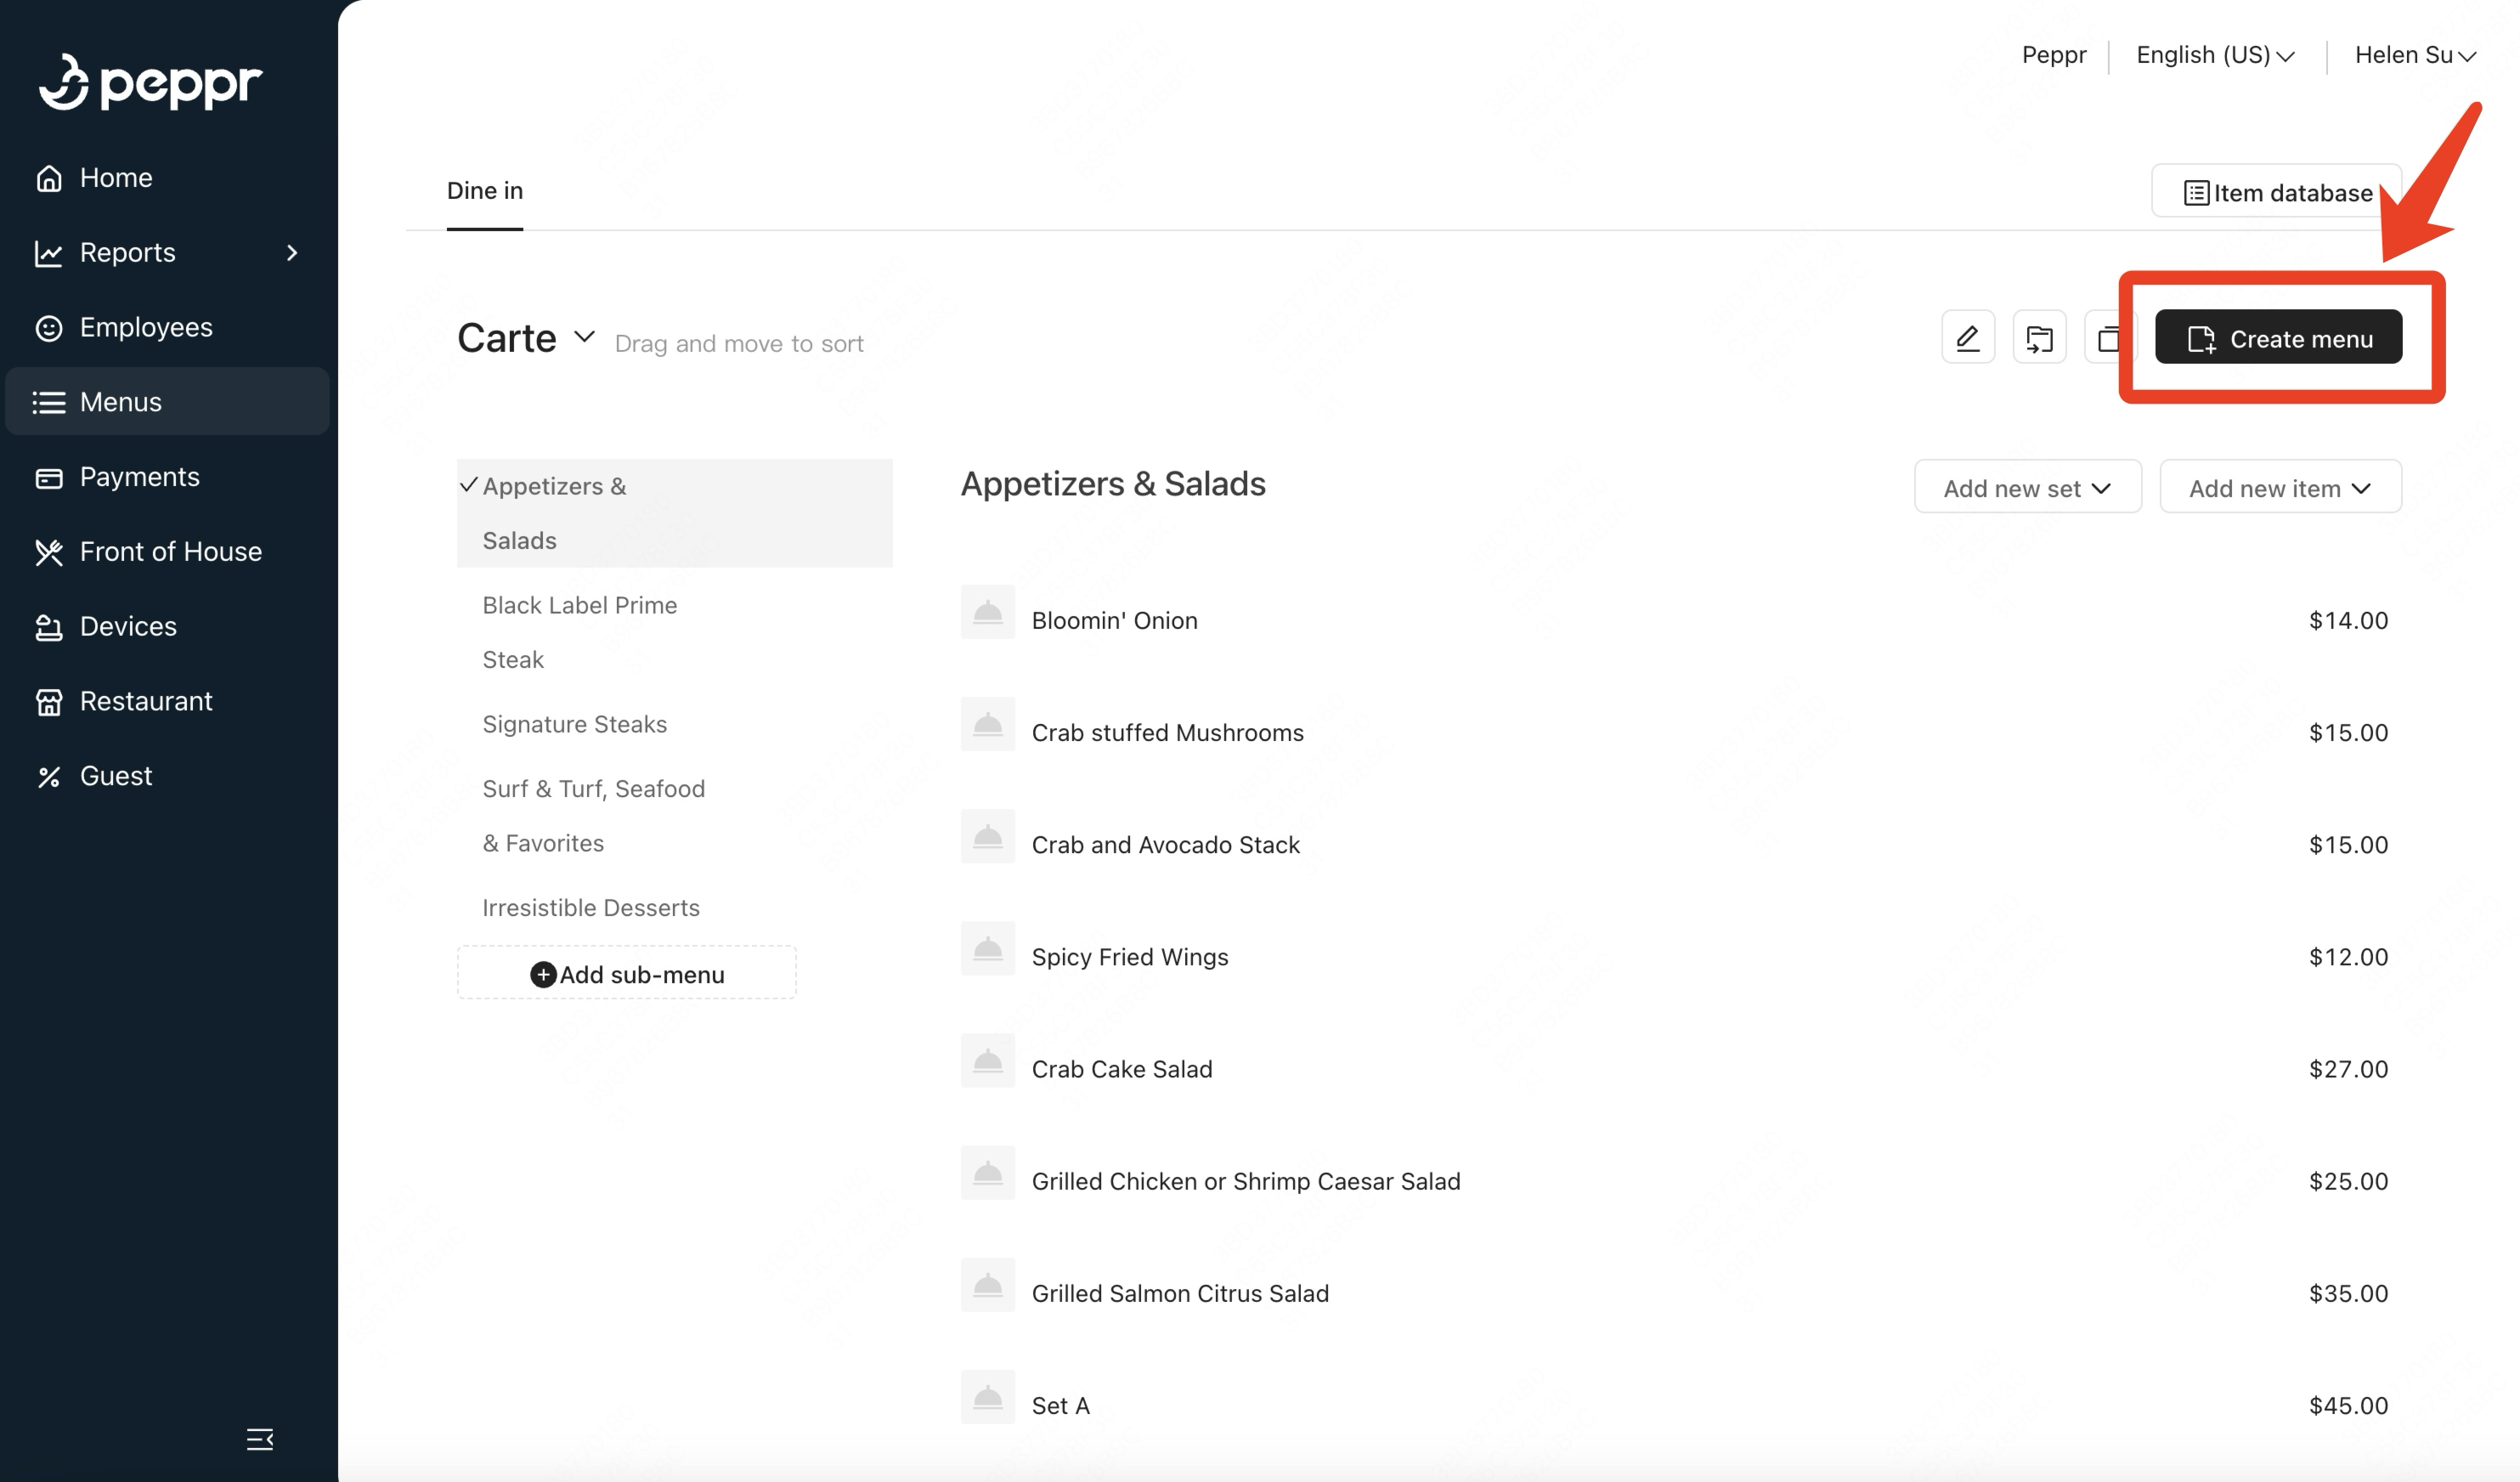 | |
② Fill in general information for the menu. |  | |
③ Set a tax rate for the menu | i. Click to choose Inherit or Disinherit tax rate. |

|
ii. Click Manage tax rates, and an inquiry window (Leave the website) will pop up. After clicking Confirm, the window will jump to the tax rates page, where you can manage the tax rates. | 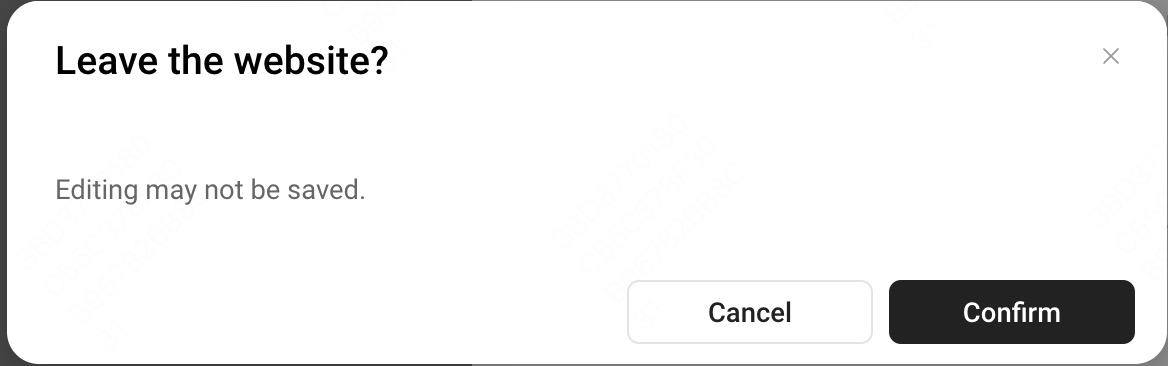 | |
④ Choose prep stations that this menu will use for | 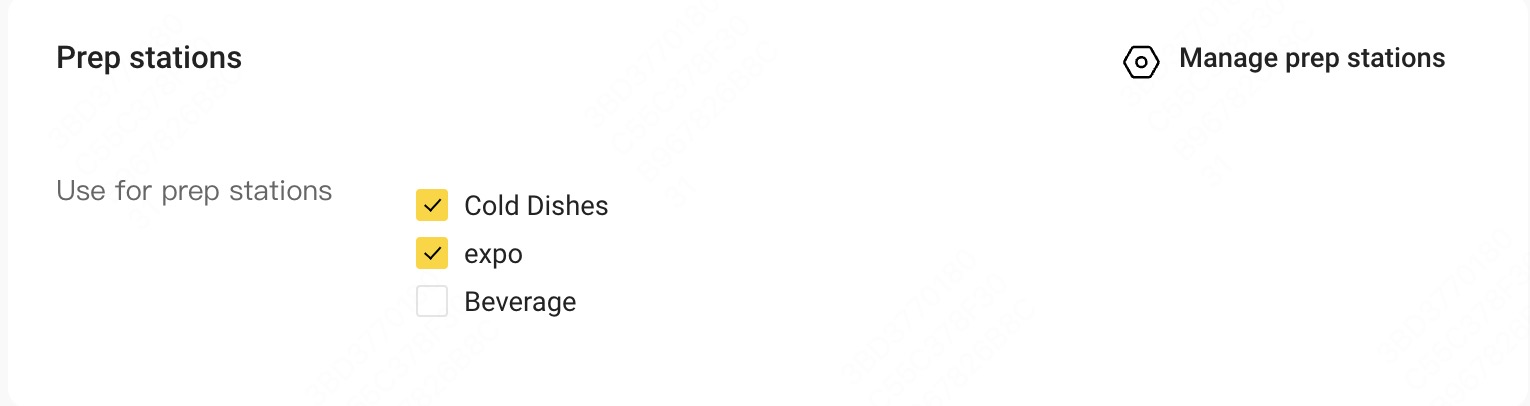 | |
⑤ Scroll down to Availability in the bottom of the page and choose Date option and Time Option . | 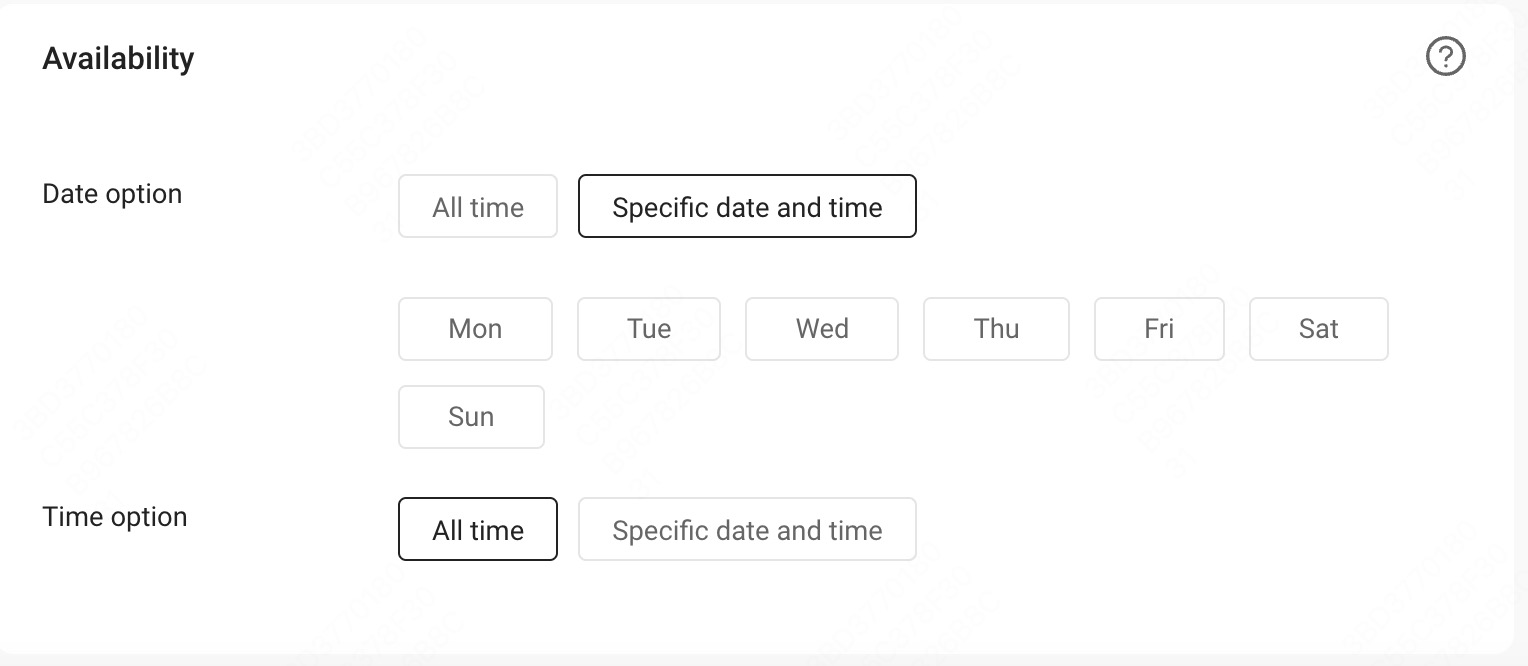 |
Notes:
i. Inheritance relationship of the tax rate is that the next level will inherit the tax rate set by the previous level. The tax rate of the menu inherits the default tax rate set in the Payment section. The tax rate of a Menu group inherits the Menu to which it belongs, and the tax rate of an Item also inherits the Menu group to which it belongs.
2.Sub-menu
Main steps | Sub-steps/Notice | Images |
|---|---|---|
① Create sub-menu | i. If there is no sub-menu in this menu, click Create sub-menu to enter the sub-menu creation page. | 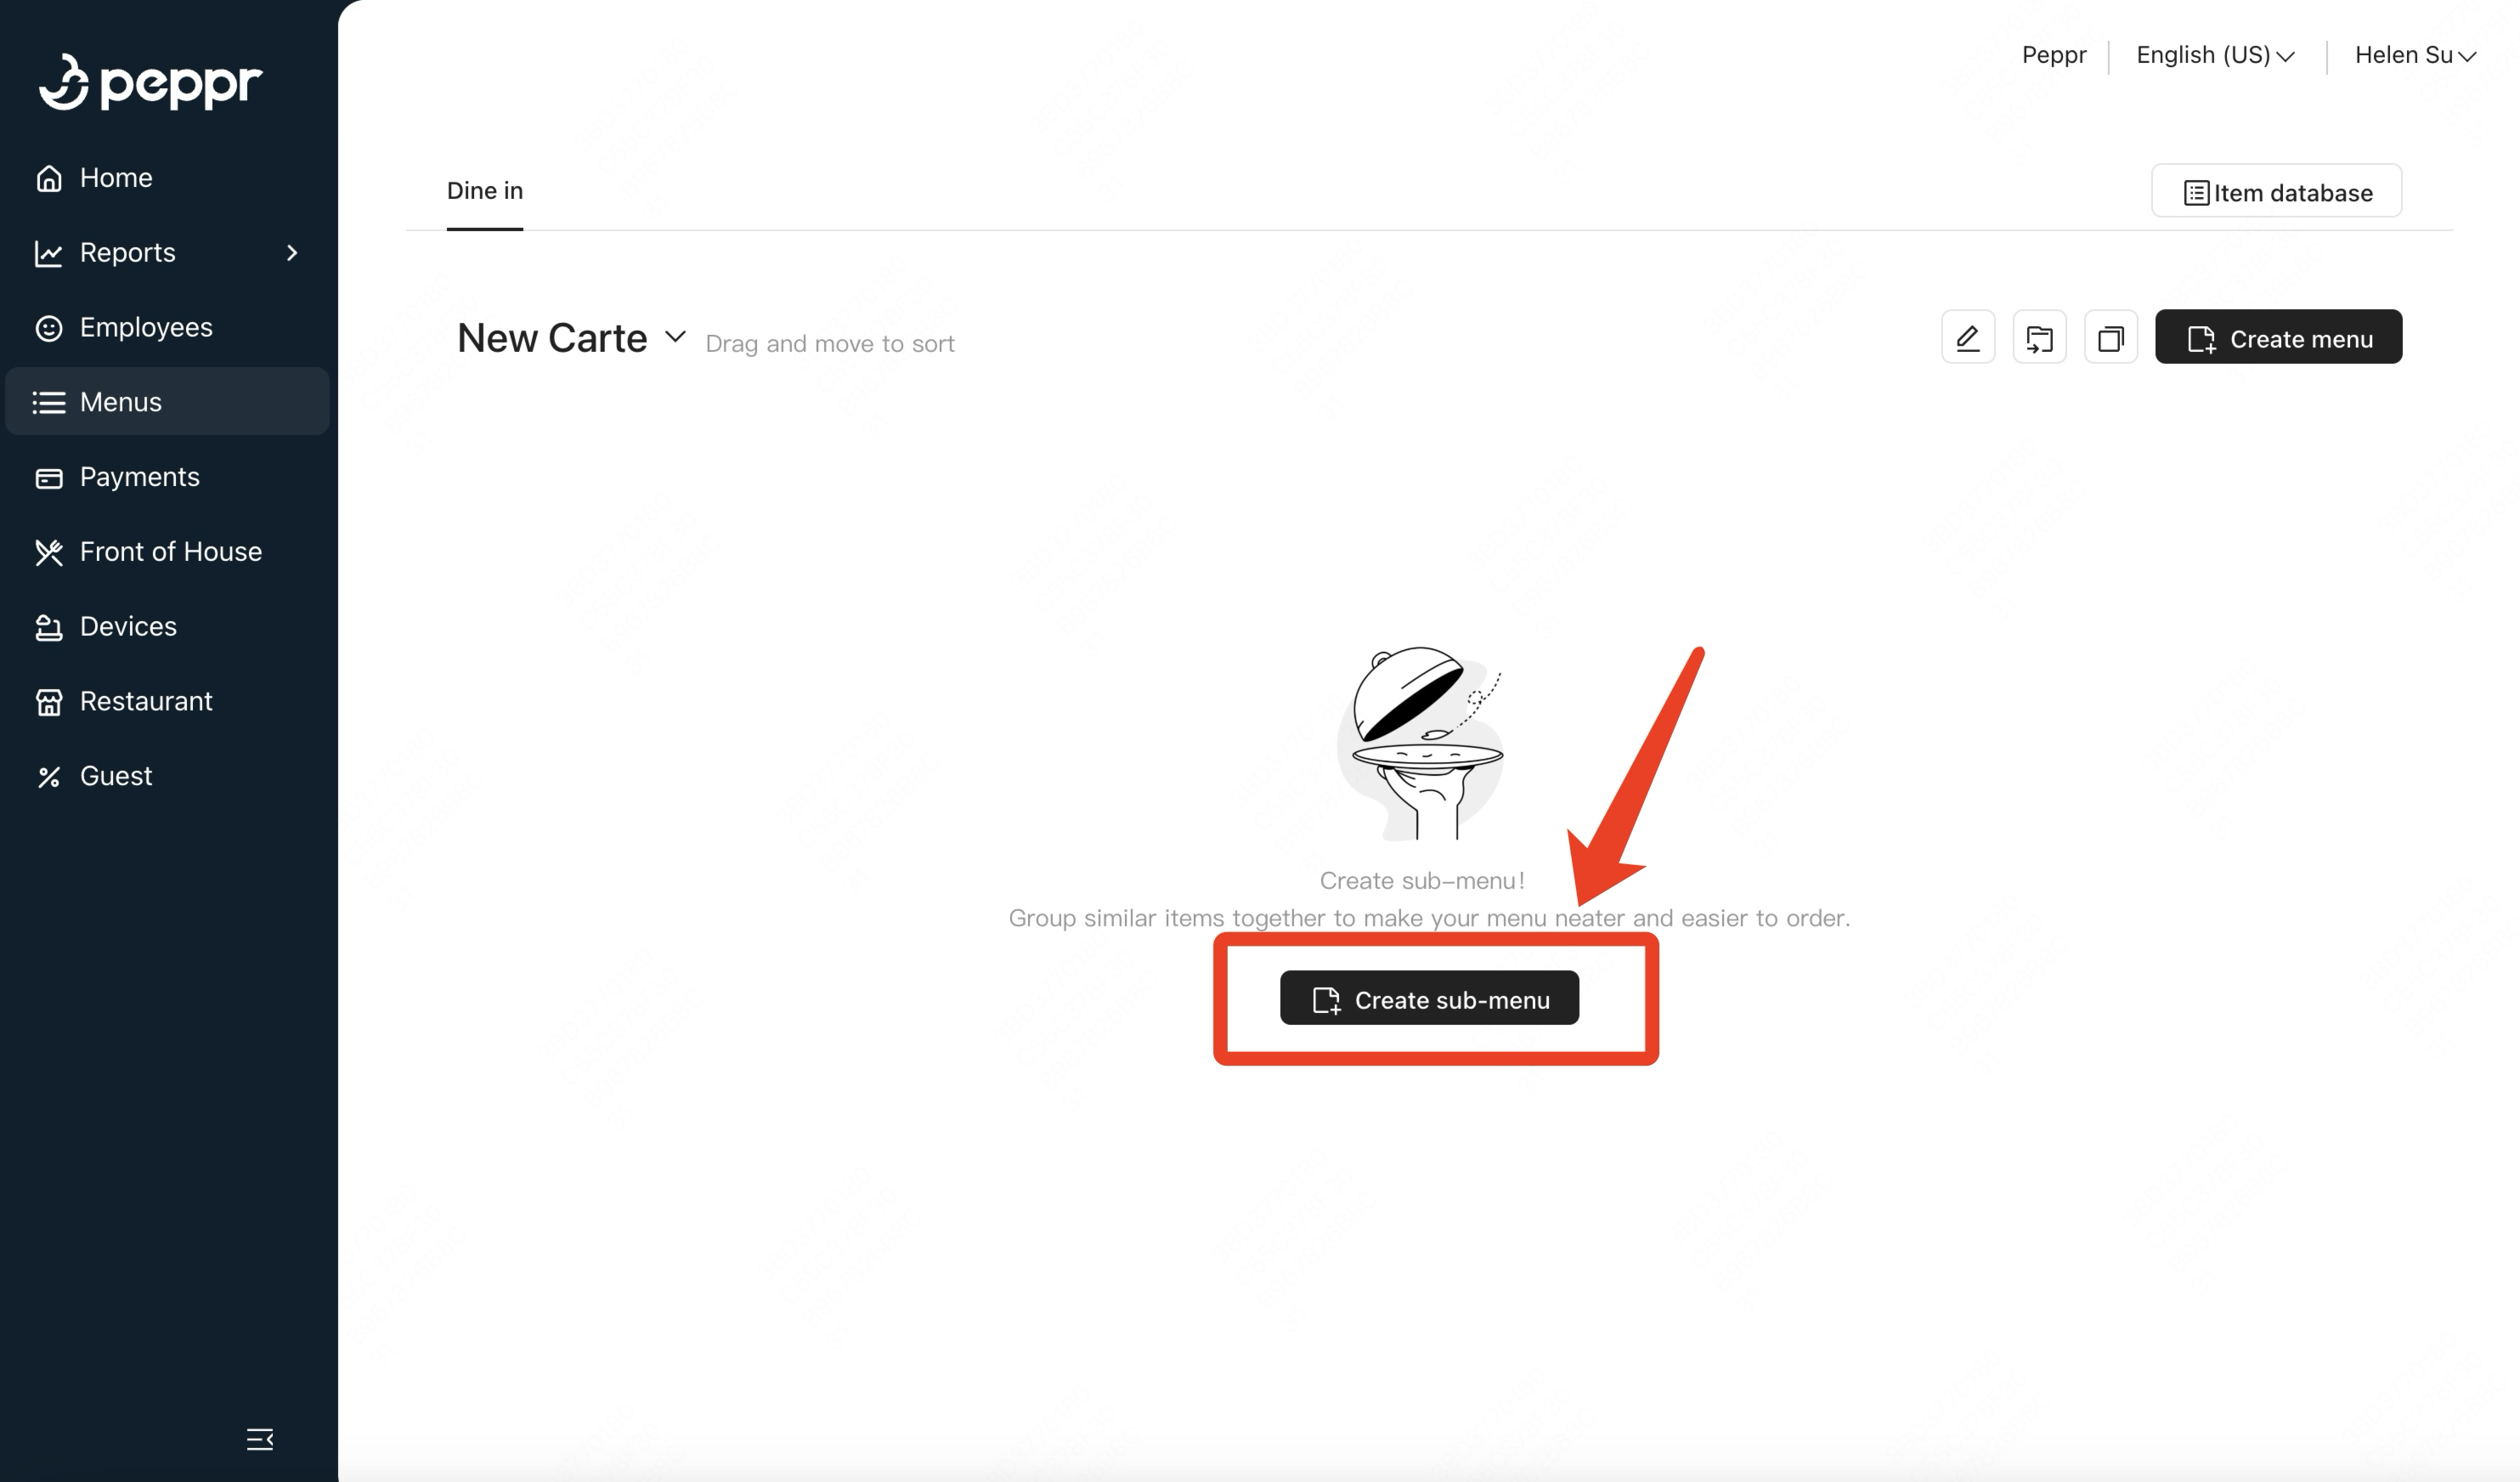 |
ii. If the menu has a sub-menu, Tap ➕Add sub-menu option below the sub-menu bar |  | |
② Fill in general information for sub-menu. | 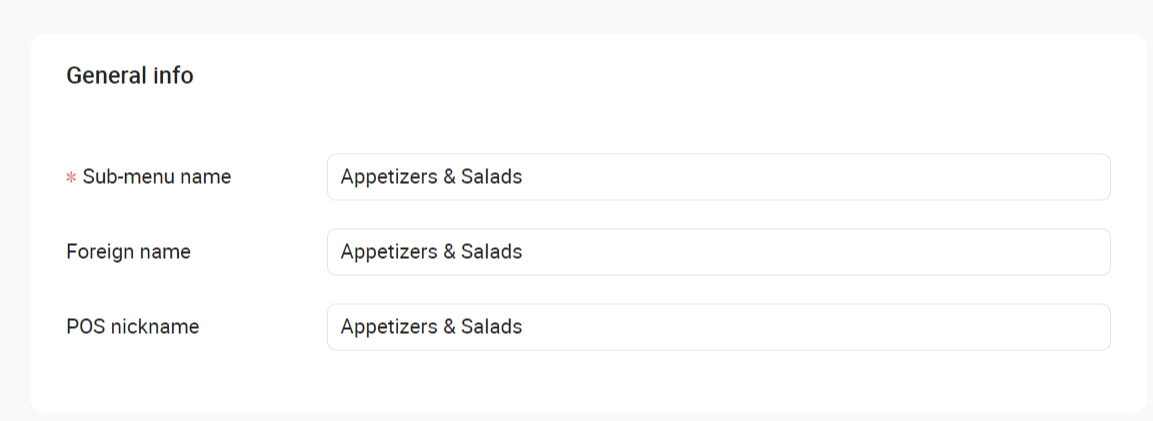 | |
③ Set tax rates | i. The tax rate will be inherited by default, and taxes will be calculated according to the default tax rates. | 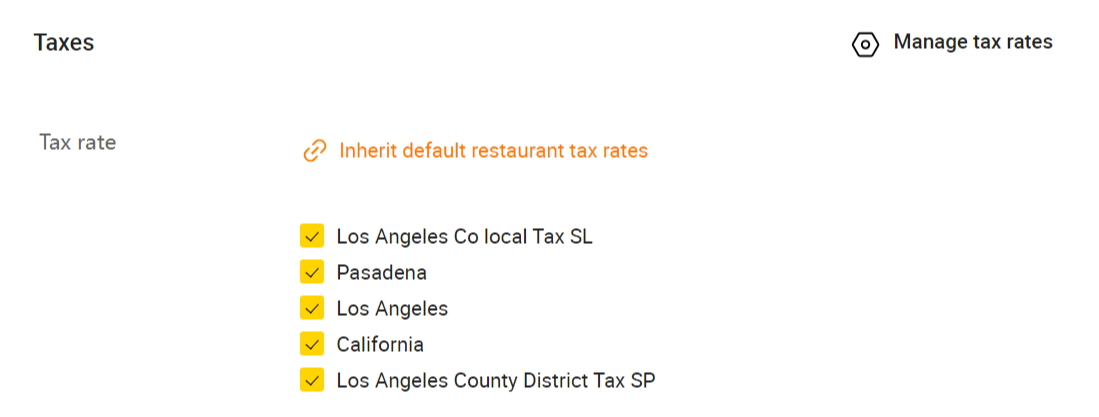 |
Notes:
i. Inheritance relationship of the tax rate is that the next level will inherit the tax rate set by the previous level. The tax rate of the menu inherits the default tax rate set in the Payment section. The tax rate of a sub-menu inherits the Menu to which it belongs, and the tax rate of an Item also inherits the sub-menu to which it belongs.
3.Menu item
Main Steps | Sub-steps/ Notice | Images |
|---|---|---|
① Enter general information,including Item name, Foreign name, POS nickname, and Item description | 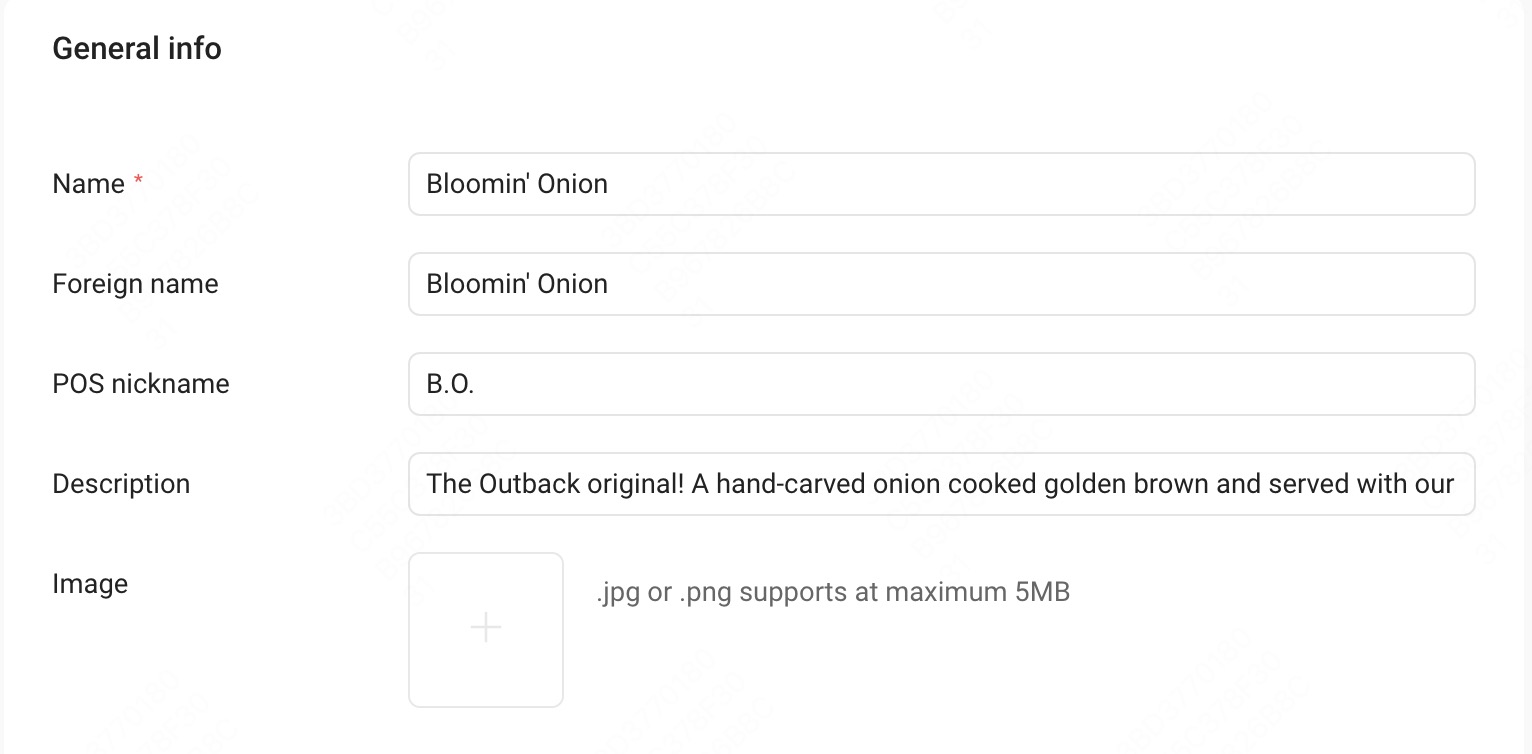 | |
② Upload an Item image and choose whether it Contains alcohol | i. After selecting Contain alcohol, a wine glass icon will be displayed on the item in the POS system |  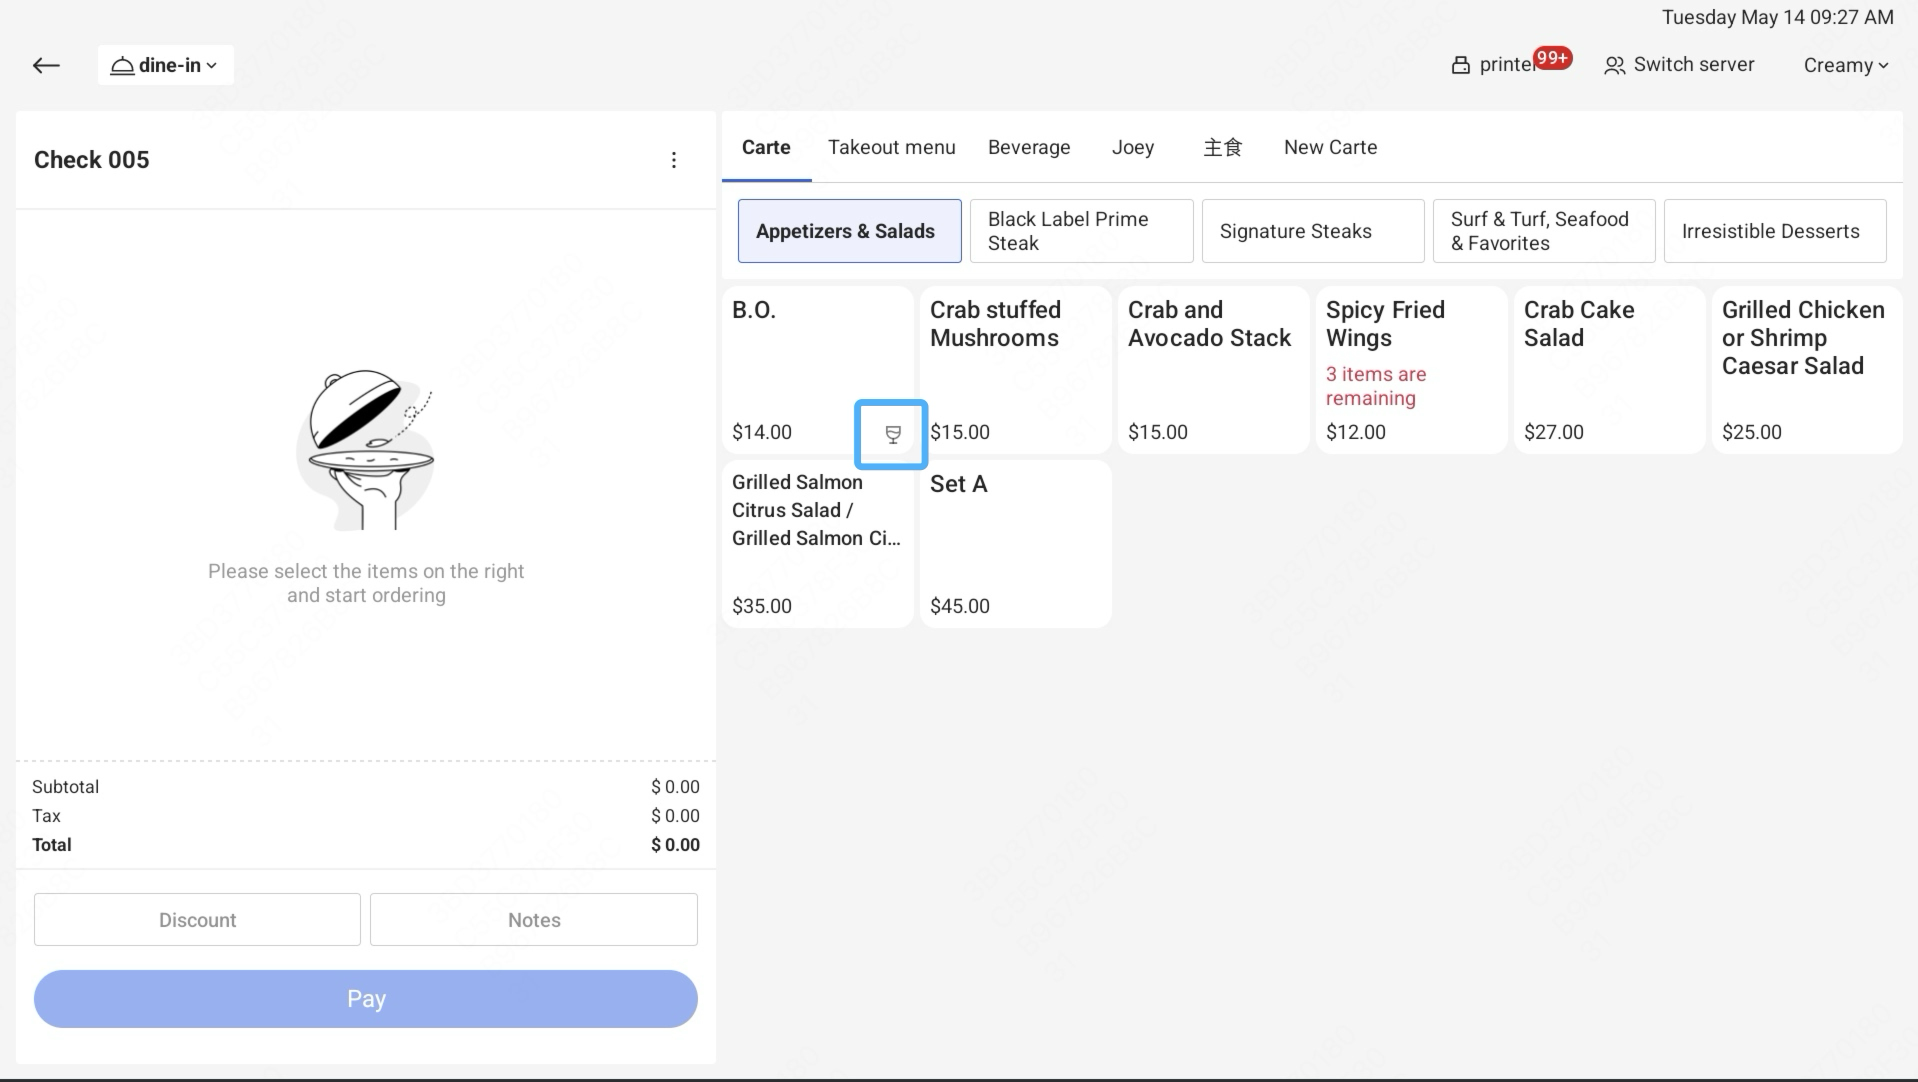 |
ii. When using a mobile phone to order, an item image will be displayed on the corresponding item. | 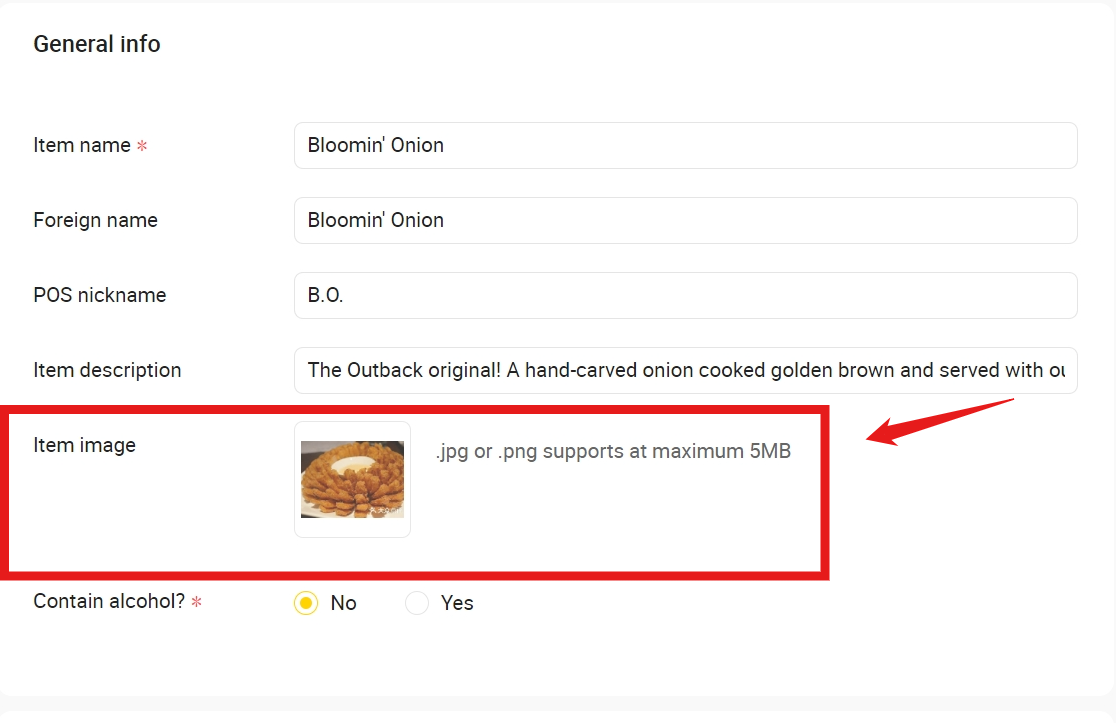 | |
③ Set a price policy | i. Base price: click Base price and enter a set price |  |
ii. Open price: Items with open prices have no a set price, so the server need enter a price every time when this item is ordered. Open price will be used for seasonal items or other items with variable prices. |  | |
④ Set a tax rate for this menu group | 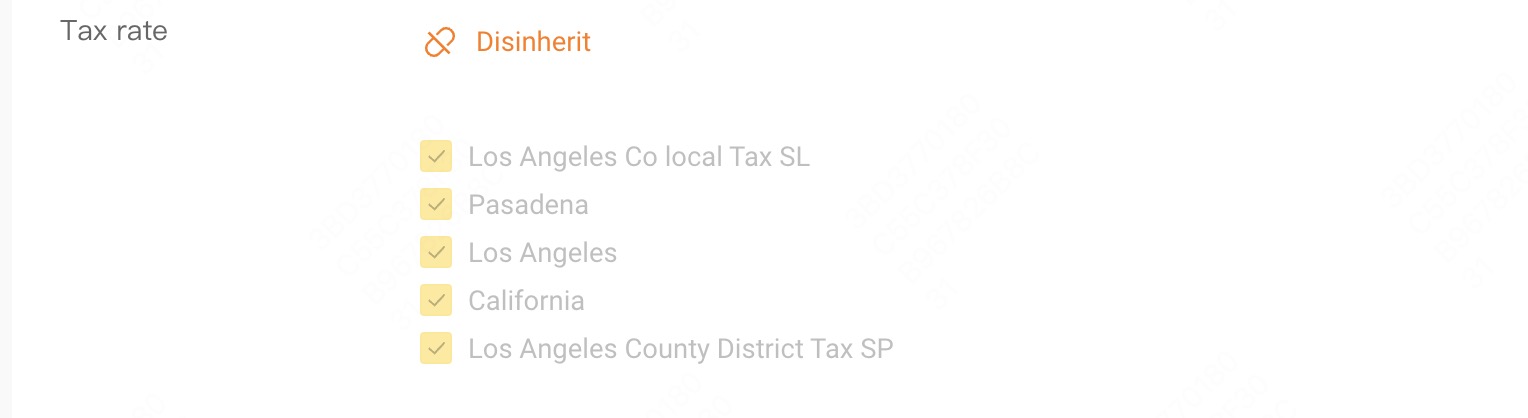 | |
⑤ Set modifier groups | i. Choose whether the modifier group needs to be inherited from the menu it belongs to. |  |
ii. Click ➕Add new to add a new modifier group. | ||
iii. Click ➕Add existing and select existing modifier groups to add to the sub-menu. | 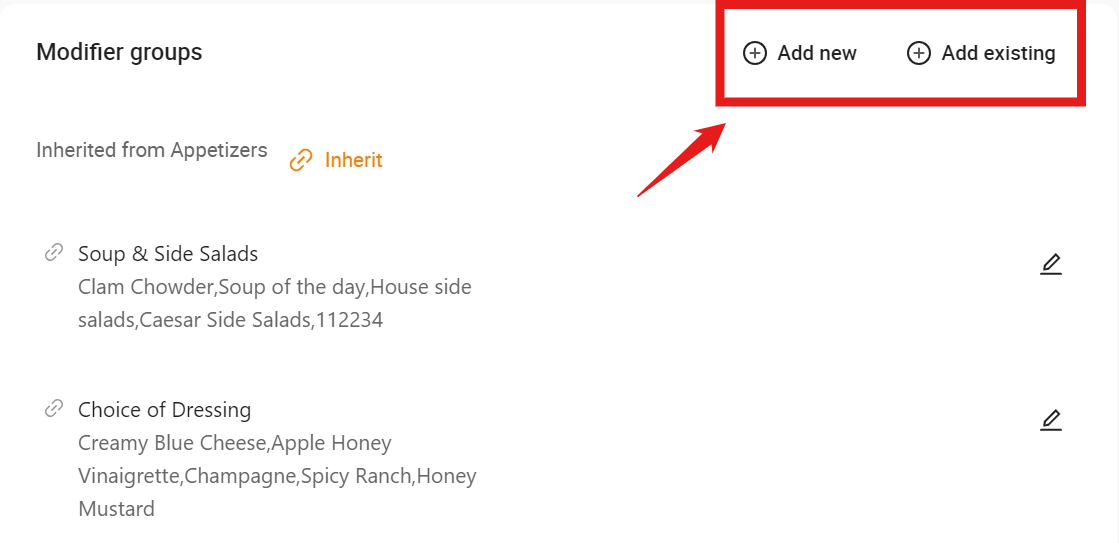 | |
⑤ Choose prep stations | i. A sub-menu will inherit prep stations chosen in the menu it belongs to by default. | |
ii. Click Disinherit to modify the settings and select which prep station to print the order | 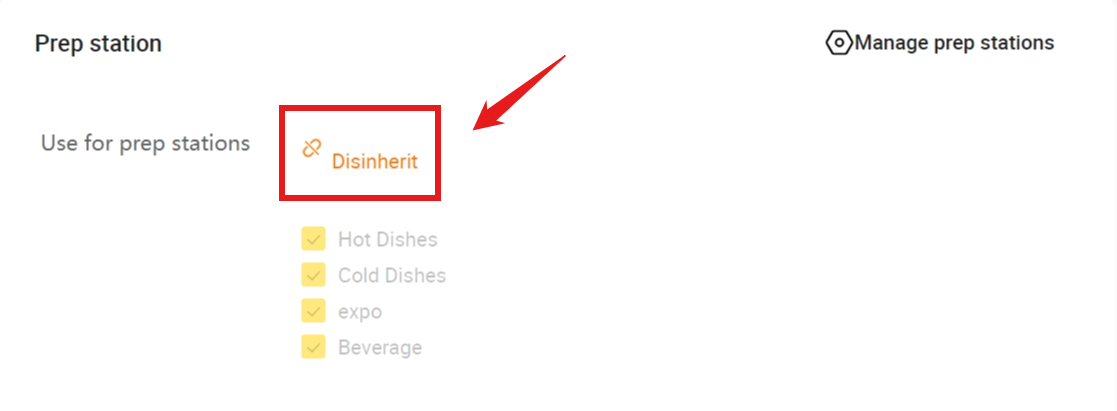 | |
⑥ To add an existing item, click the square in front of each item. (You can add all items in other menus or sub-menus except this sub-menu) | i. This function can be used when an item needs to be displayed under different sub-menus. | 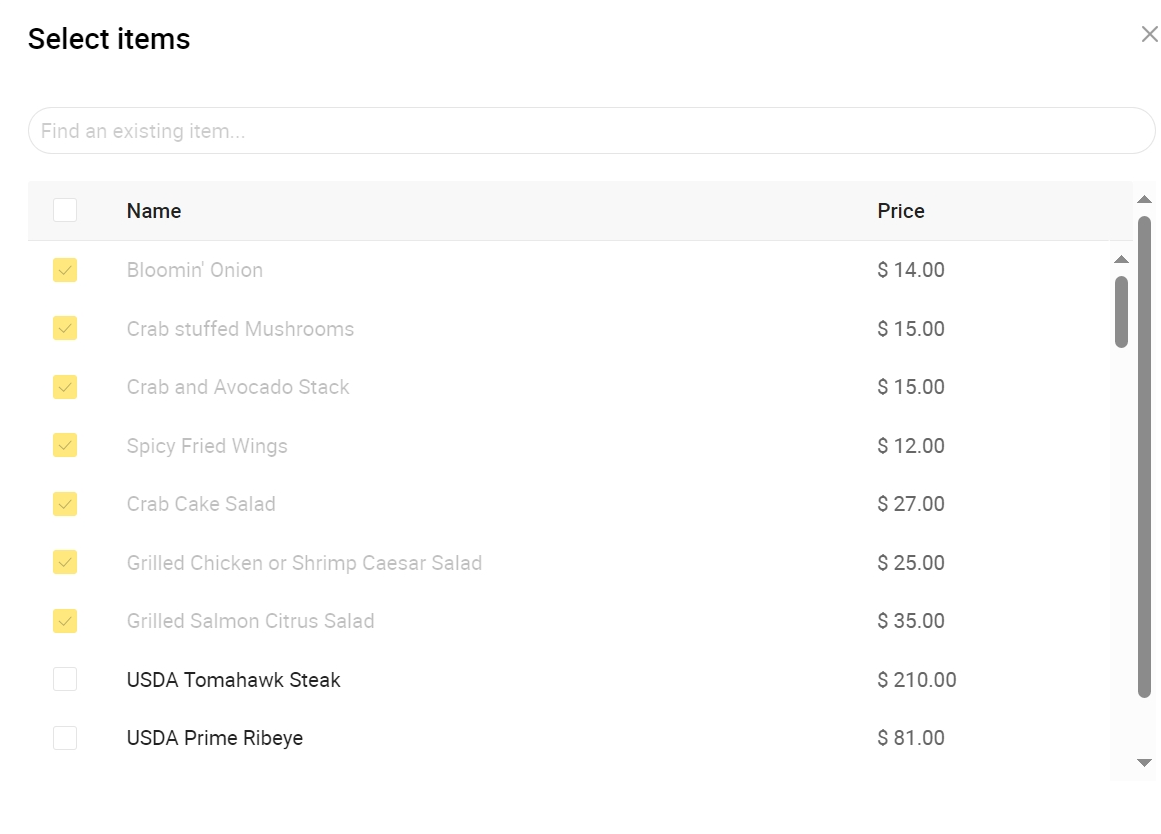 |
Notes:
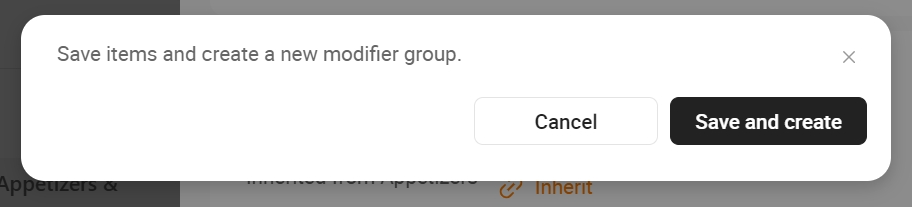
i. If you have create a new menu group or an new item that have not been saved yet, you must save them before you can create the modifier group. Select Save and Create to save the menu group and move to the Create modifier group page.
4.Set
Module | Main steps | Sub-steps/Notice | Images |
|---|---|---|---|
a. Add a new set | ①Click ➕Add new set to create a new set | ||
②Enter general information,including Set name, Foreign name, POS nickname, and Set description | 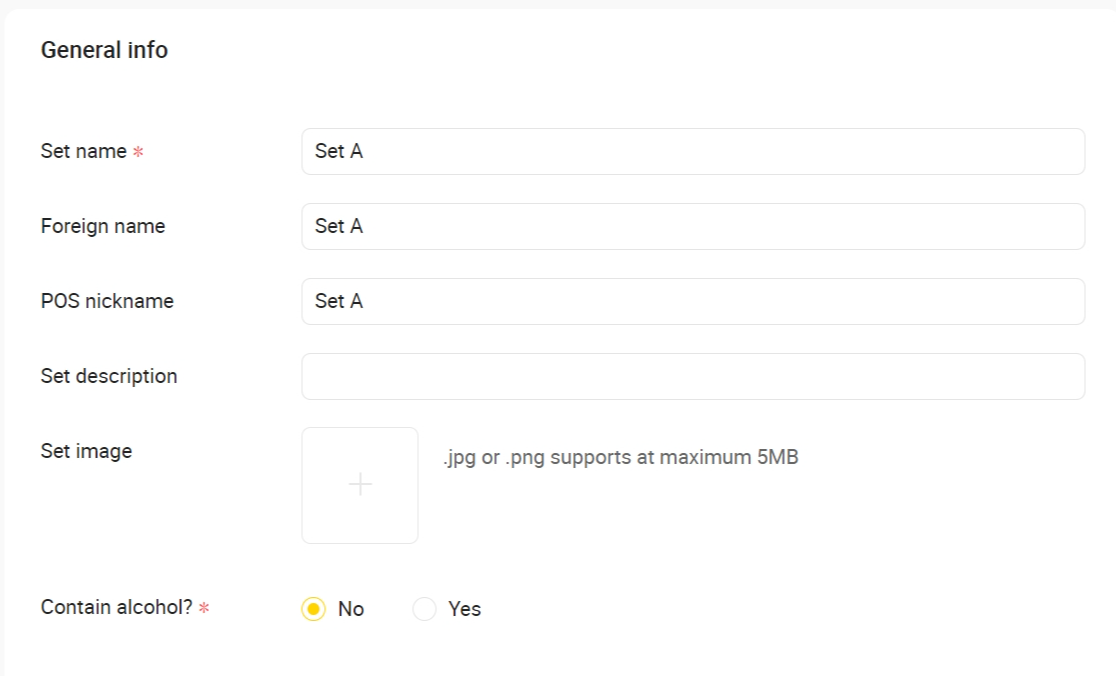 | ||
③Upload an Set image and choose whether it Contains alcohol | i. After selecting Contain alcohol, a wine glass icon will be displayed on the set in the POS system | ||
ii. When using a mobile phone to order, a set image will be displayed on the corresponding set. | |||
iii. If a Nickname is set for the set, it will be displayed on the corresponding set in the POS system, otherwise only the Name / Foreign name will be displayed. | |||
b. Prices and Tax rates | ① Enter a base price of the set |  | |
② Choose whether to inherit tax rates | 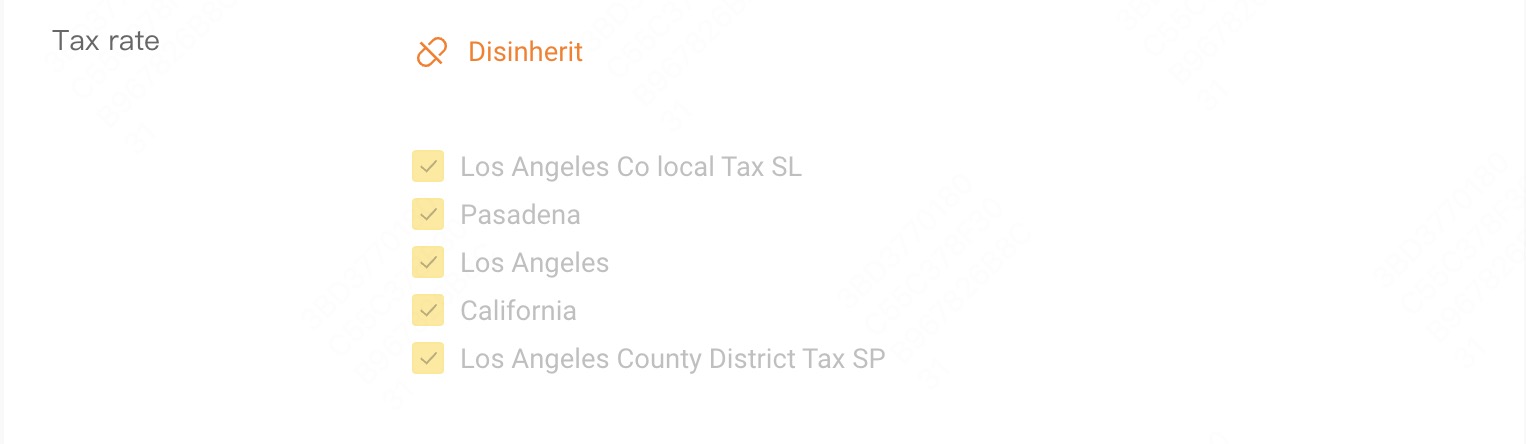 | ||
c. Item groups | ① Choose whether to inherit the modifier groups in the sub-menu to which this set belongs. |  | |
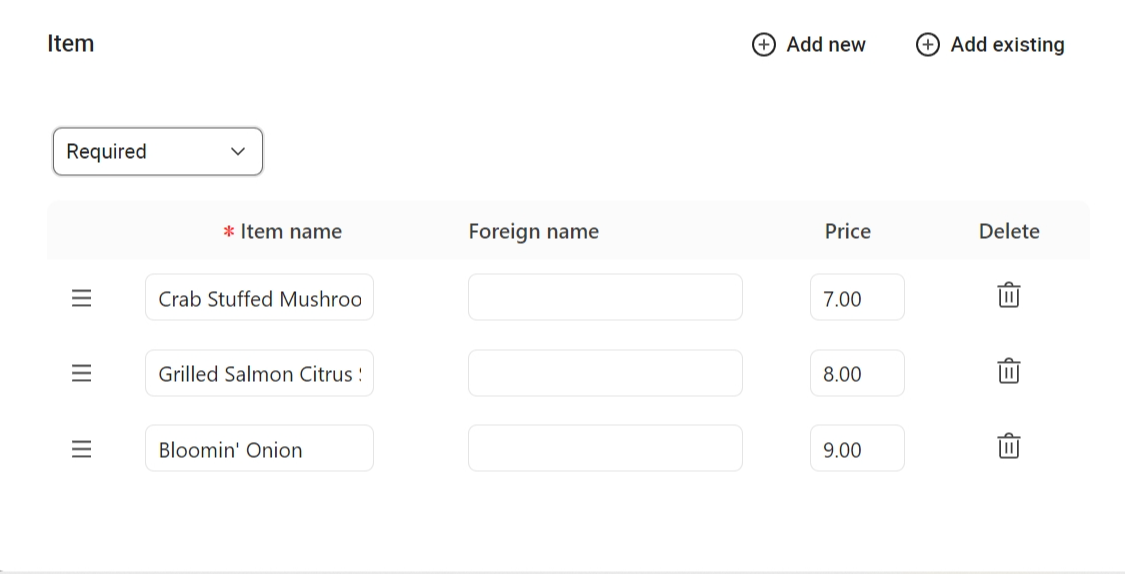
② Add an item group | i. Fill in General information | 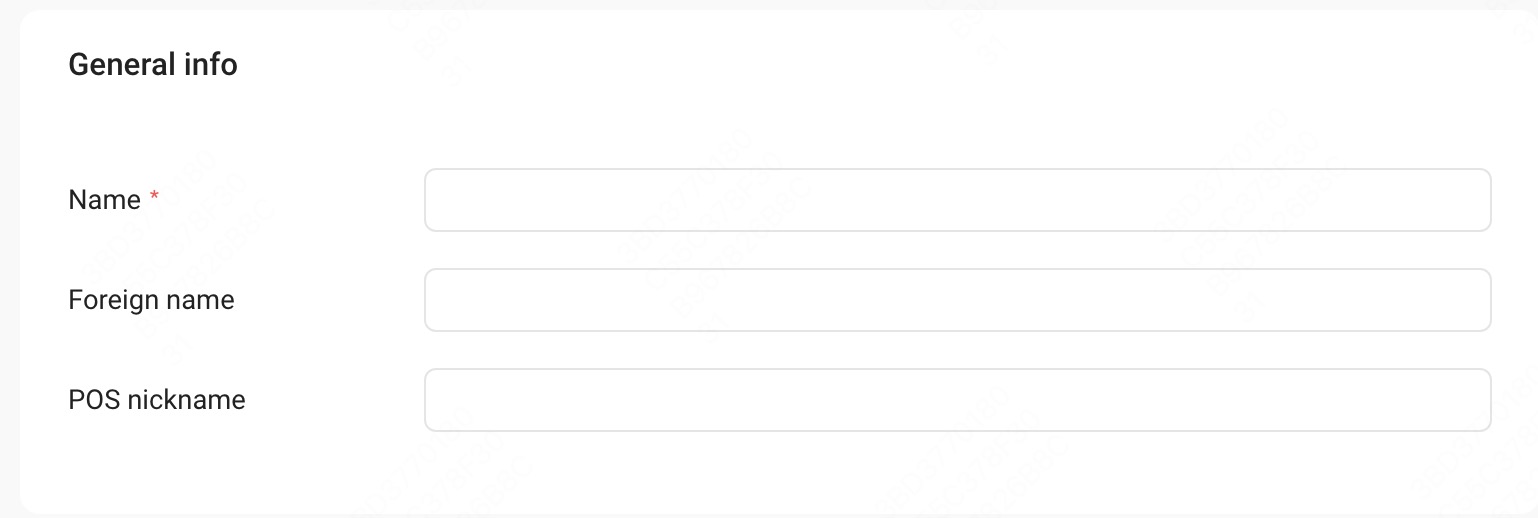 | |
ii. Add the required items to the corresponding item group | |||
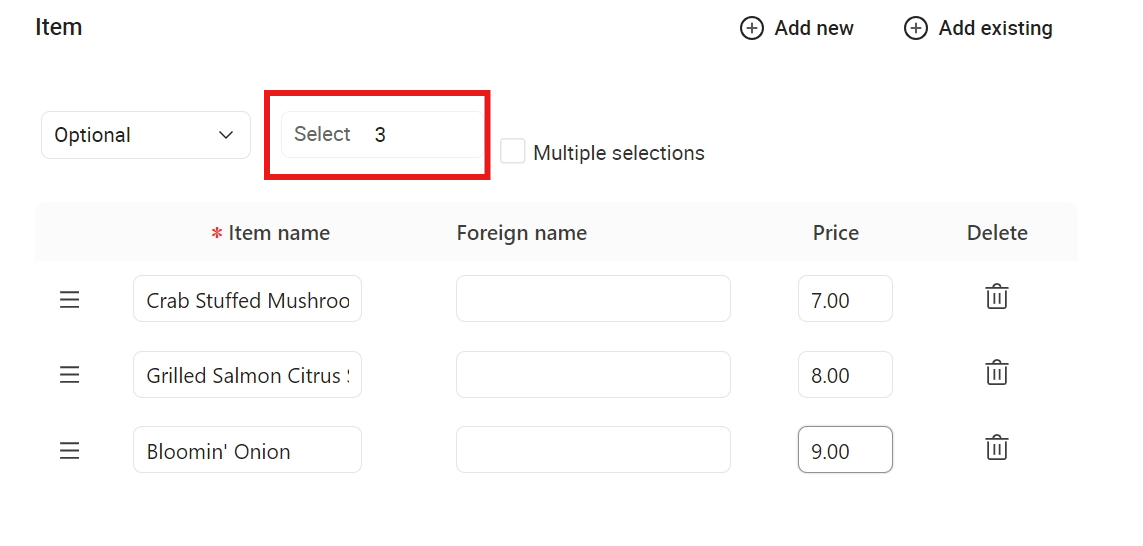
iii. Set whether the item is required or optional. | 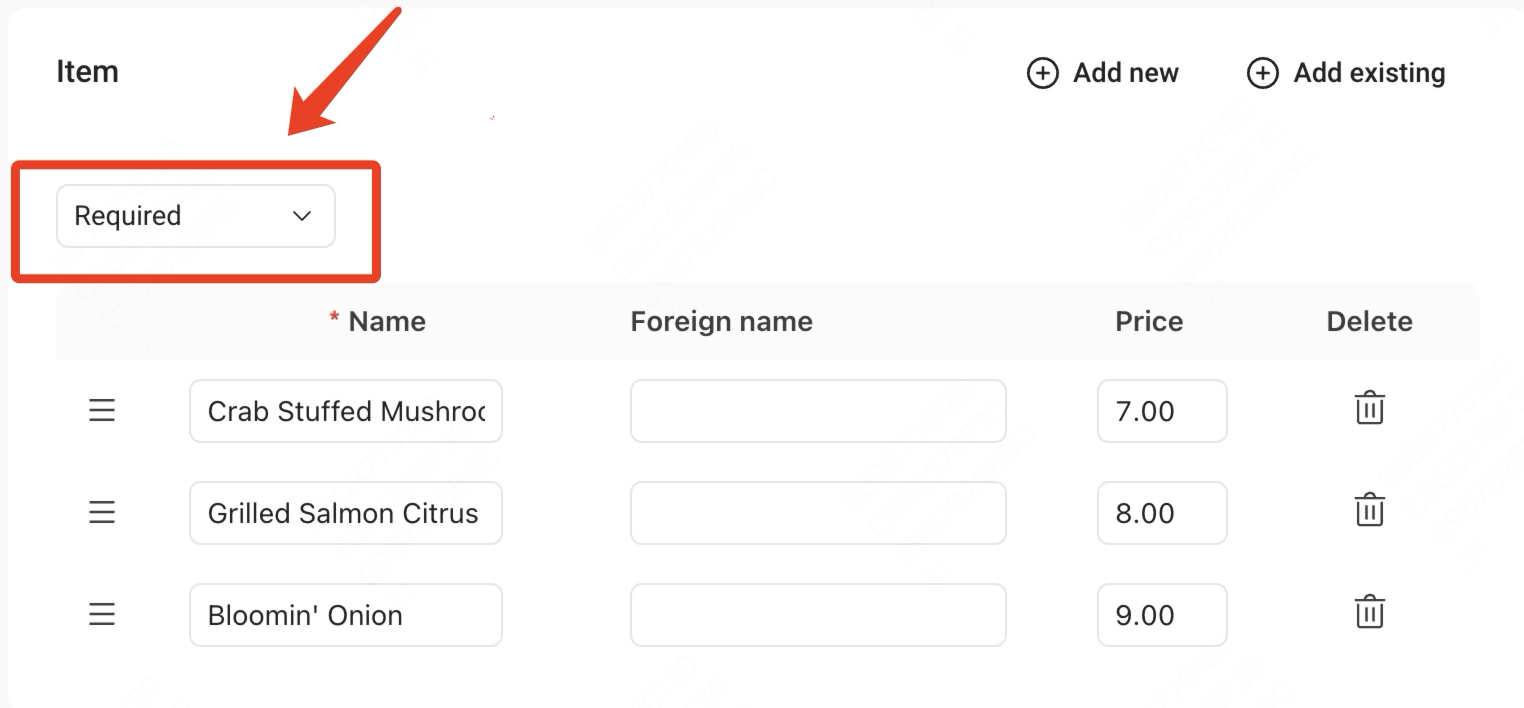 |
Notes:
i. Select the status of the item as Optional and enter the number that can be selected. When the number you enter is greater than one, a Multiple selections option will appear. After choose Multiple selections, each item can be selected more than once, but the final number selected cannot exceed the set number.
If you do not select Multiple slections, each dish can only be selected individually, and the number of orders cannot exceed the set number.
ii. When the item status is selected as Required, you must select all the items in this item group.
5.Modifier group
To meet customers' individual taste preferences, we need to make customized additional requests or changes to the dishes. Through modifiers, customers can customize dishes according to their preferences, such as adding, removing, or changing ingredients, adjusting cooking methods, changing the spiciness or sweetness of the dish, replacing side dishes for dishes and so on. This personalized customization enhances the customer experience, increases customer satisfaction, and helps the restaurant better meet the needs of different customers, thereby improving service quality.
You can create modifier groups that contain a set of modifier options you wish to offer for a menu item or an entire group. Modifier groups are only needed to help organize modifier options. "Meat Temperature" is a modifier group in this example.
Modifiers are individual options used to change, add to, or further define items that are being ordered. Modifier options are what are actually selected when placing an order. The meat temperature options such as "Rare" and "Medium Rare" are the modifier options in this example.
If you want to add/edit modifier groups and modifiers, you can do in Peppr as follows:
Module | Main steps | Sub-steps/Notice | Images |
|---|---|---|---|
a. New modifier group | ① Click ➕Add new to create a new modifier group | 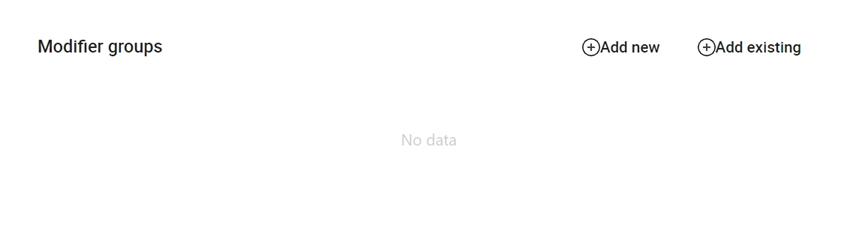 | |
② Fill in relevant information, including Modifier group name, Foreign name, and POS nickname | 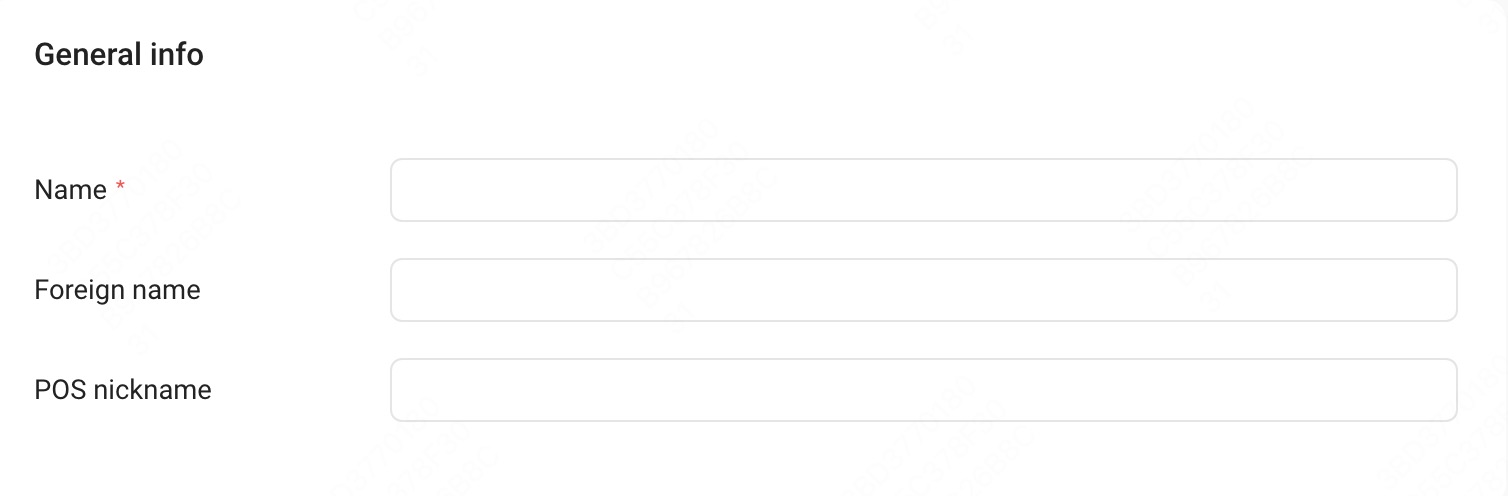 | ||
③ Choose a price policy for this modifier. | i. No charge: Each modifier is free | 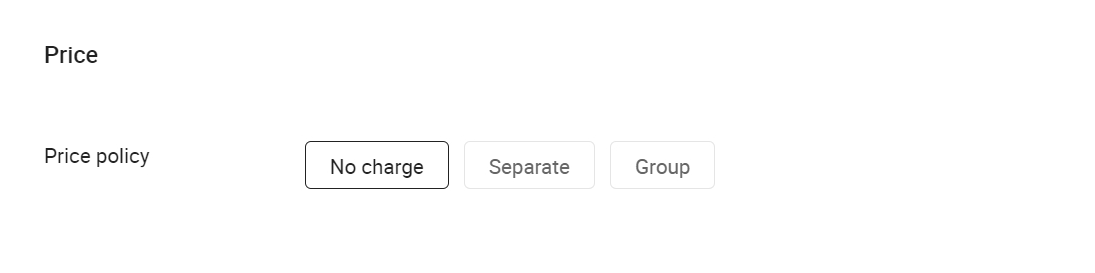 | |
ii.Separate: Each modifier has a unique price. | |||
iii. Group: All modifiers share the same price. | |||
b. Existing modifier group | ①Click ➕Add existing to add a modifier group that has already existed in the system. | 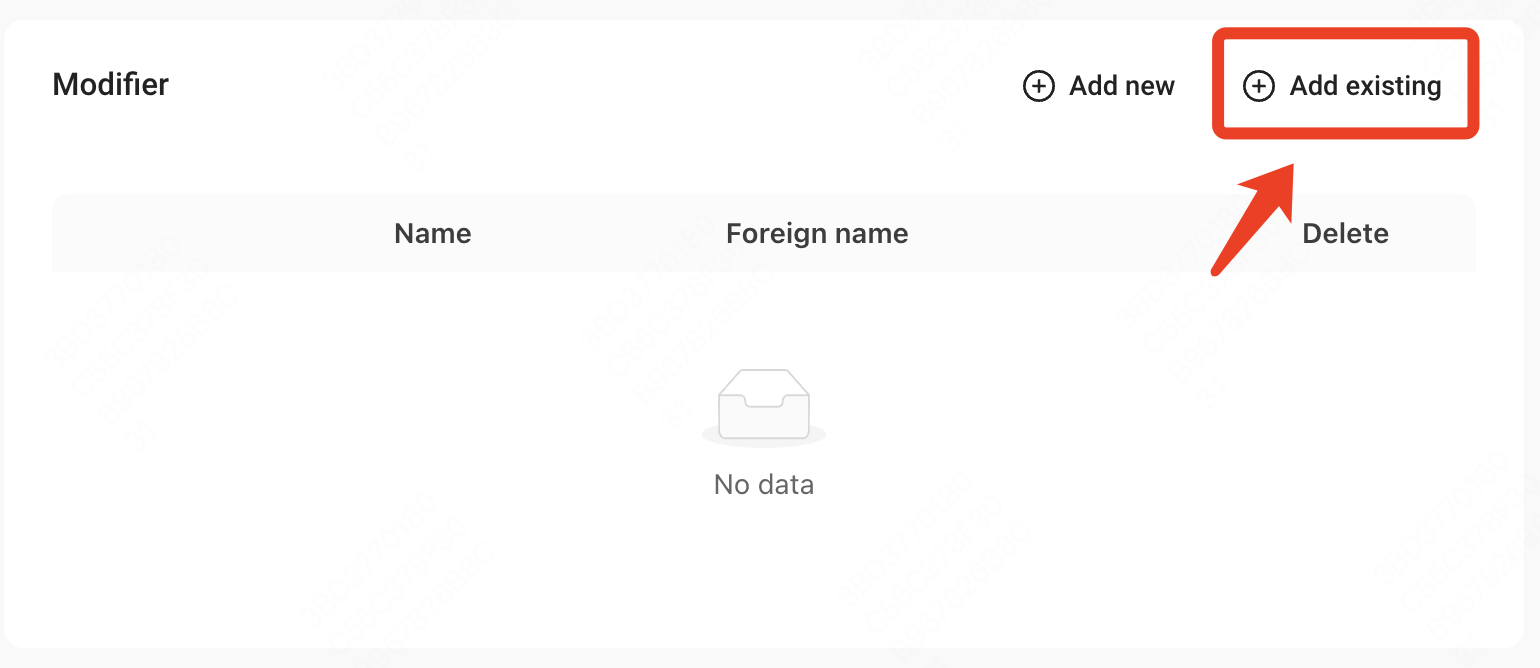 | |
②Select the modifier group you need in the page. The modifier that has already be selected cannot be selected again. | 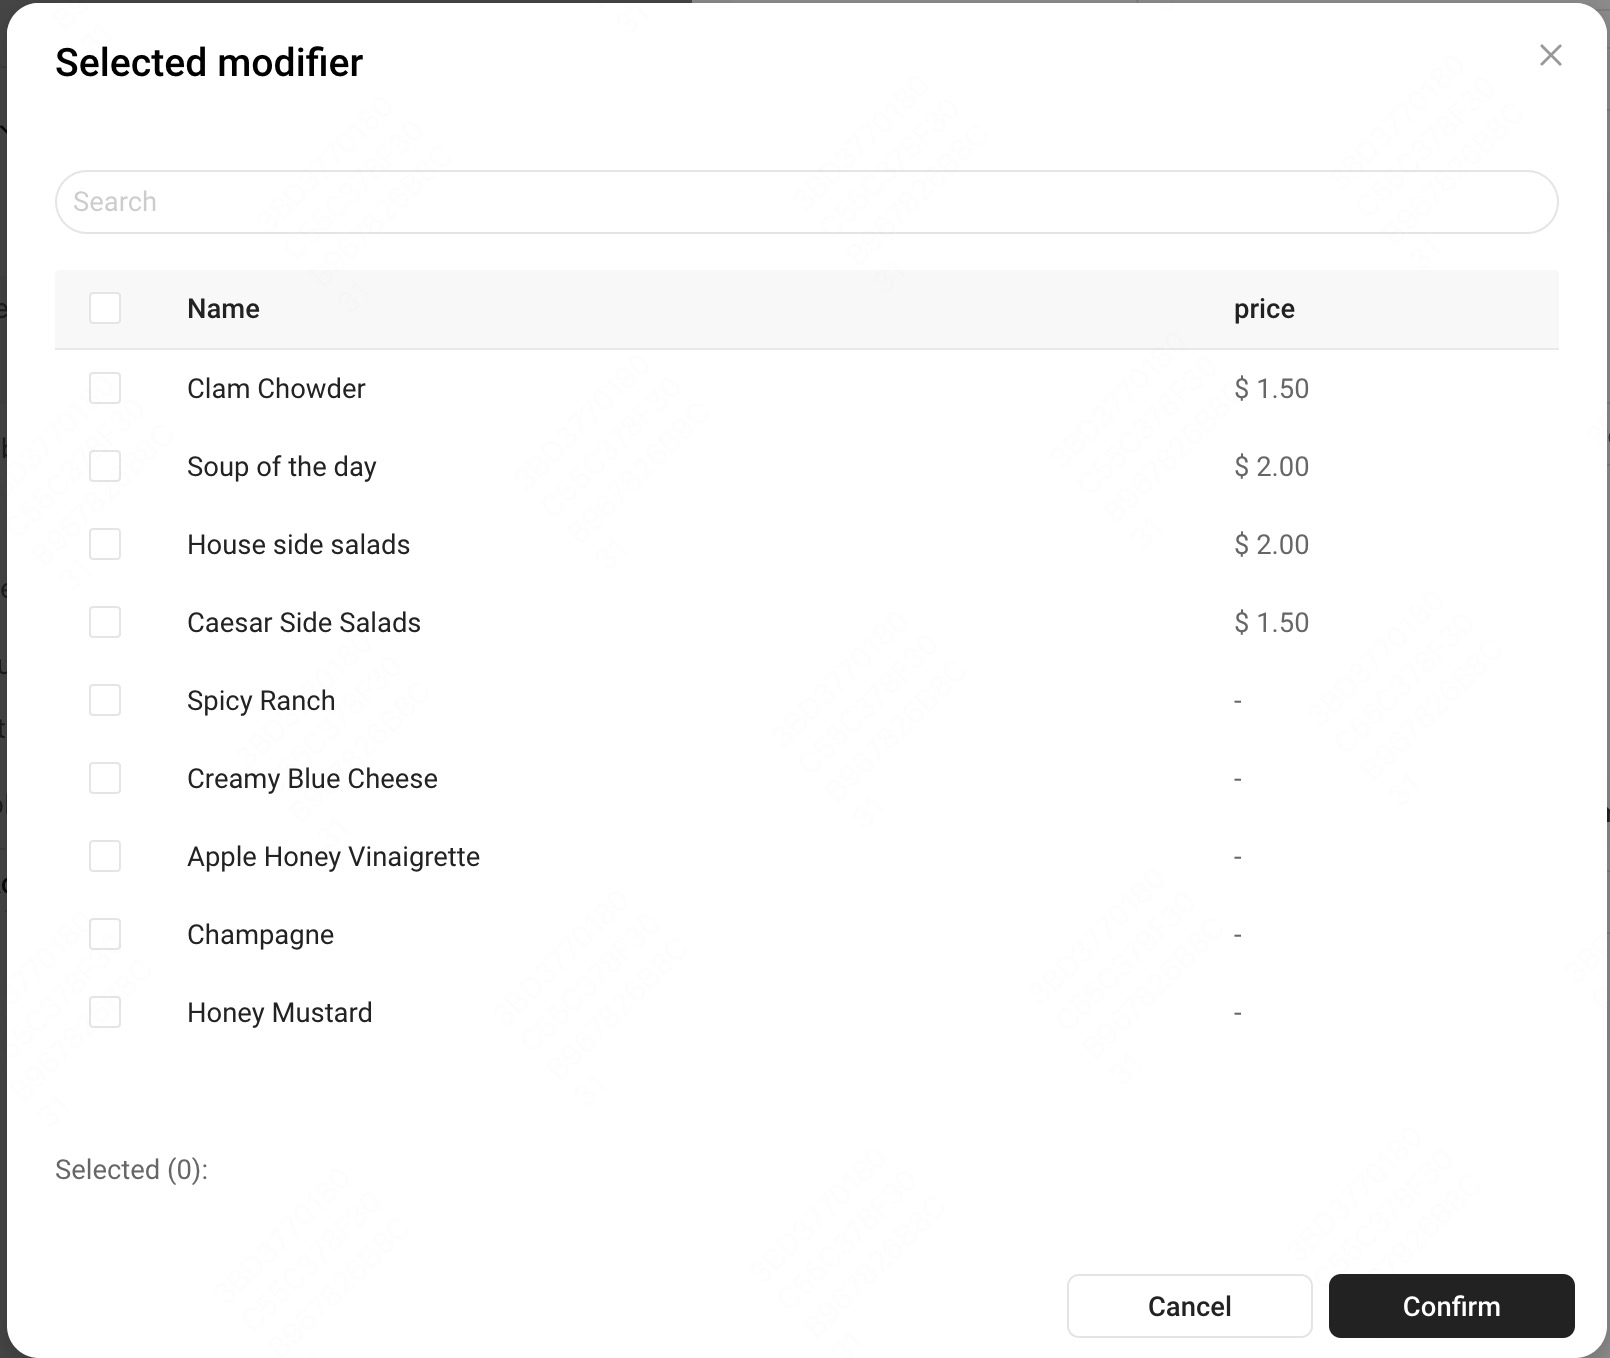 | ||
③Click Confirm when finished. | |||
c. Inherit from sub-menu | i. An item inherits the modifier group of the sub-menu by default | 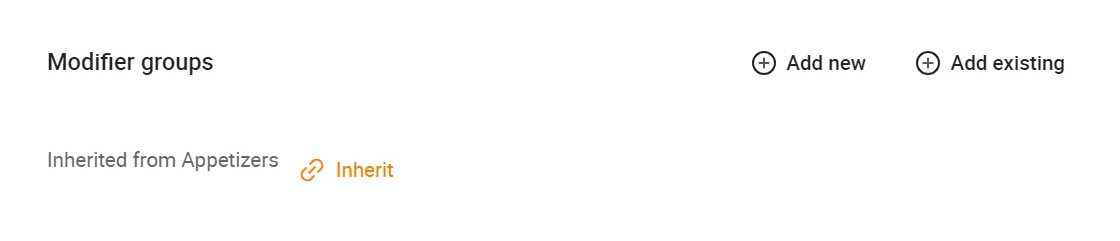 | |
ii . If you don’t need to inherit modifier group from superior level , click to Inherit change it to Disinherit |  | ||
d. Modifier group setting | ① Required | i. Click Required, the customer must select at least one modifier from this modifier group. | 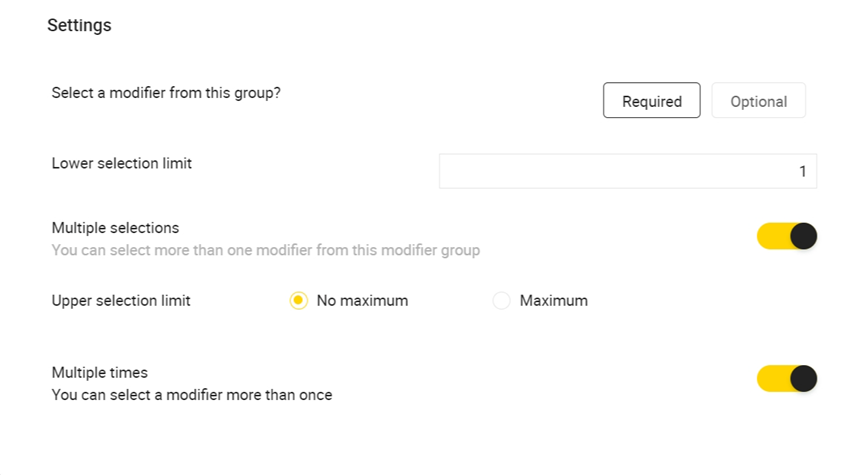 |
ii. You can set the minimum number of selected modifiers through Lower selection limit. | |||
iii. Through Upper selection, you can choose whether to limit the maximum value selected by the modifier, or enter the maximum value that needs to be selected. | |||
iv. Turn on the Multiple selections option to select more than one modifier | |||
v. Turn on the Multiple times option to select a modifier more than once. | |||
② Optional | i. An Optional modifier group is available to a guest or server but they don't have to view it or make a selection from it. | 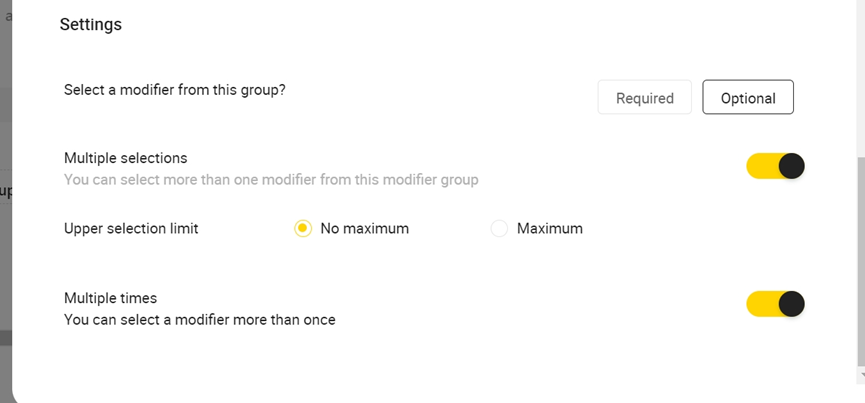 | |
ii. Click Multiple selections to select more than one modifier | |||
iii. In Upper selection, you can choose whether to limit the maximum value selected by the modifier, or enter the maximum value that needs to be selected. | |||
iv. Turn on the Multiple times option to select a modifier more than once. |
Notes:
You can configurate modifiers in Peppr as follows:
Requirement | Settings |
|---|---|
Guest can make zero or one selection from this modifier group. | Optional Multiple selections × |
Guest must make one, and only one, selection from this modifier group. | Required Lower selection limit: 1 Multiple selections × |
Guests must select a specific number of modifiers from this modifier group. | Required Lower selection limit: 2 Multiple selections √ Upper selection limit: Maximum: 2 You can select a modifier more than once × |
Guests can select as few or as many modifiers from this modifier group as they want. | Optional Multiple selections √ Upper selection limit: No maximum |
Guests must select at least one modifier from this modifier group but they can also pick as many modifiers from this group as they want. | Required Lower selection limit: 1 Multiple selections: √ Upper selection limit: No maximum
|
Guests do not have to select any modifiers from this group but, if they do, they are limited to a specific number(such as 2). | Optional Multiple selections: √ Upper selection limit: Maximum: 2 |
6.Modifiers
Module | Main steps | Images |
|---|---|---|
a. Add new modifier | ① Click ➕Add new to add a new modifier | |
② Enter Modifier name and Foreign name | 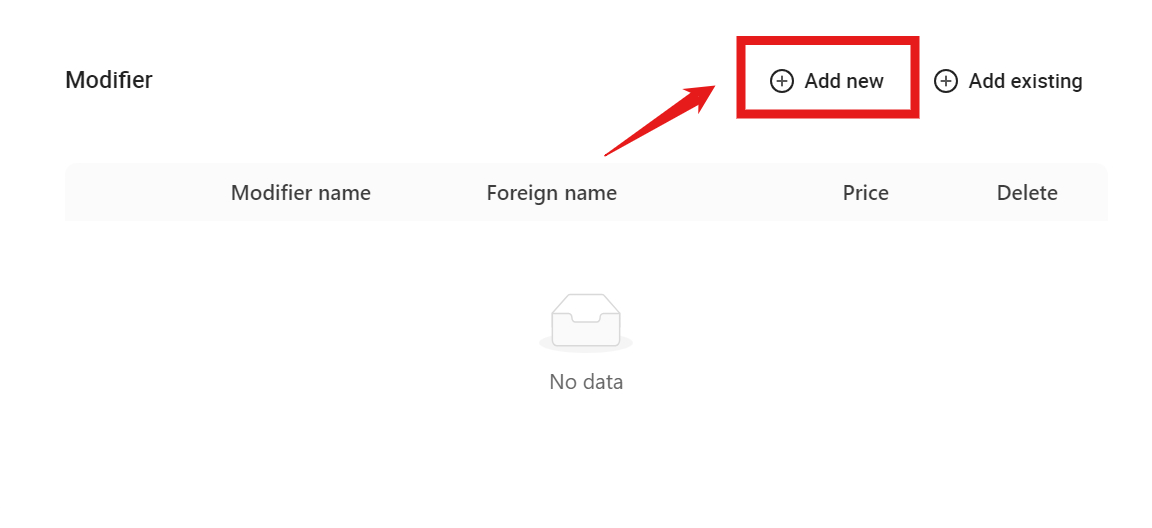 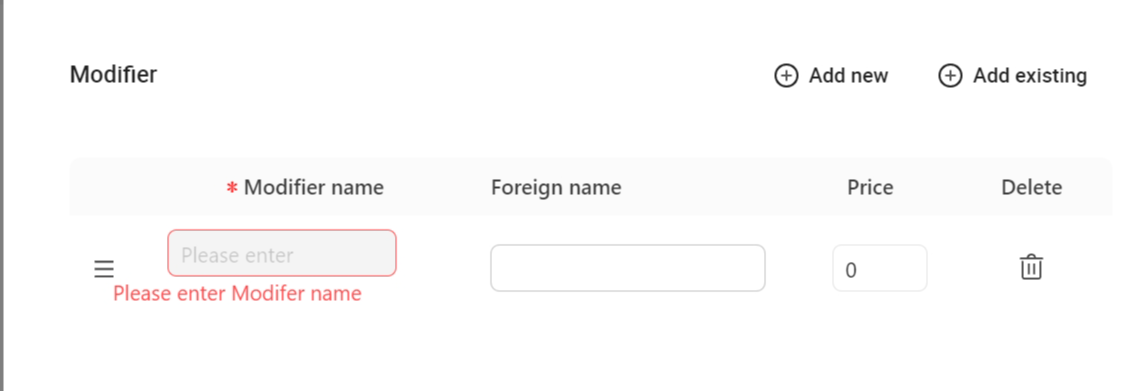 | |
b. Add existing modifiers | ① Click ➕Add existing to add an existing modifier | 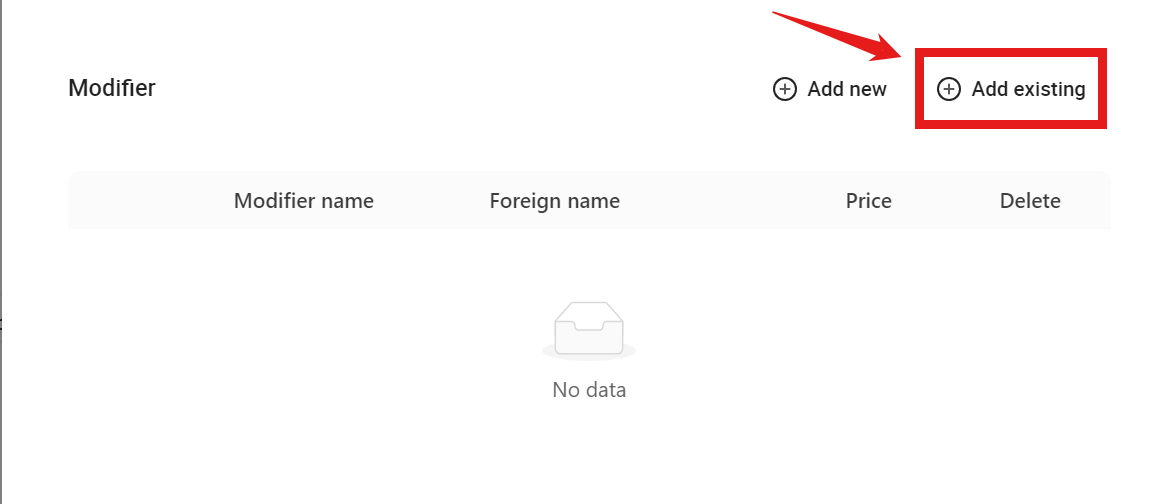 |
② In the Select modifier page, select the modifier that needs to be added. It cannot be selected if it is already in the modifier group. | 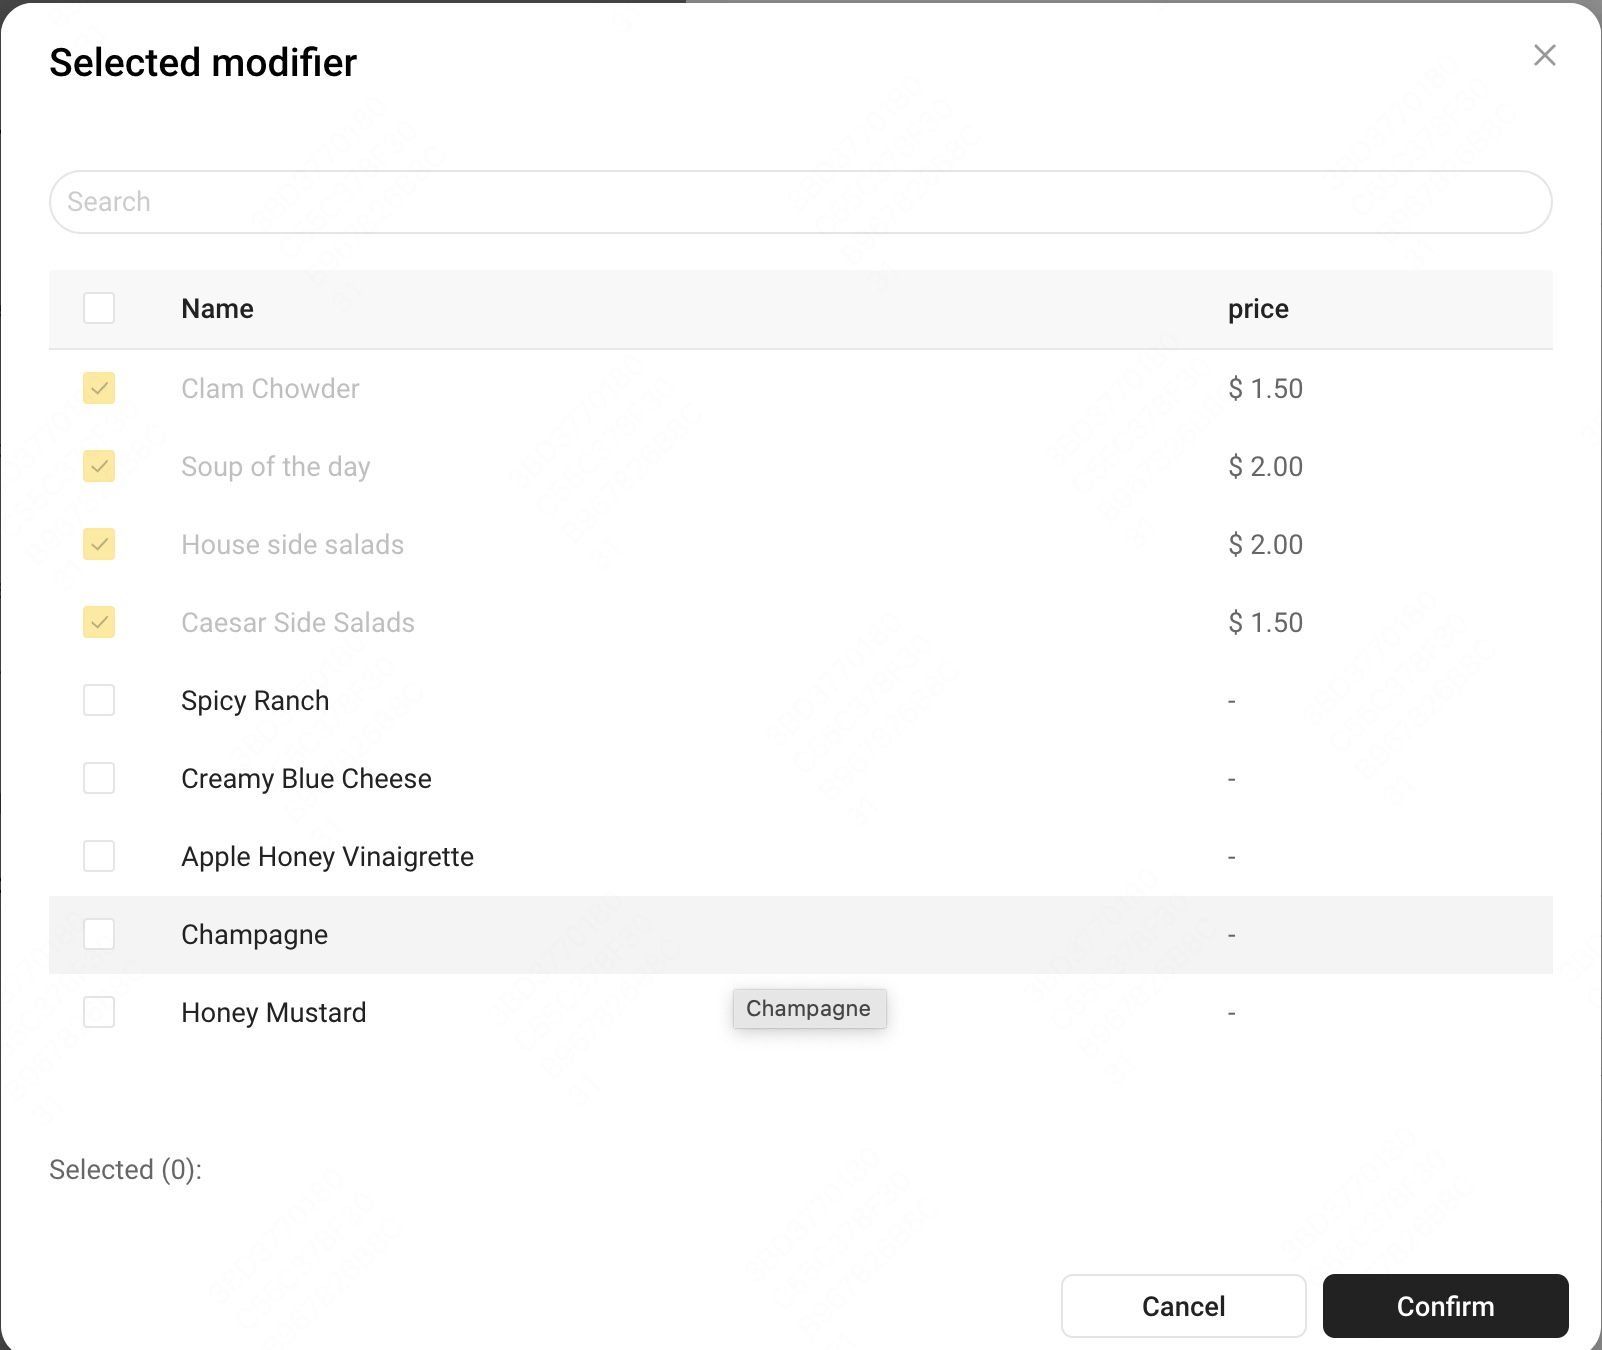 |