.png)
Table service(English Version)
In a restaurant system, the Table Service section typically includes functions such as table management, ordering service, order management, order merging, payment functionality, order transfer, and opening and closing tables, helping restaurants improve service efficiency and customer experience.
If you want to operate in Table Service, you can do so in Peppr as follows:
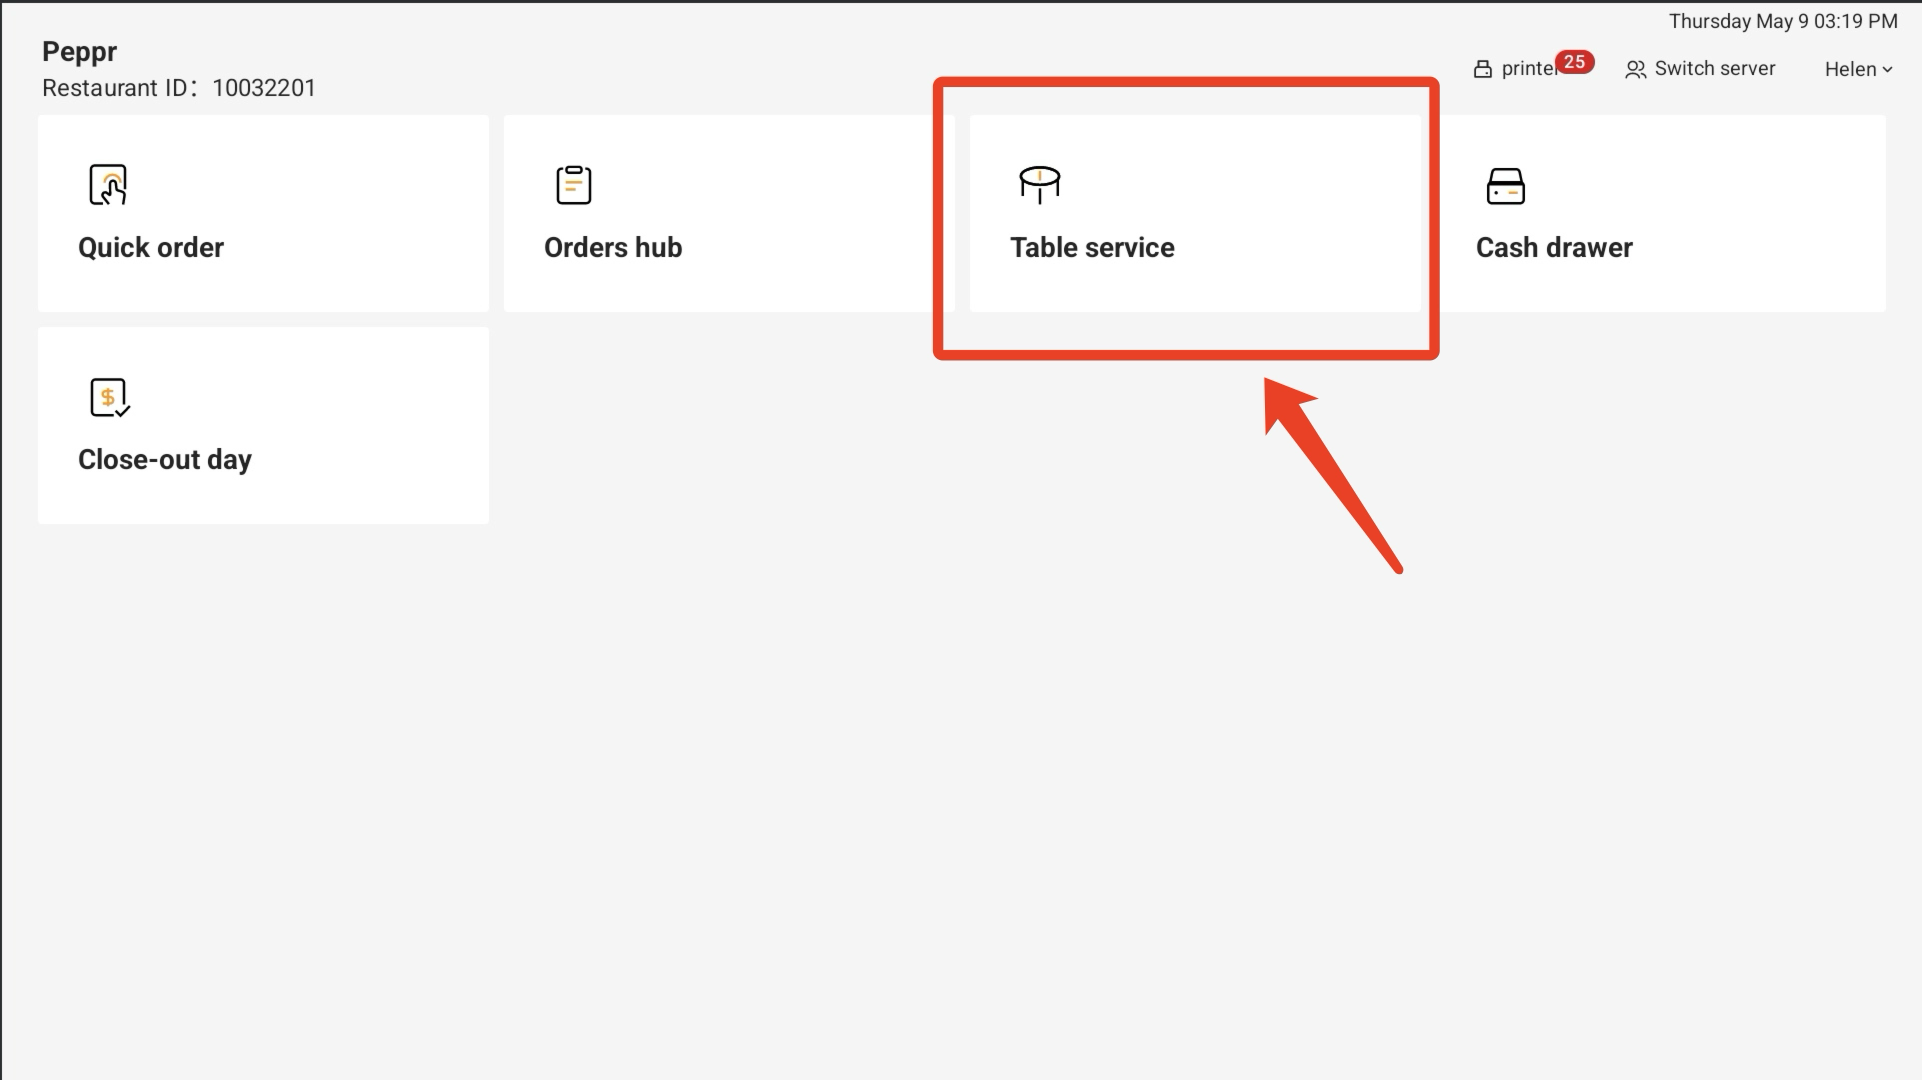
① Click Table service.
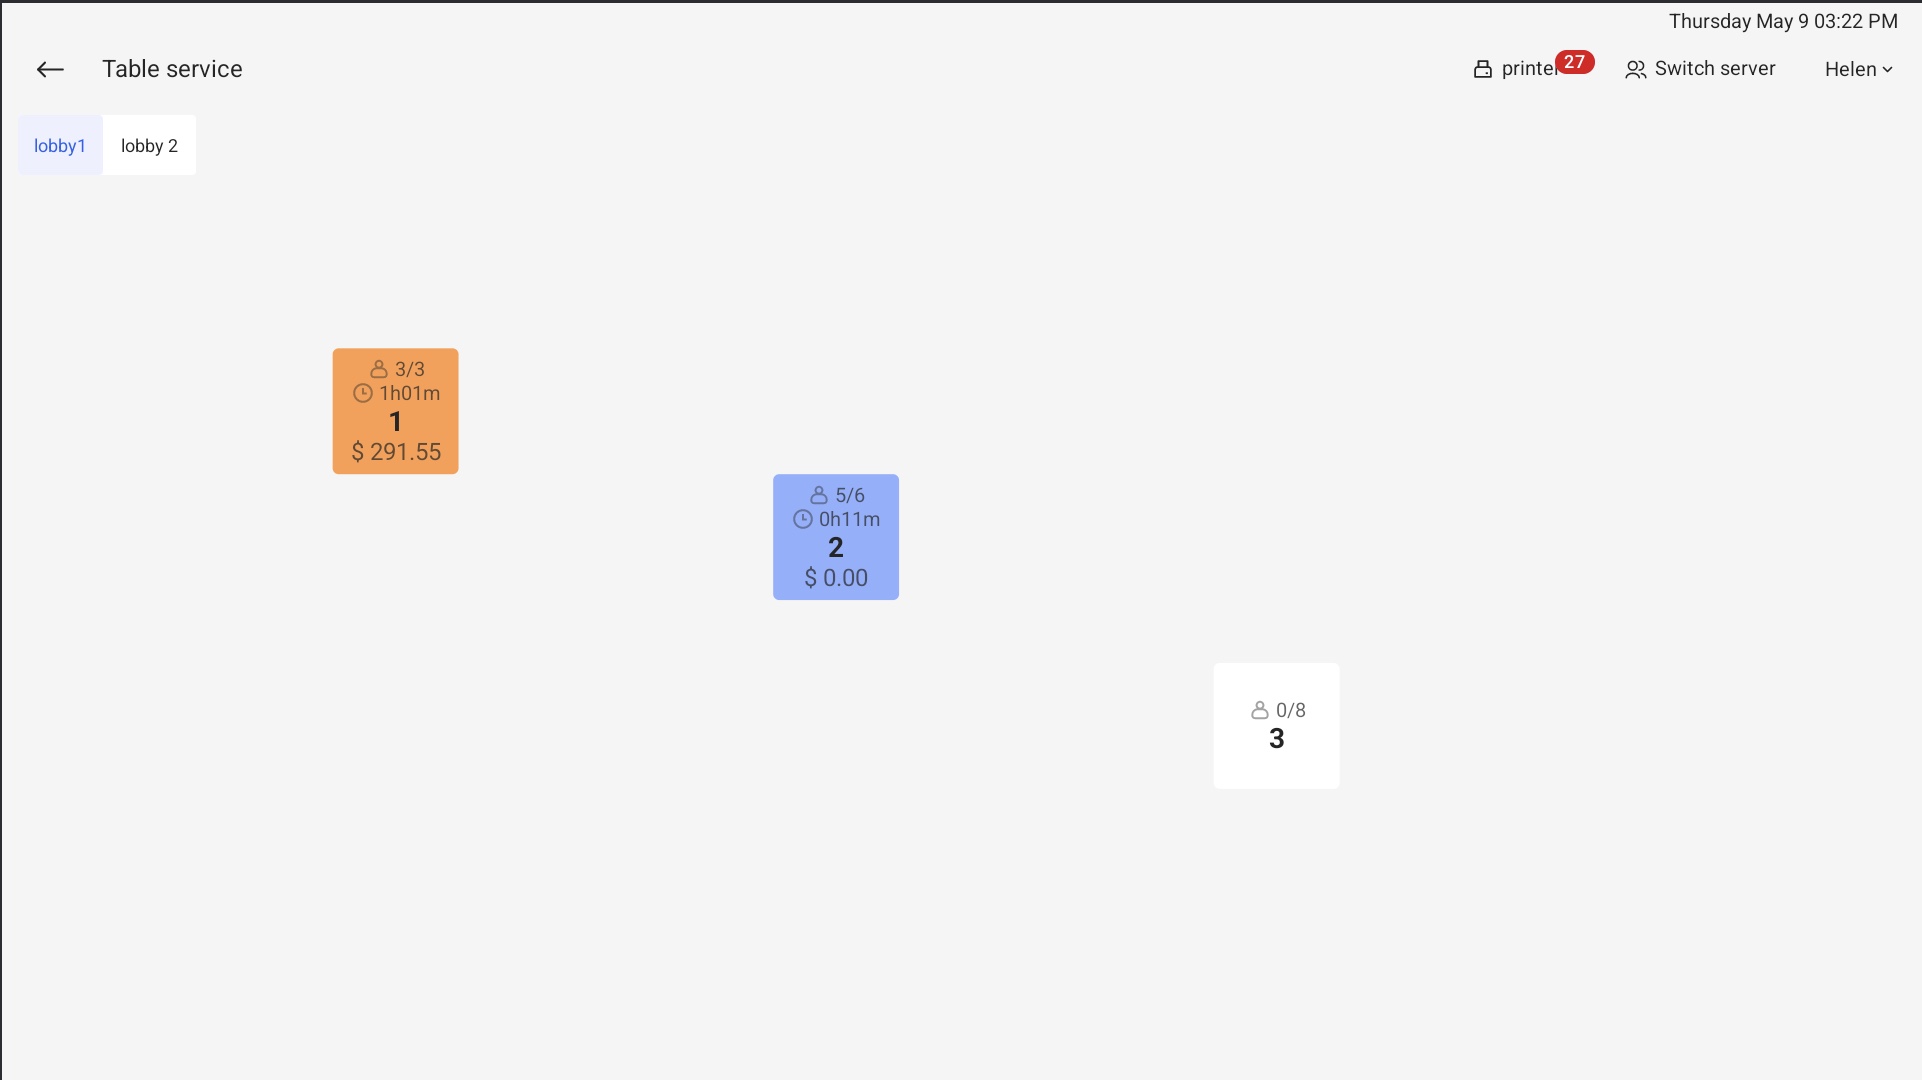
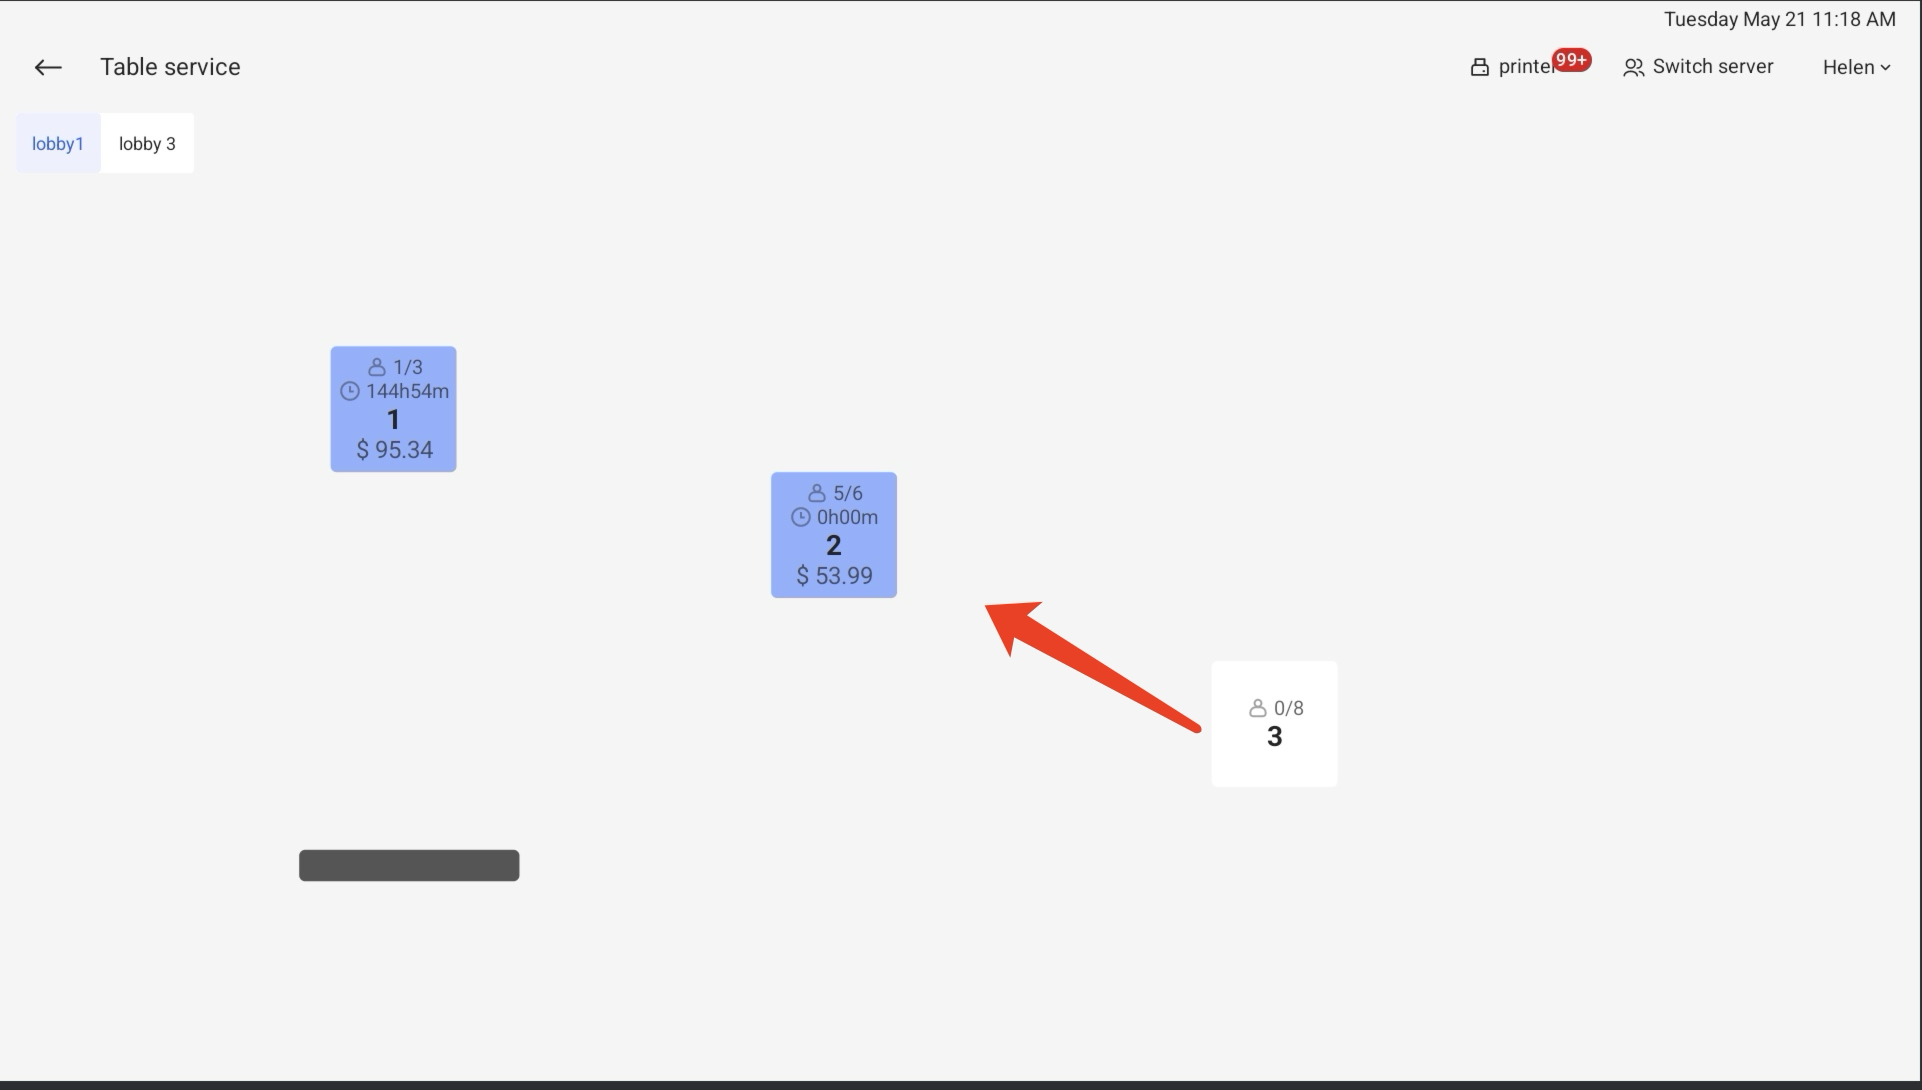
② Click to switch different lobbies
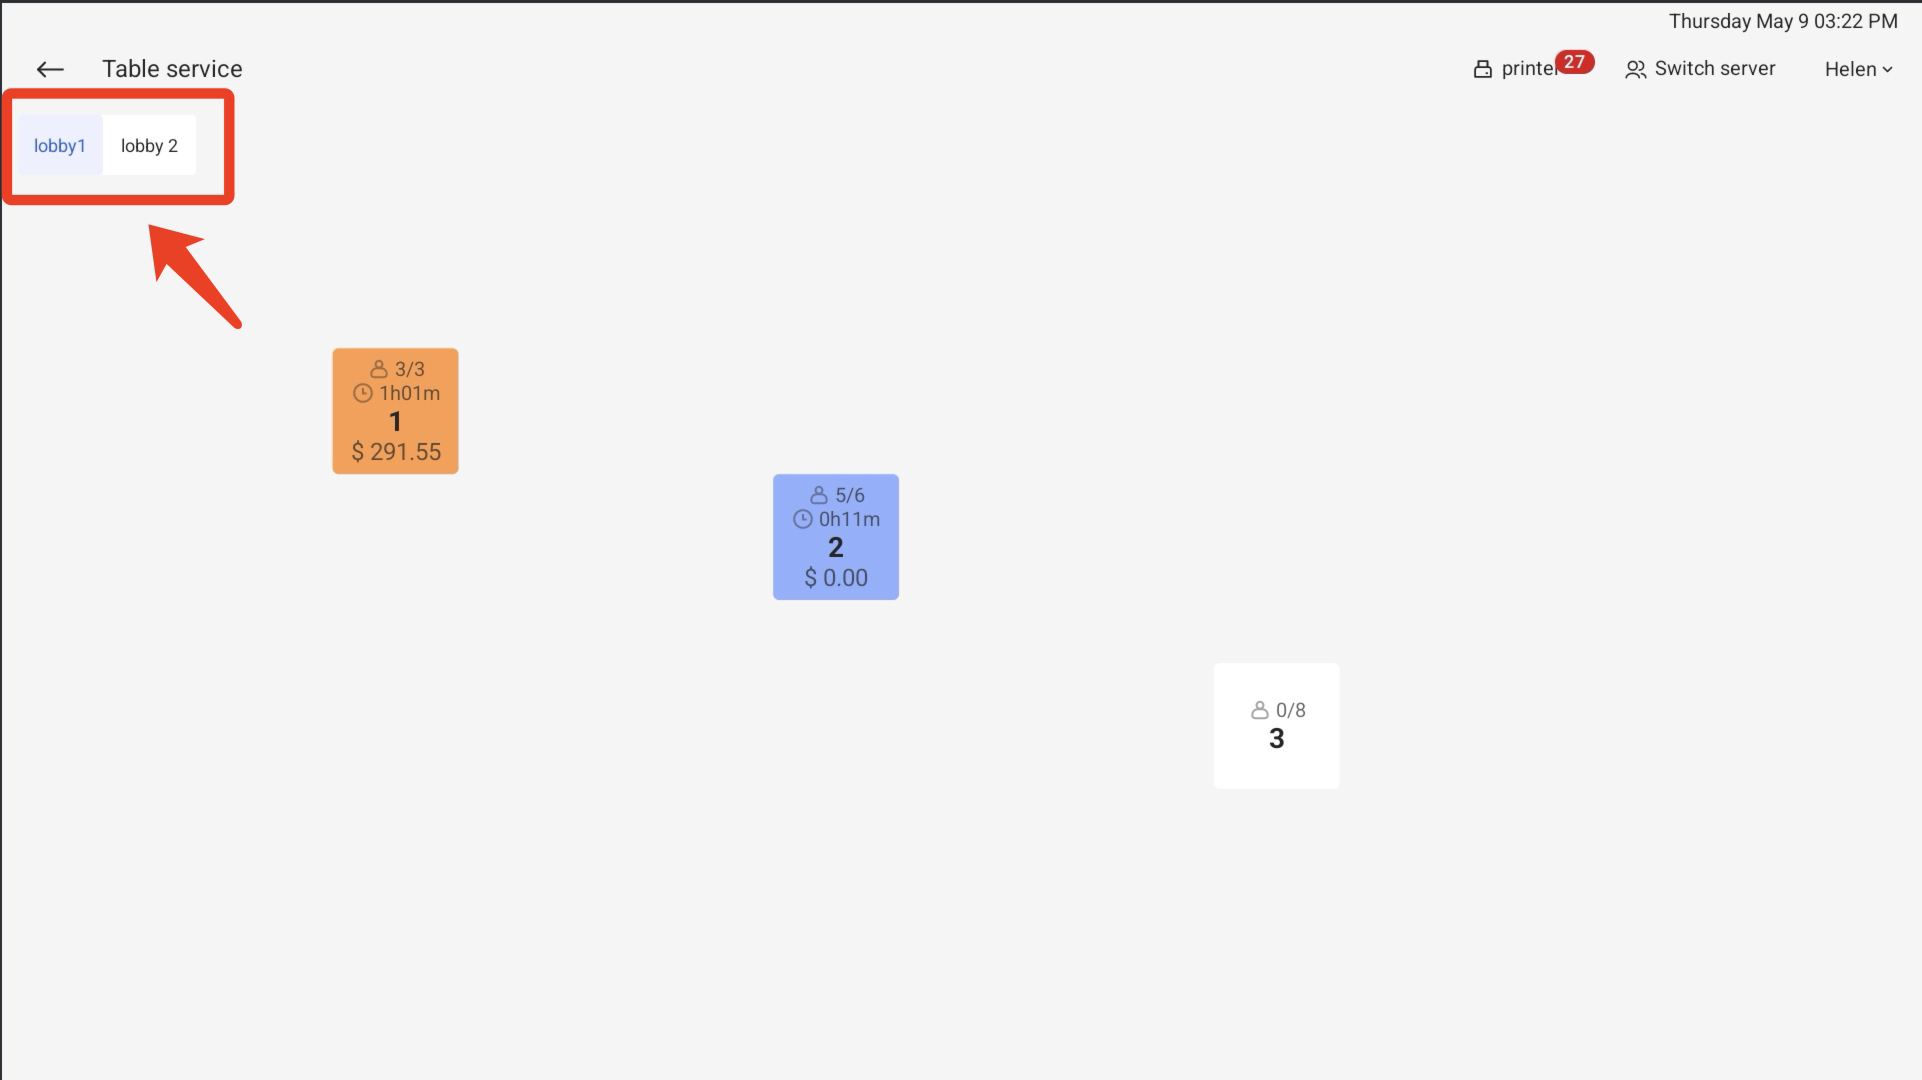
③ Here are three different status of each table: Sent, Unsent and Open
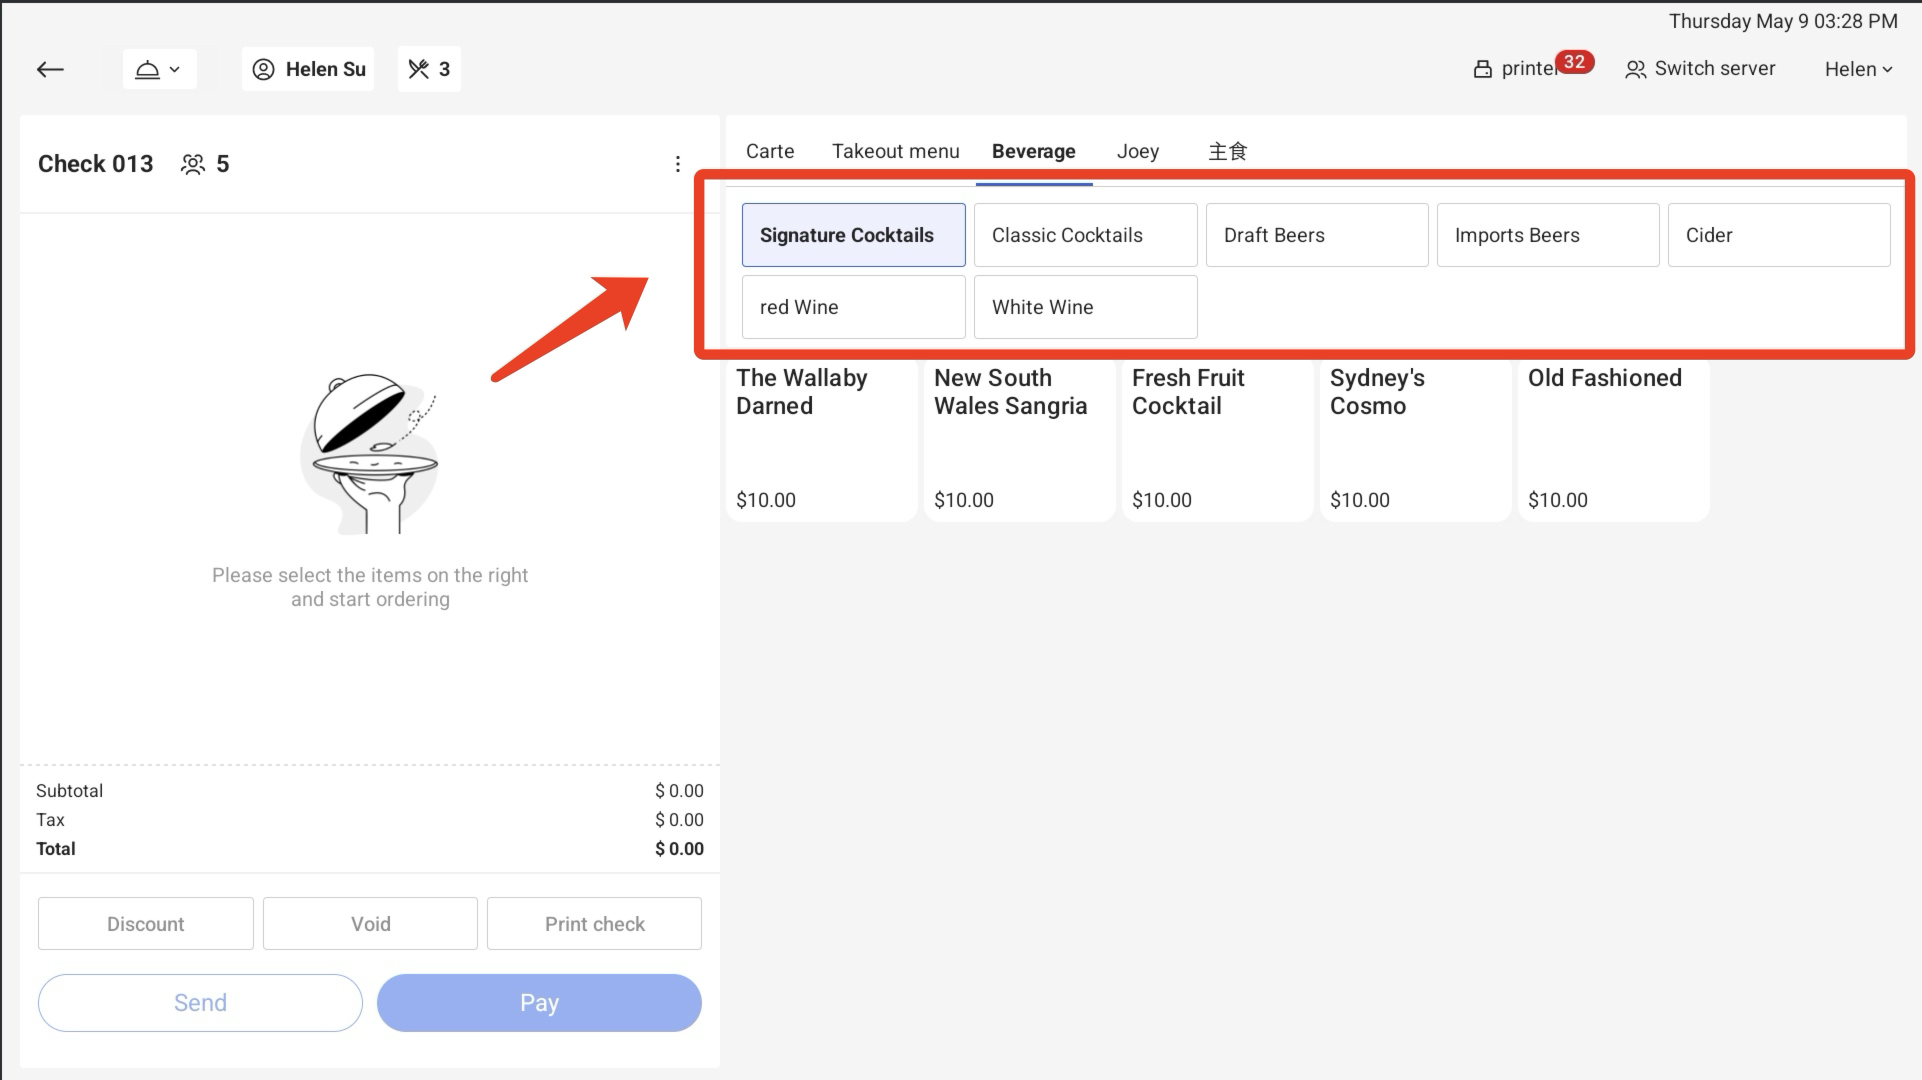
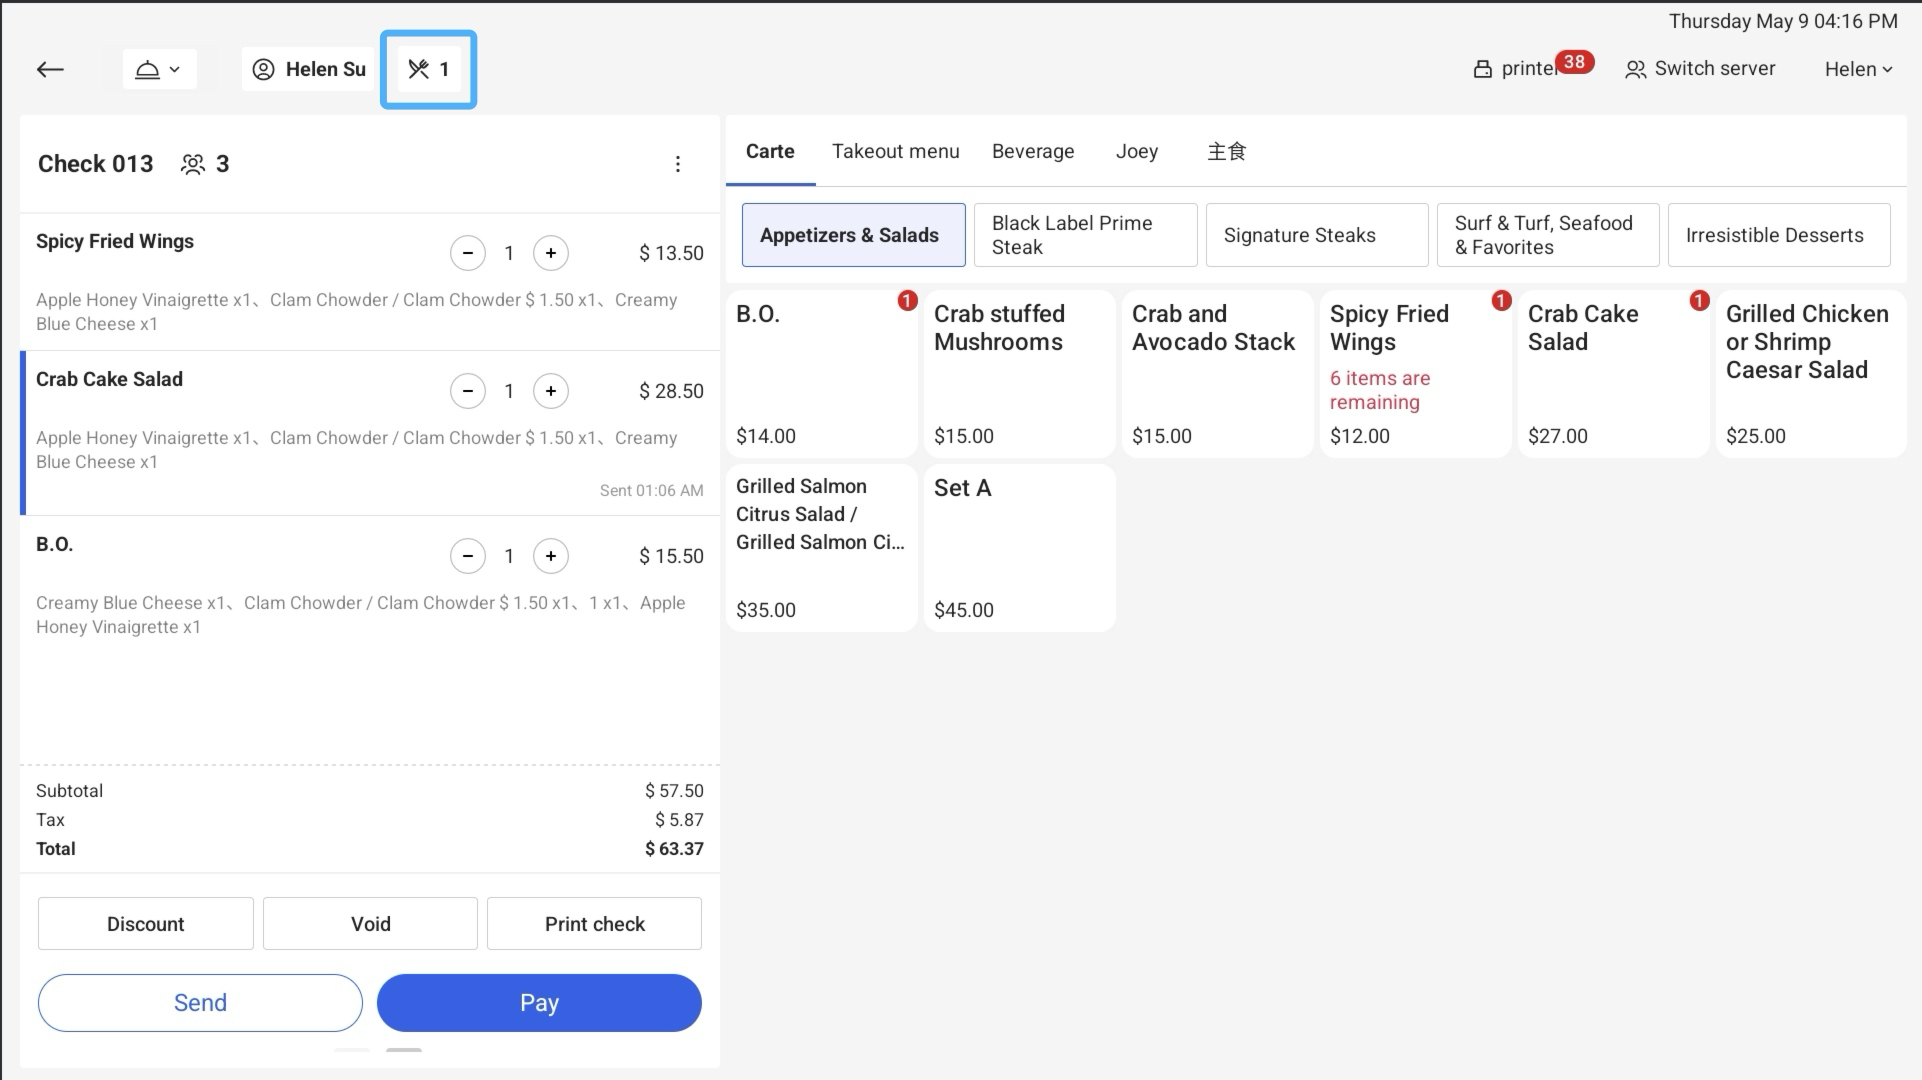
1. Order
a. Select menu
Click to select a menu
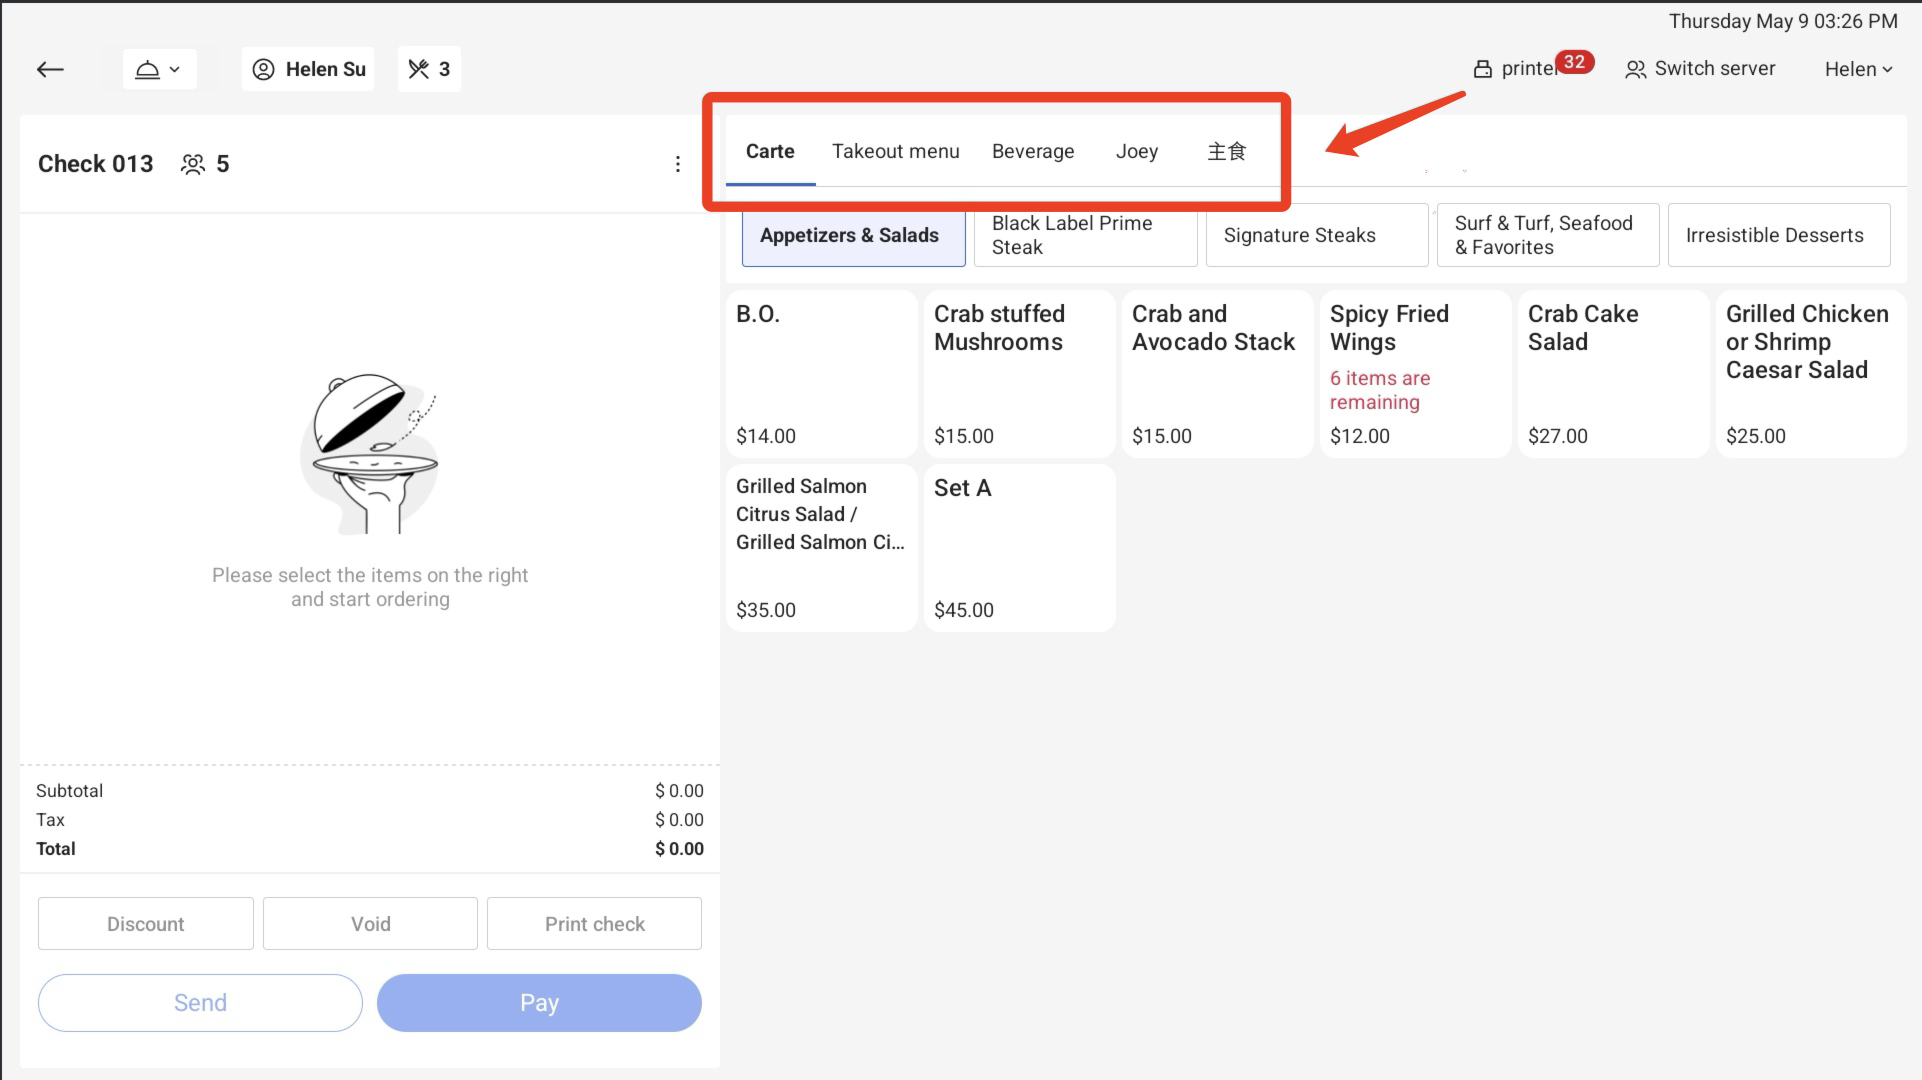
b. Select sub-menu
Click to select a sub-menu where you want to choose items.
c. Select item
i. Click an item in the sub-menu to add it in the cart.
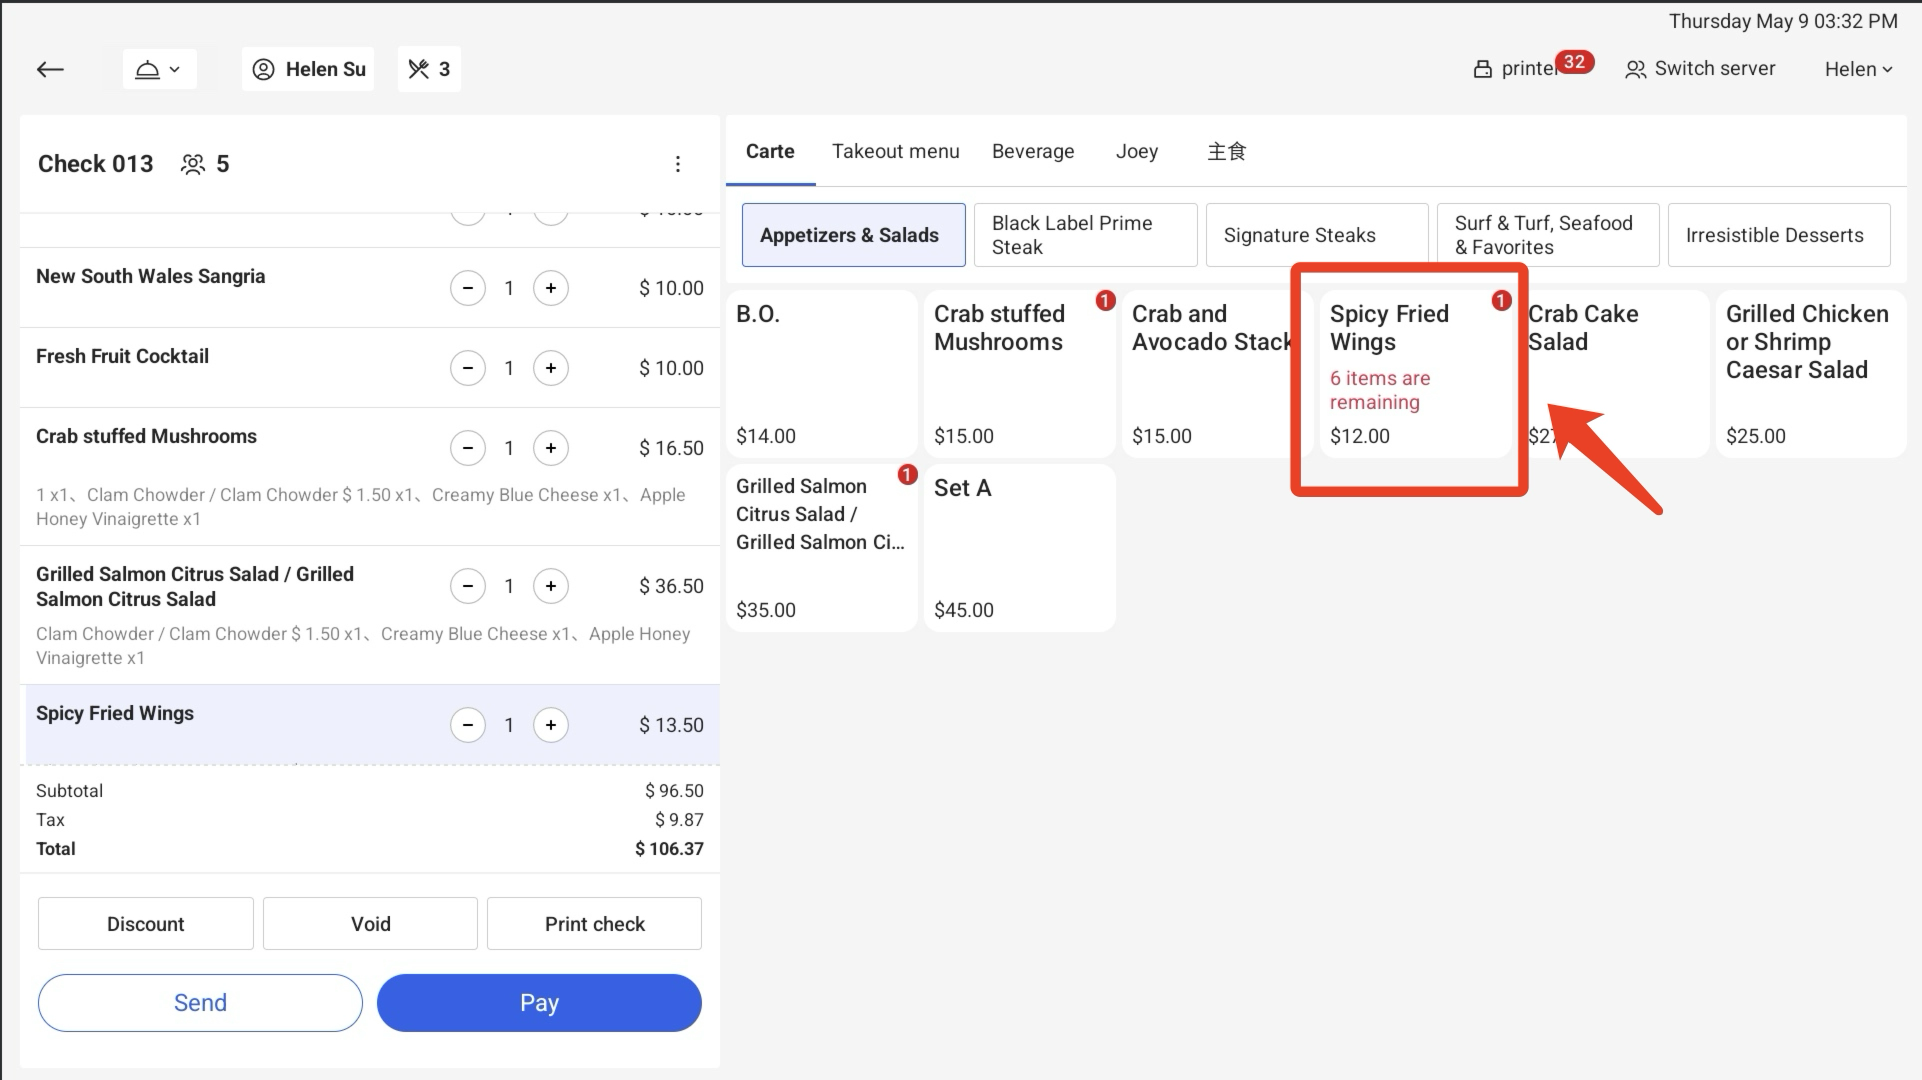
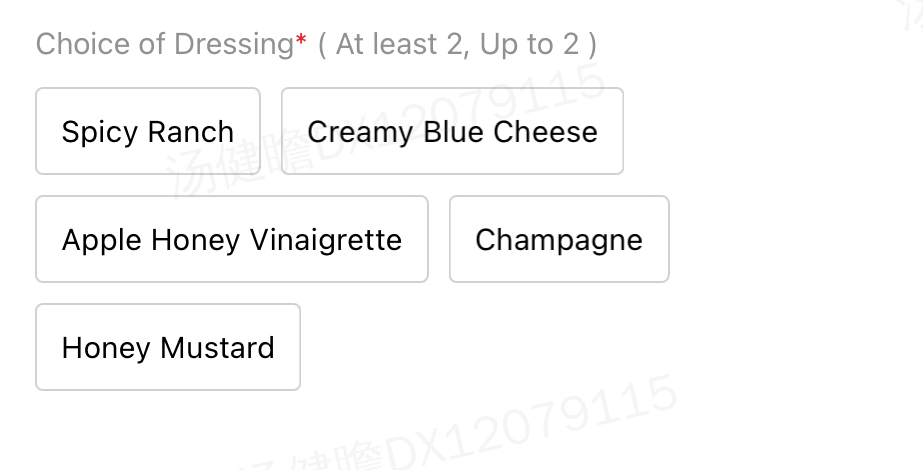
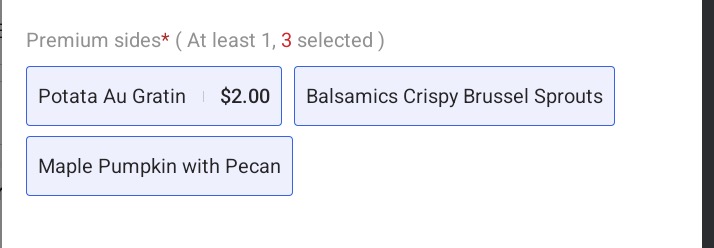
d. Select modifier
If modifiers are configured in the item, they will be displayed when you select this item to add it into the
order.
Requirement | Display on the POS |
|---|---|
Guest can make zero or one selection from this modifier group.
|
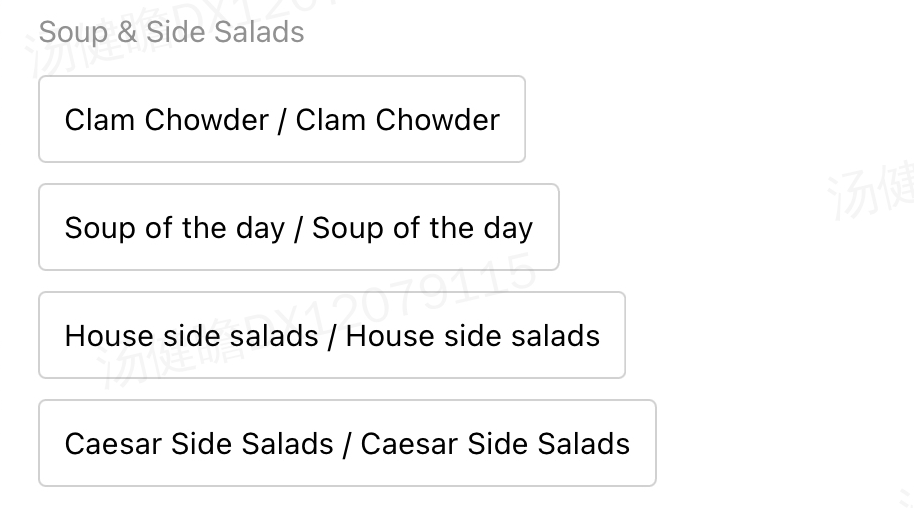
|
Guest must make one, and only one, selection from this modifier group.
|  |
Guests must select a specific number of modifiers from this modifier group. |
|
Guests can select as few or as many modifiers from this modifier group as they want. |

|
Guests must select at least one modifier from this modifier group but they can also pick as many modifiers from this group as they want. |
|
Guests do not have to select any modifiers from this group but, if they do, they are limited to a specific number(such as 2). |
|
Notes: * means required
if you can’t select modifiers of an item according to its requirement before quitting the selection page, a pop-up will be triggered and you have to select Continue to select or Confirm to cancel
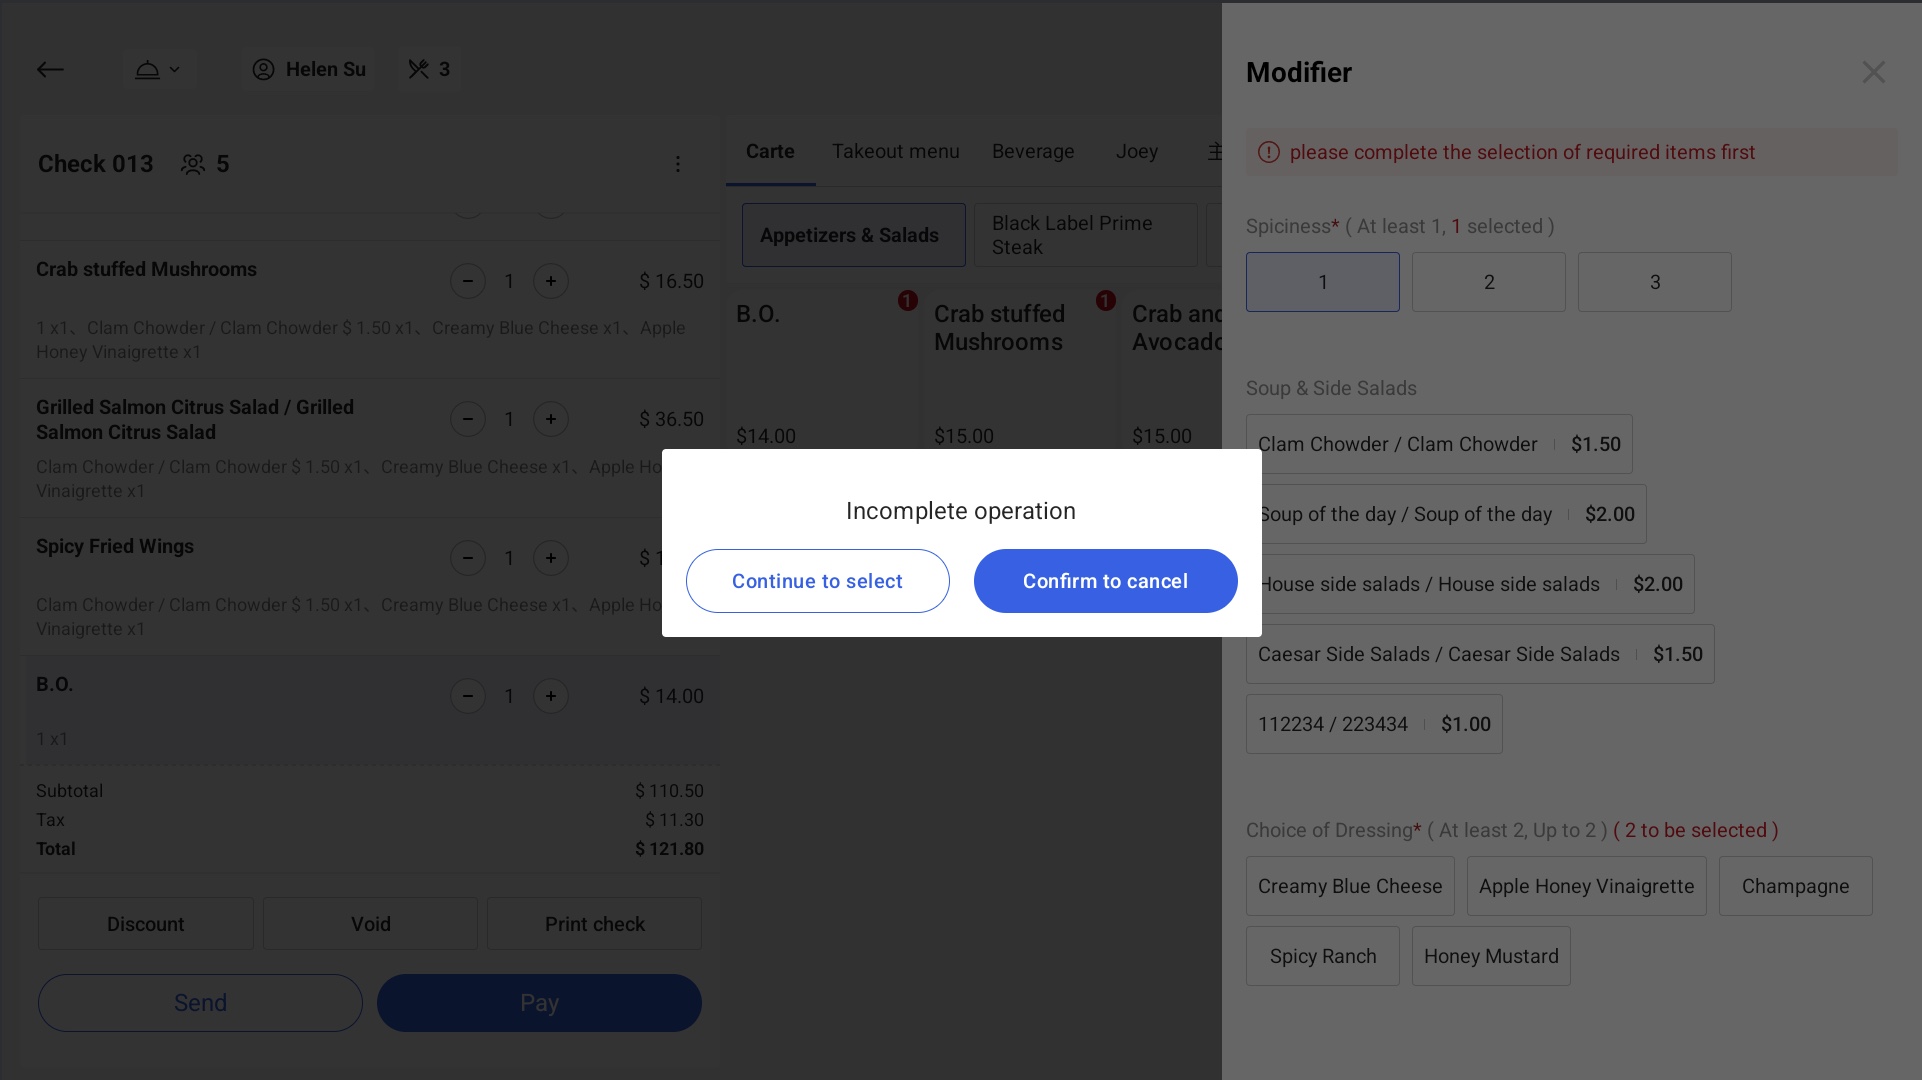
2. Shopping Cart
a. Order Configuration
① Click ➕ button to increase and ➖to decrease.
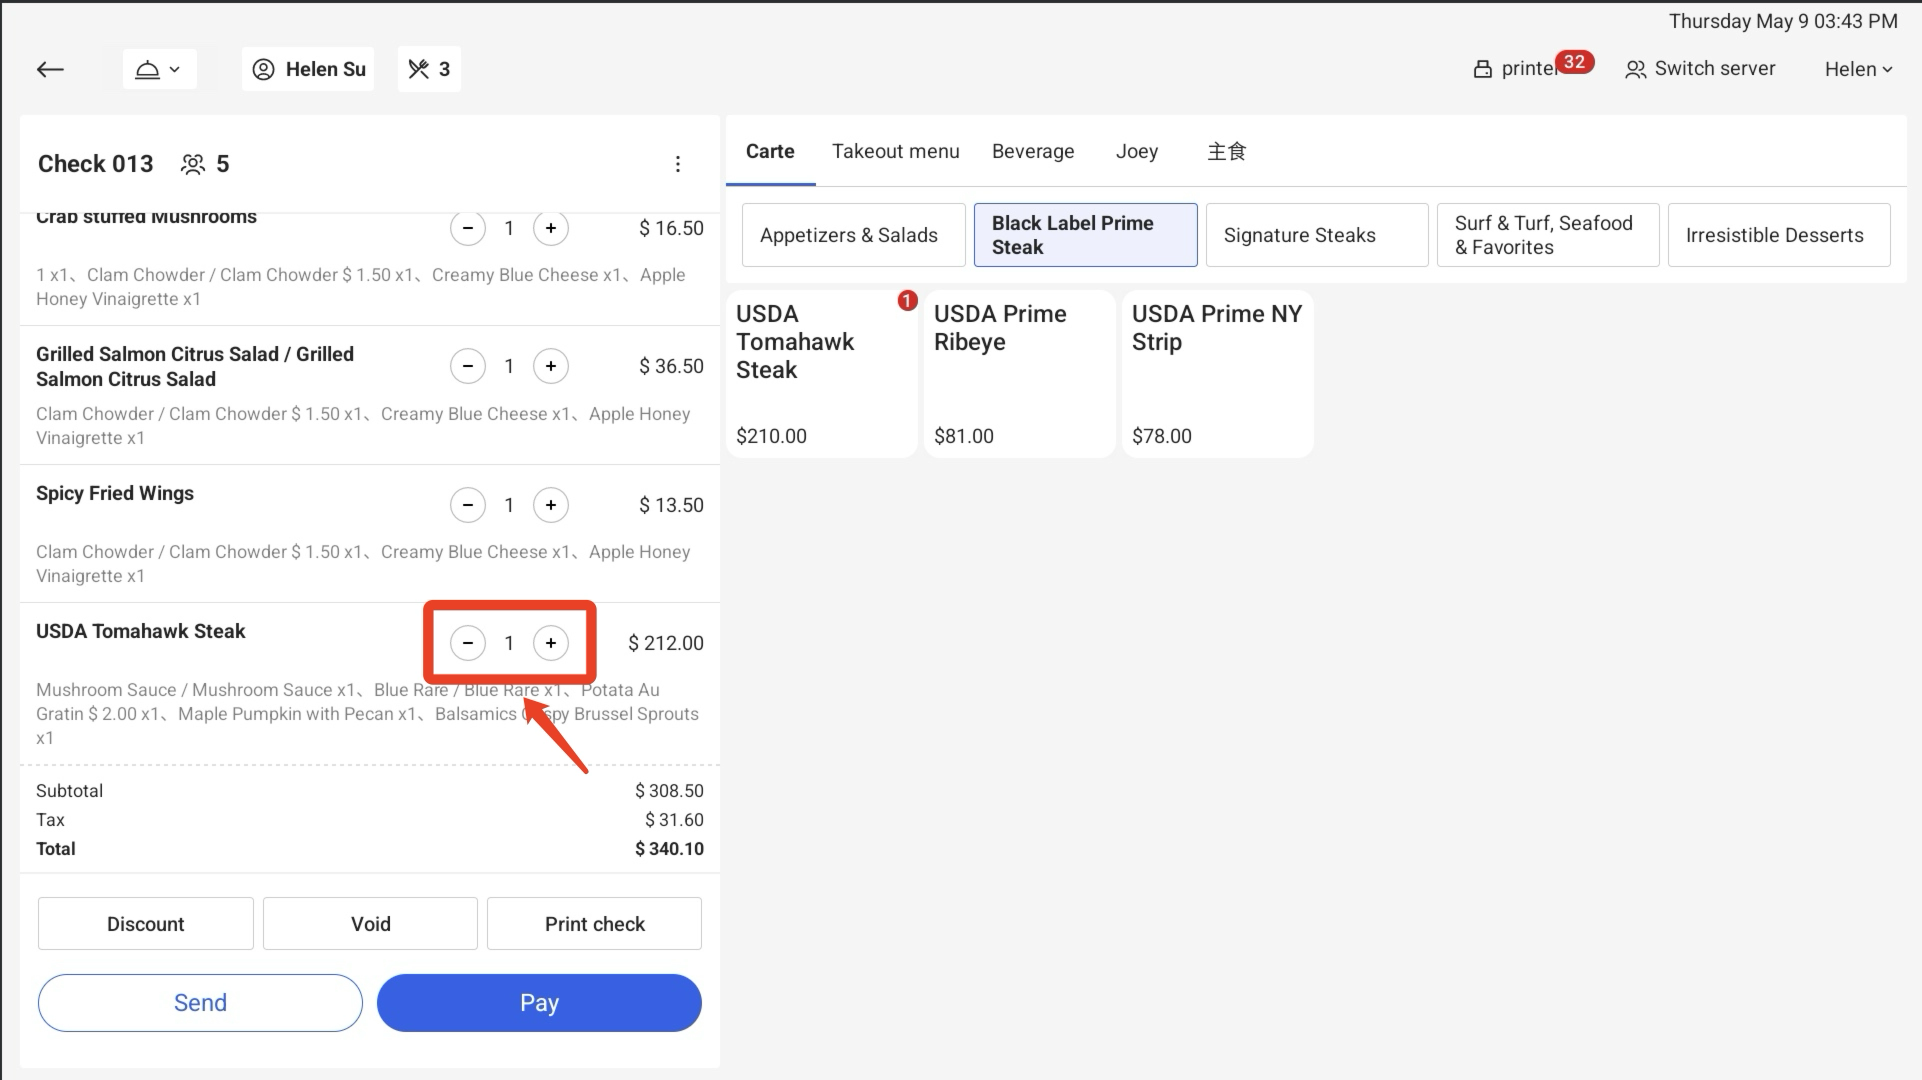
② Long press an item to add notes, and these notes will be shown on the kitchen ticket. Or you can also tap![]() to select Notes
to select Notes
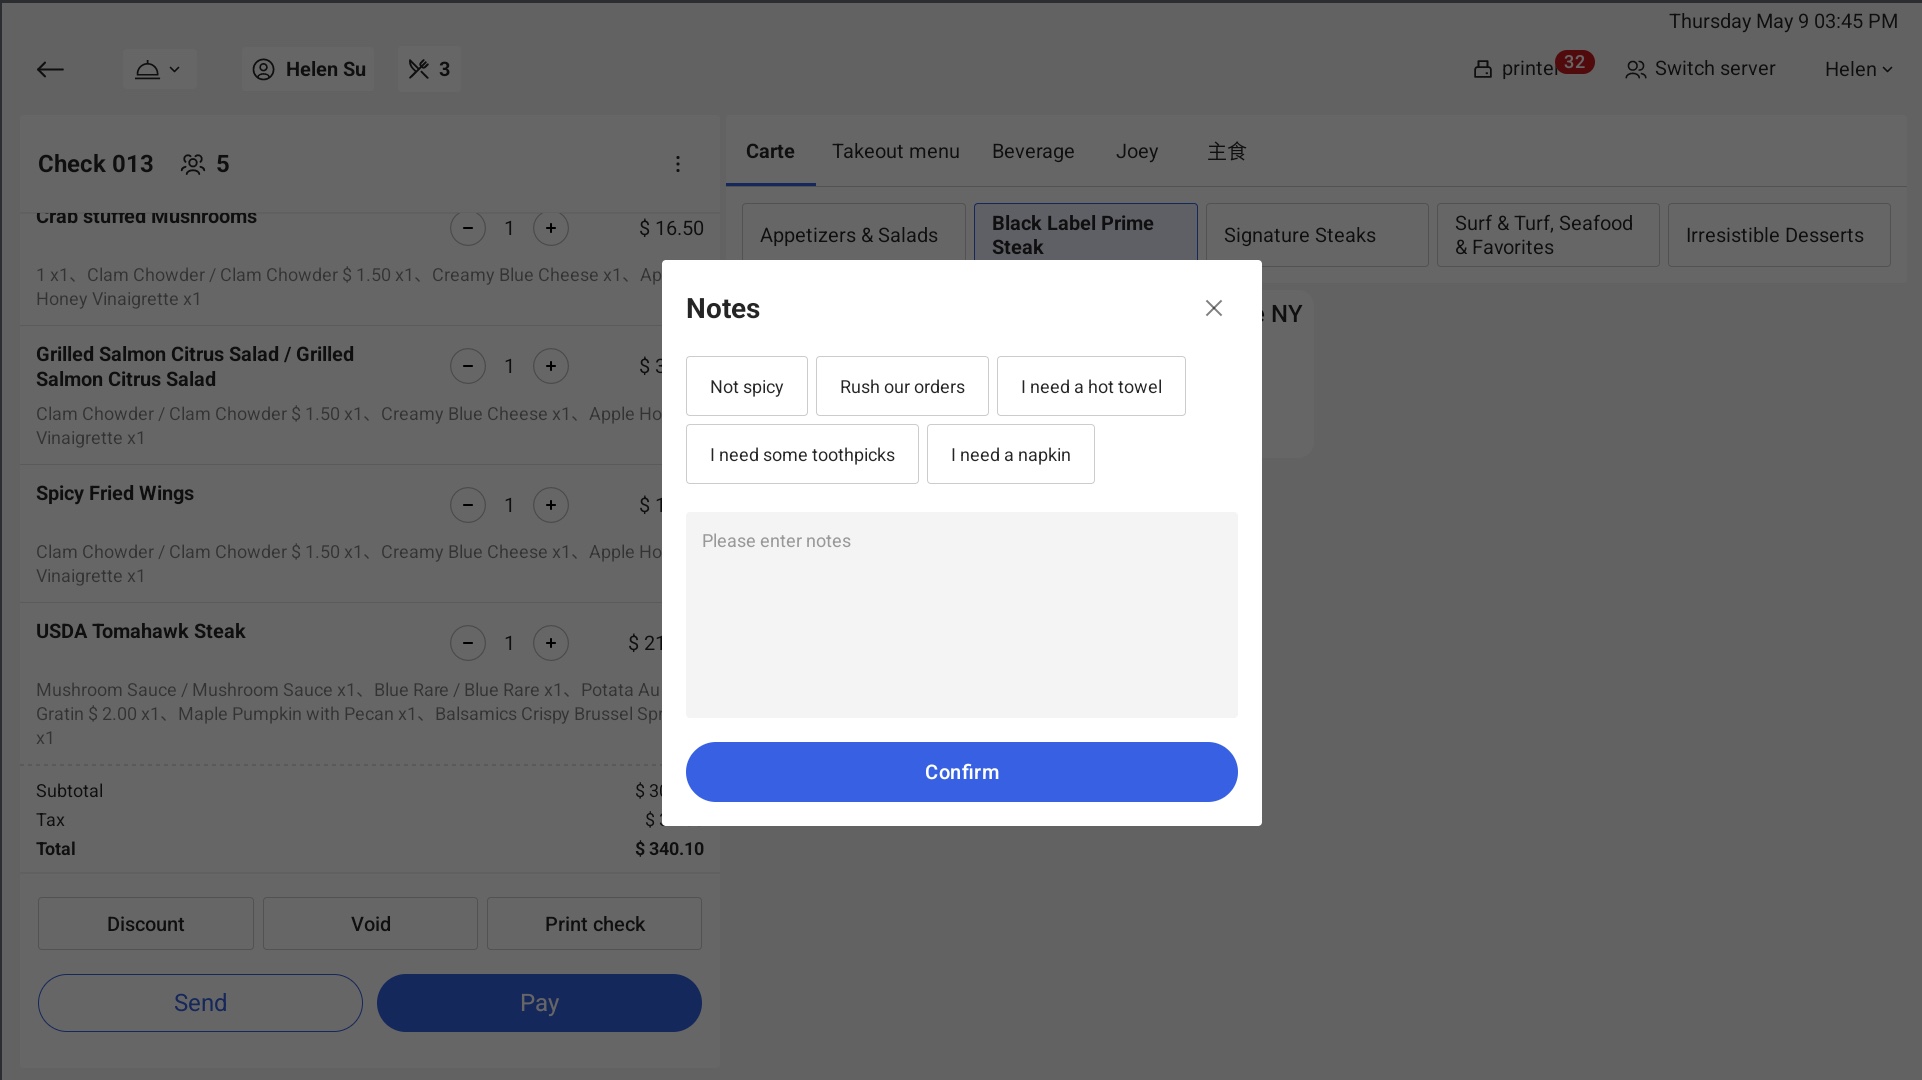
i. If you have set frequently used notes in your Peppr website, these remarks will be displayed here.
ii. If the remarks is set to be Required on your Peppr website, there will be a prompt when the remark is not filled in. In Peppr website, navigate to Front of house > Notes> Notes and check your notes settings.
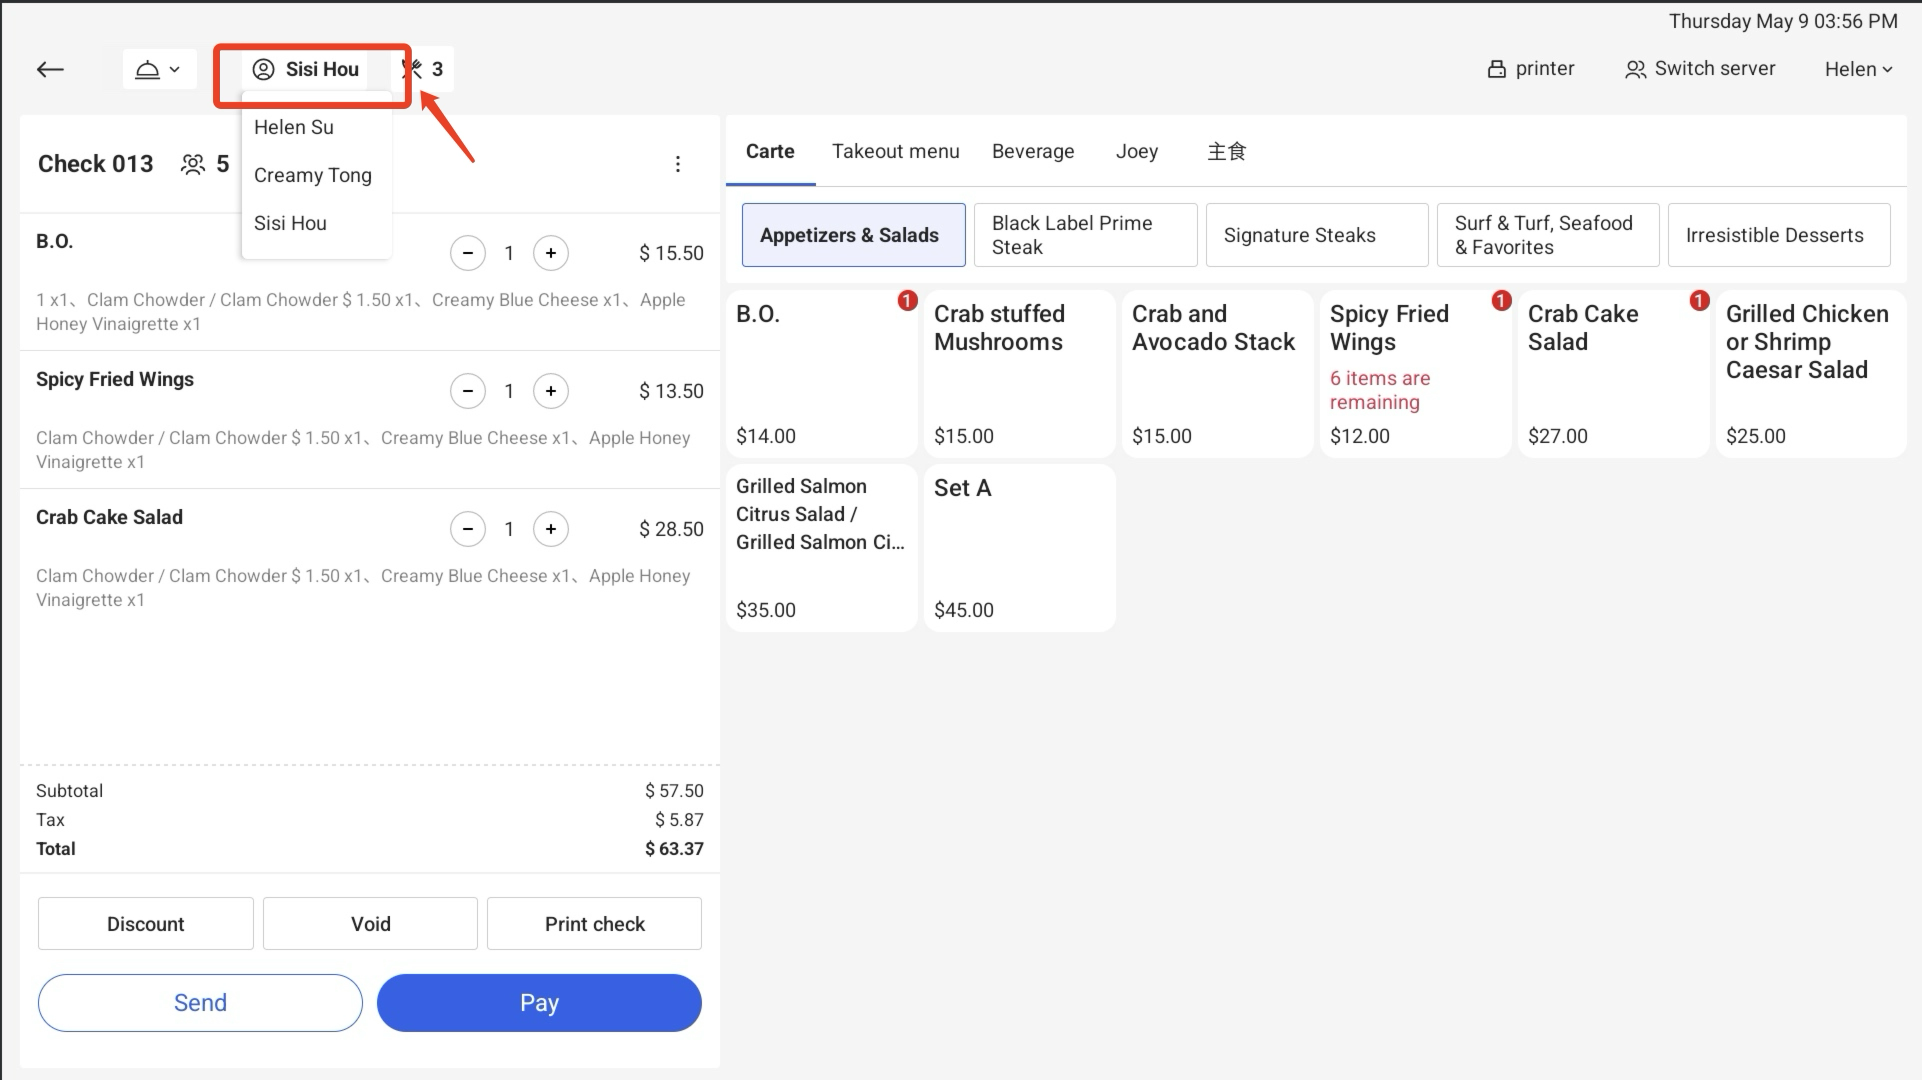
③ Clicking on the server name above can change the server.
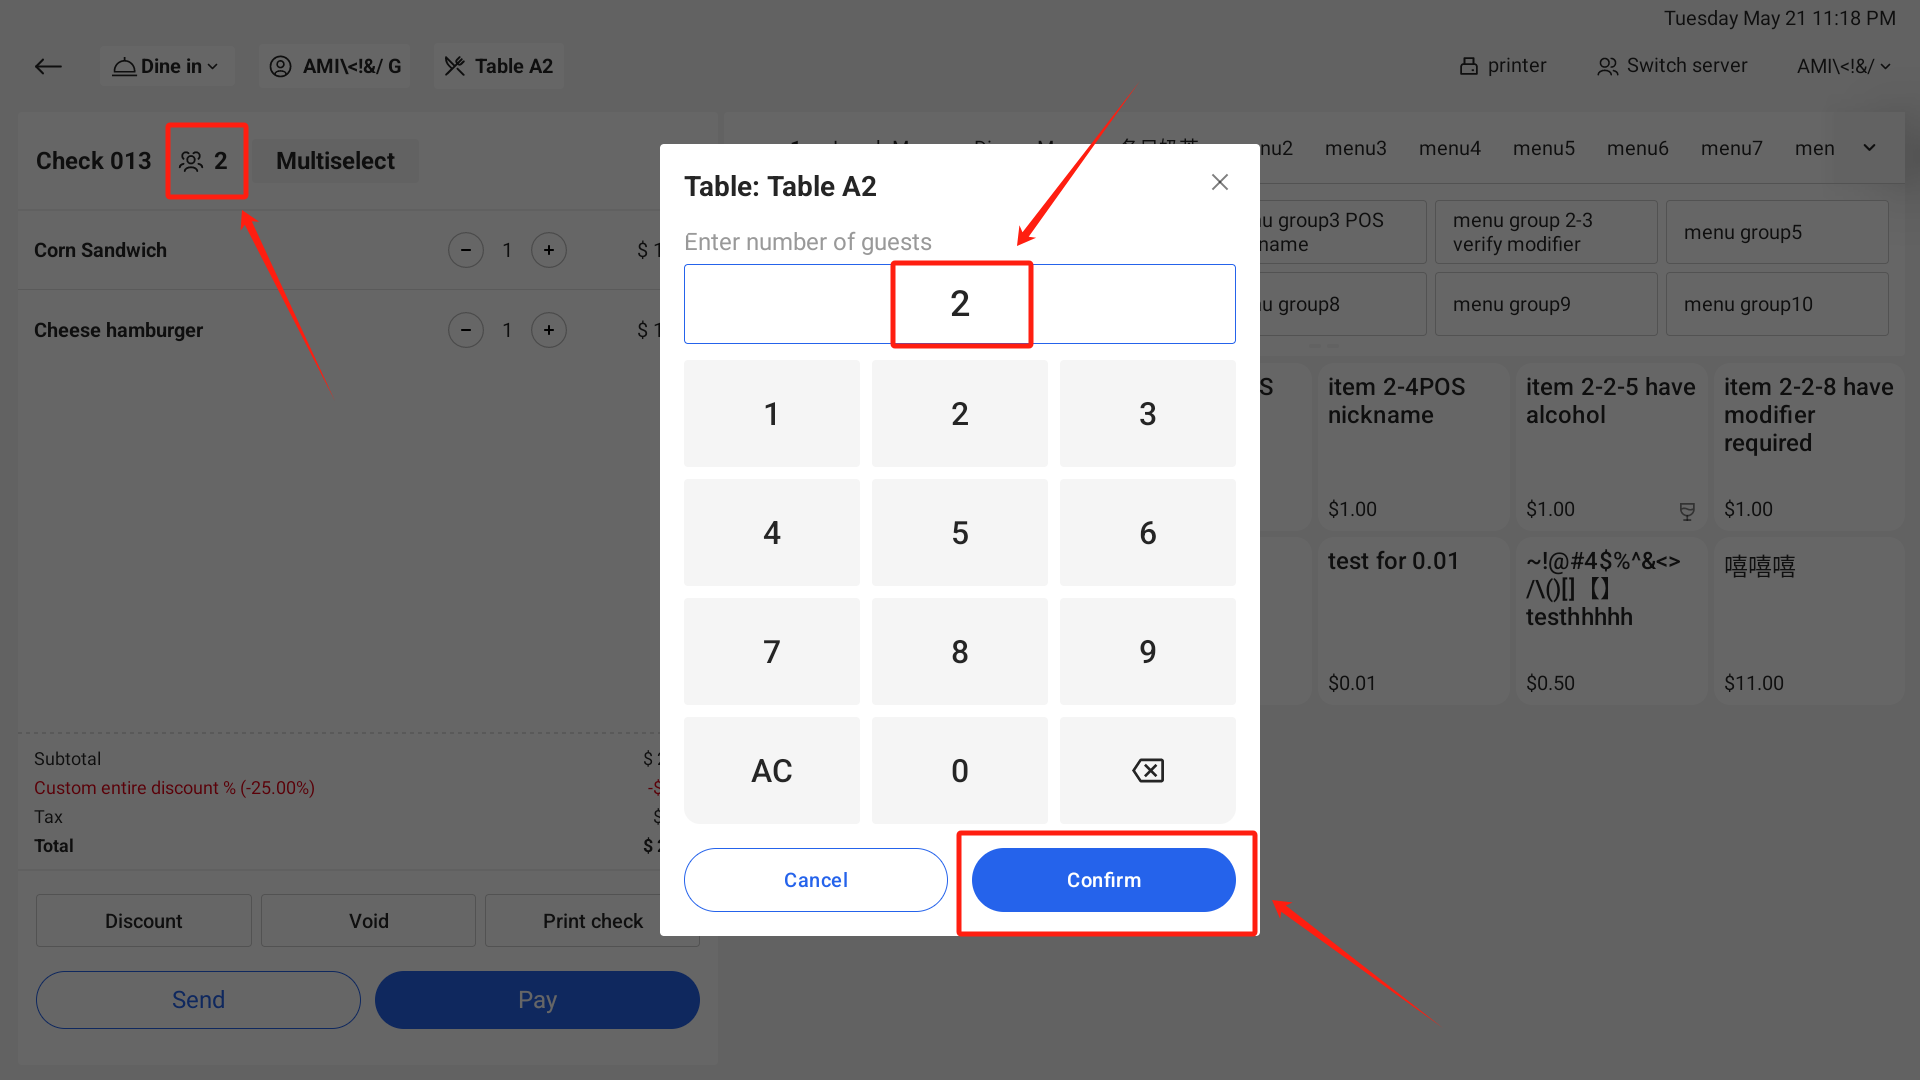
④ Clicking on the number of diners above allows you to customize and modify the number of diners.

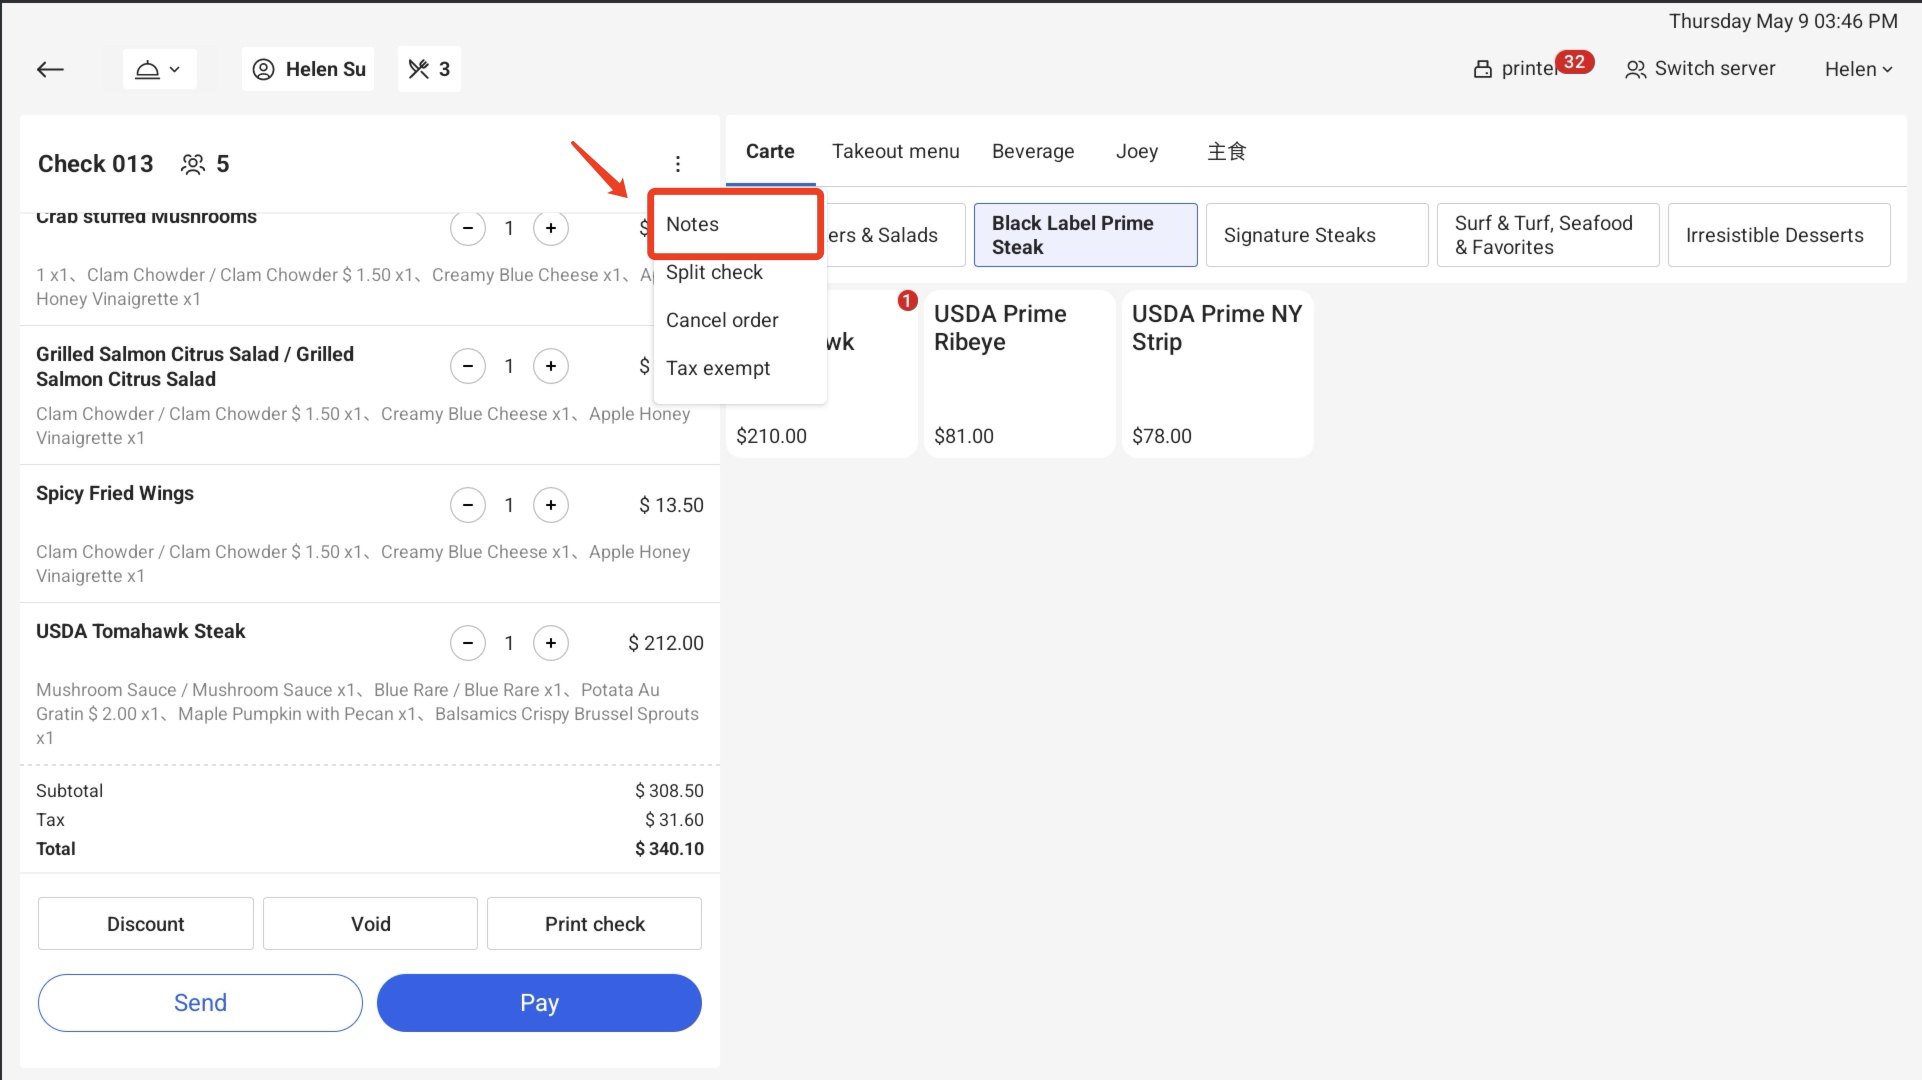
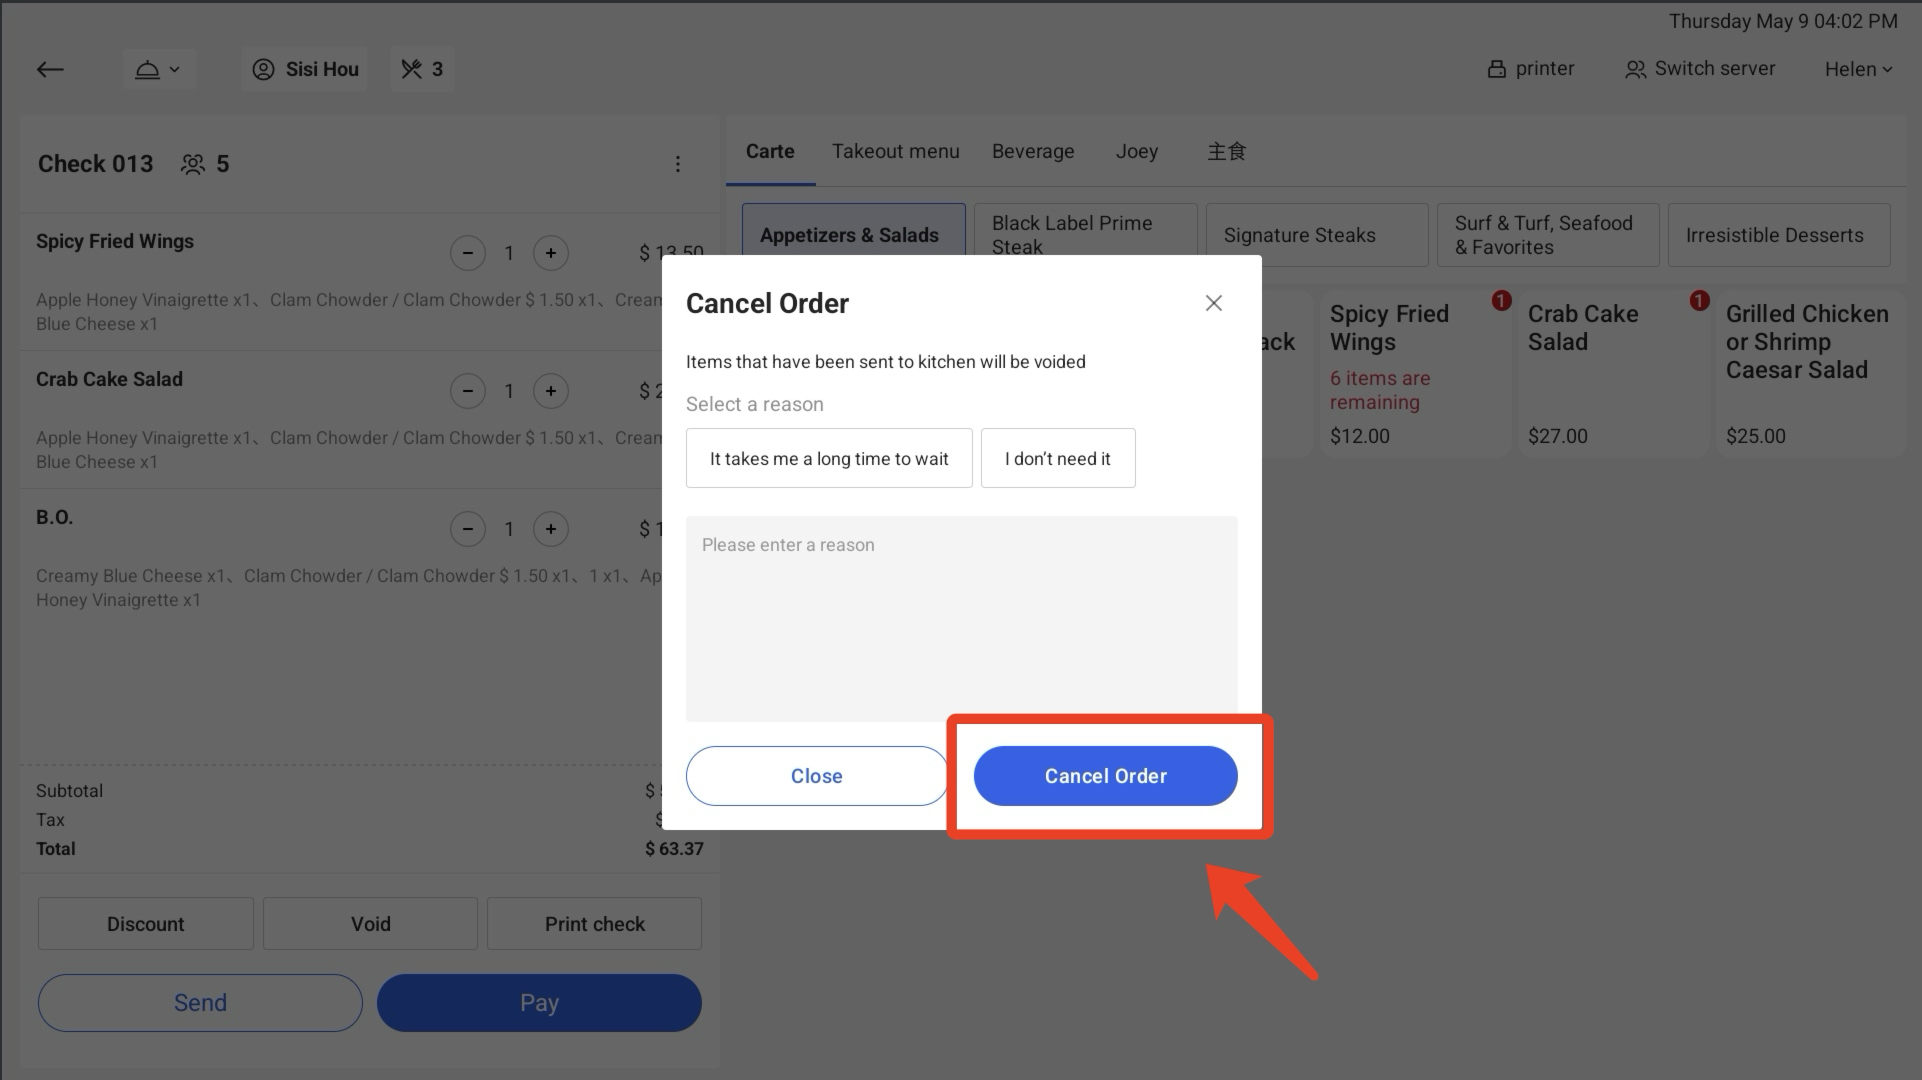
b. Cancel Order
① Click┇ and select Cancelled order.

② After Cancel Order pops up, select or enter reason and click Cancel Order, then you can delete the entire order.
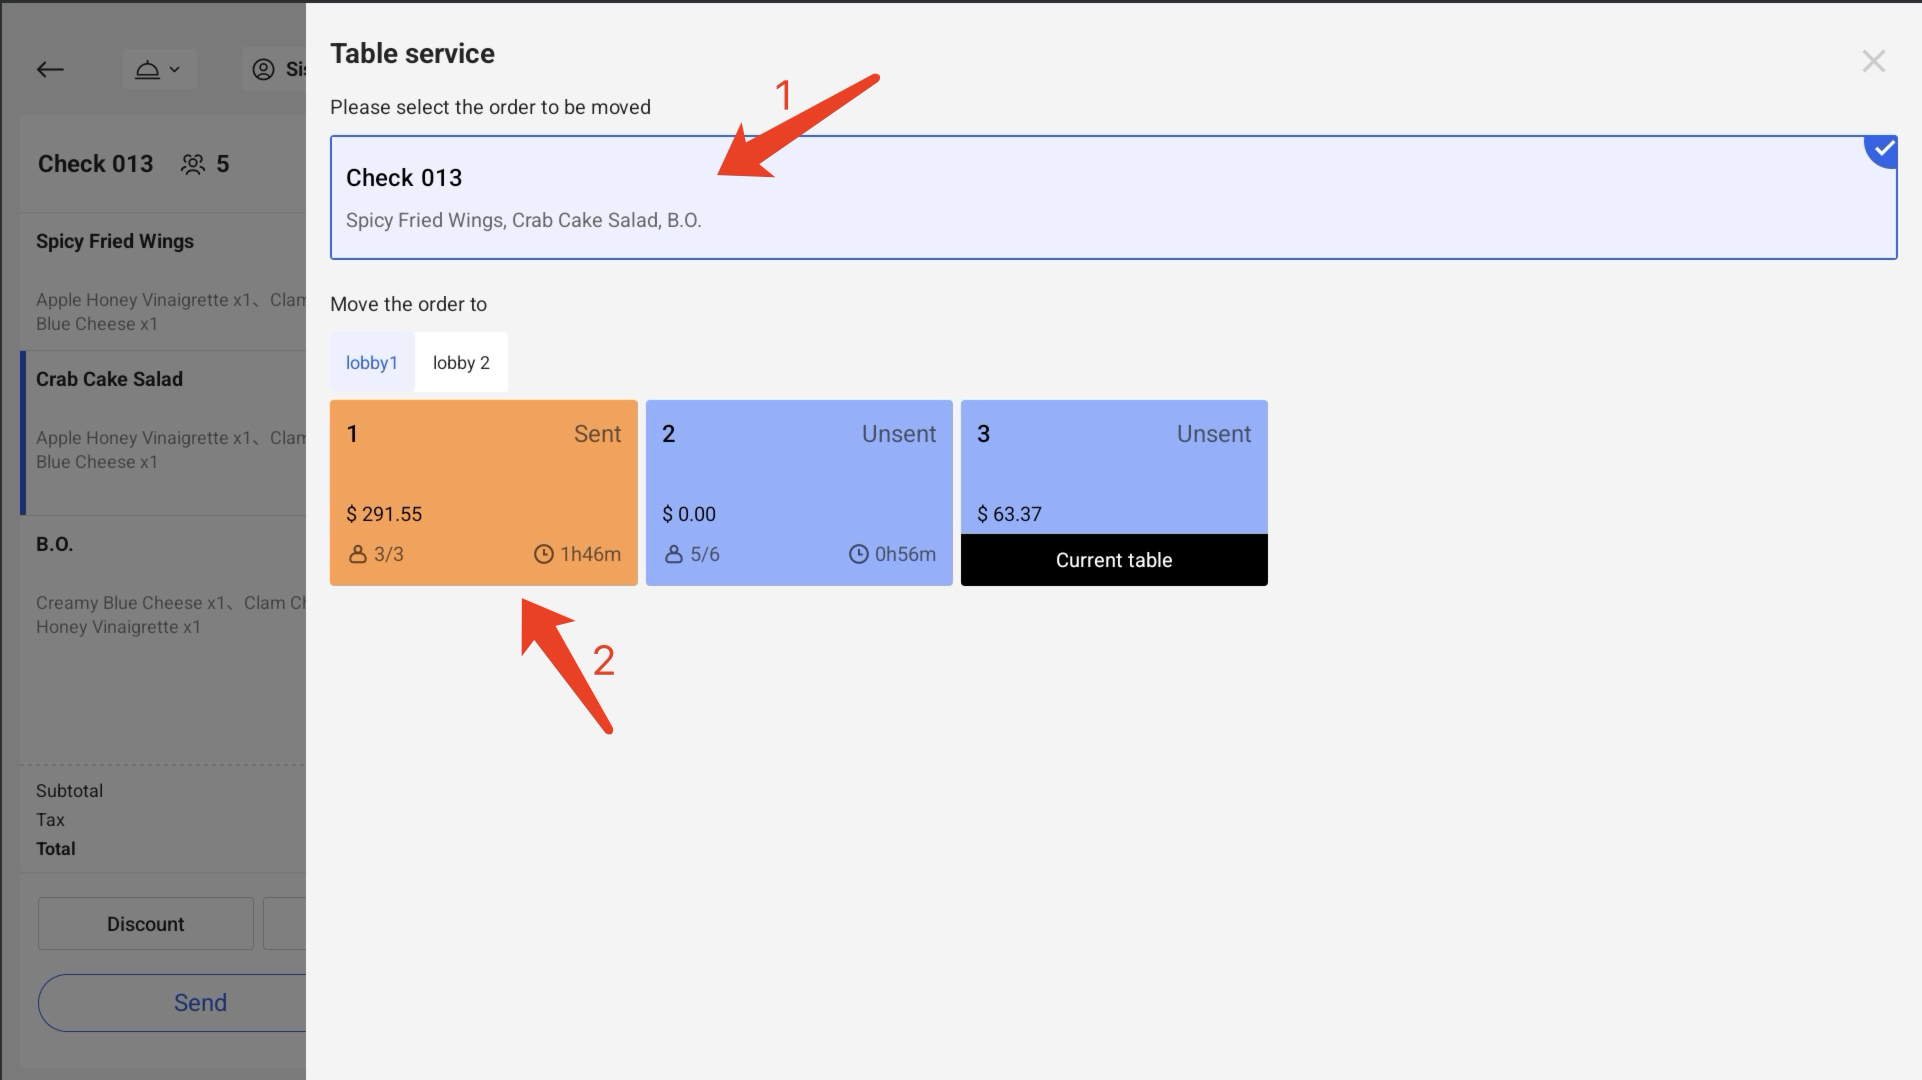
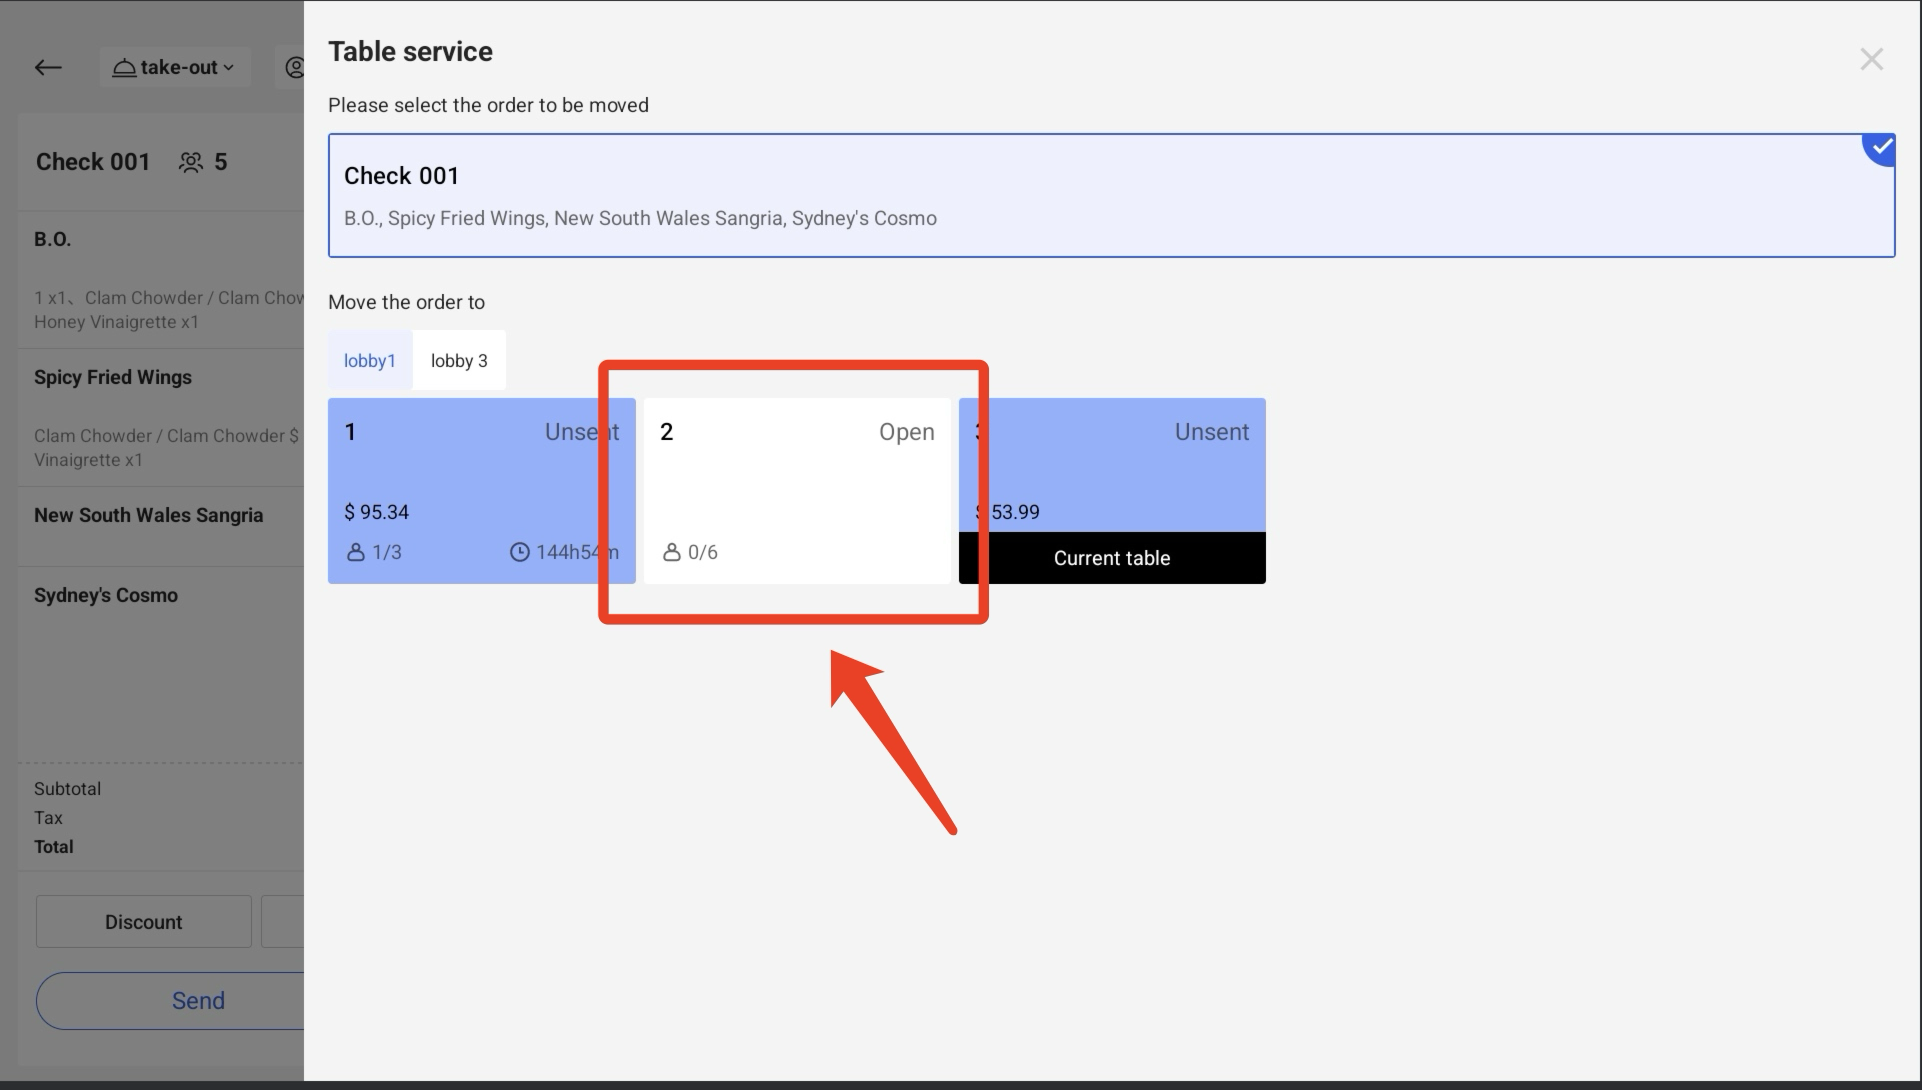
3. Merge Table
① Click on the table number button at the top left corner of the interface to enter the management page.
② This table will be marked as the Current table, and the order information will also be displayed in the banner above.
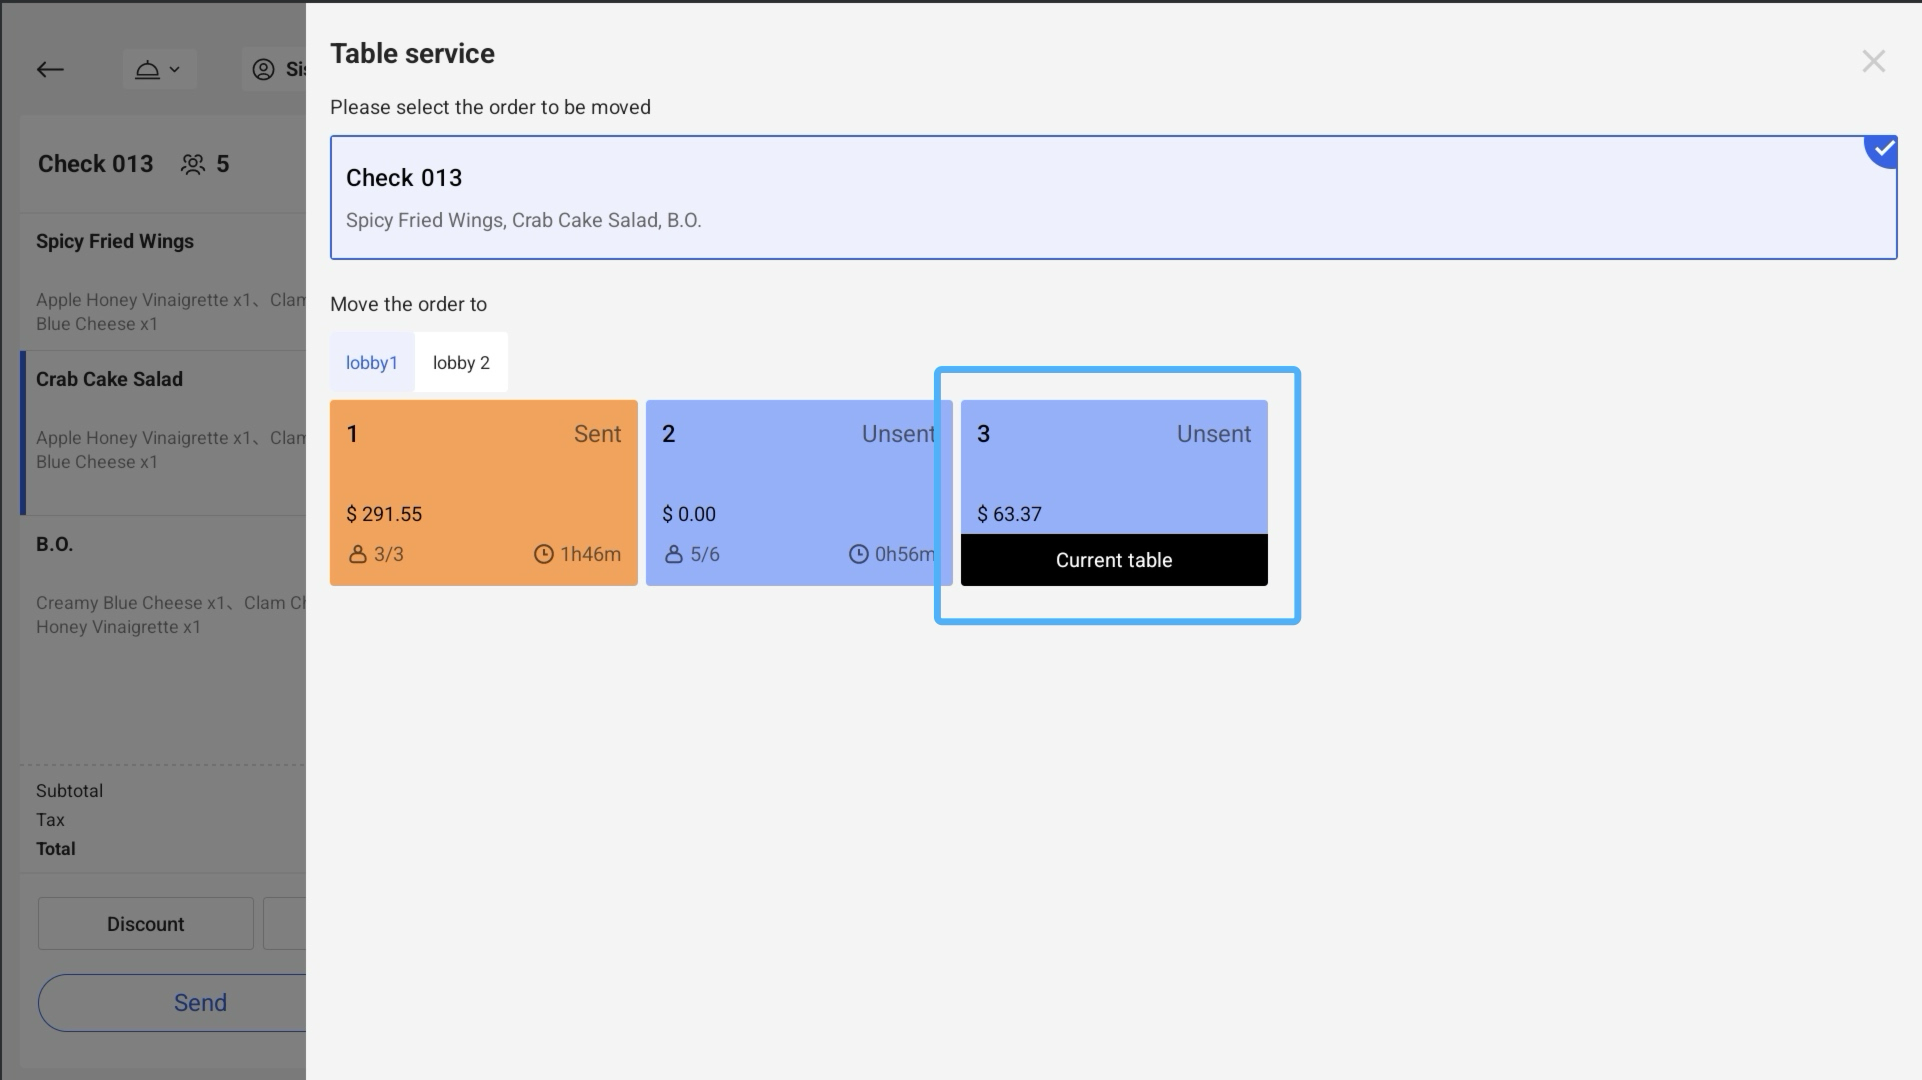
③ First select the orders that need to be transferred, then select the table to which they need to be moved. Click on Merge and the orders will be transferred to the other table.
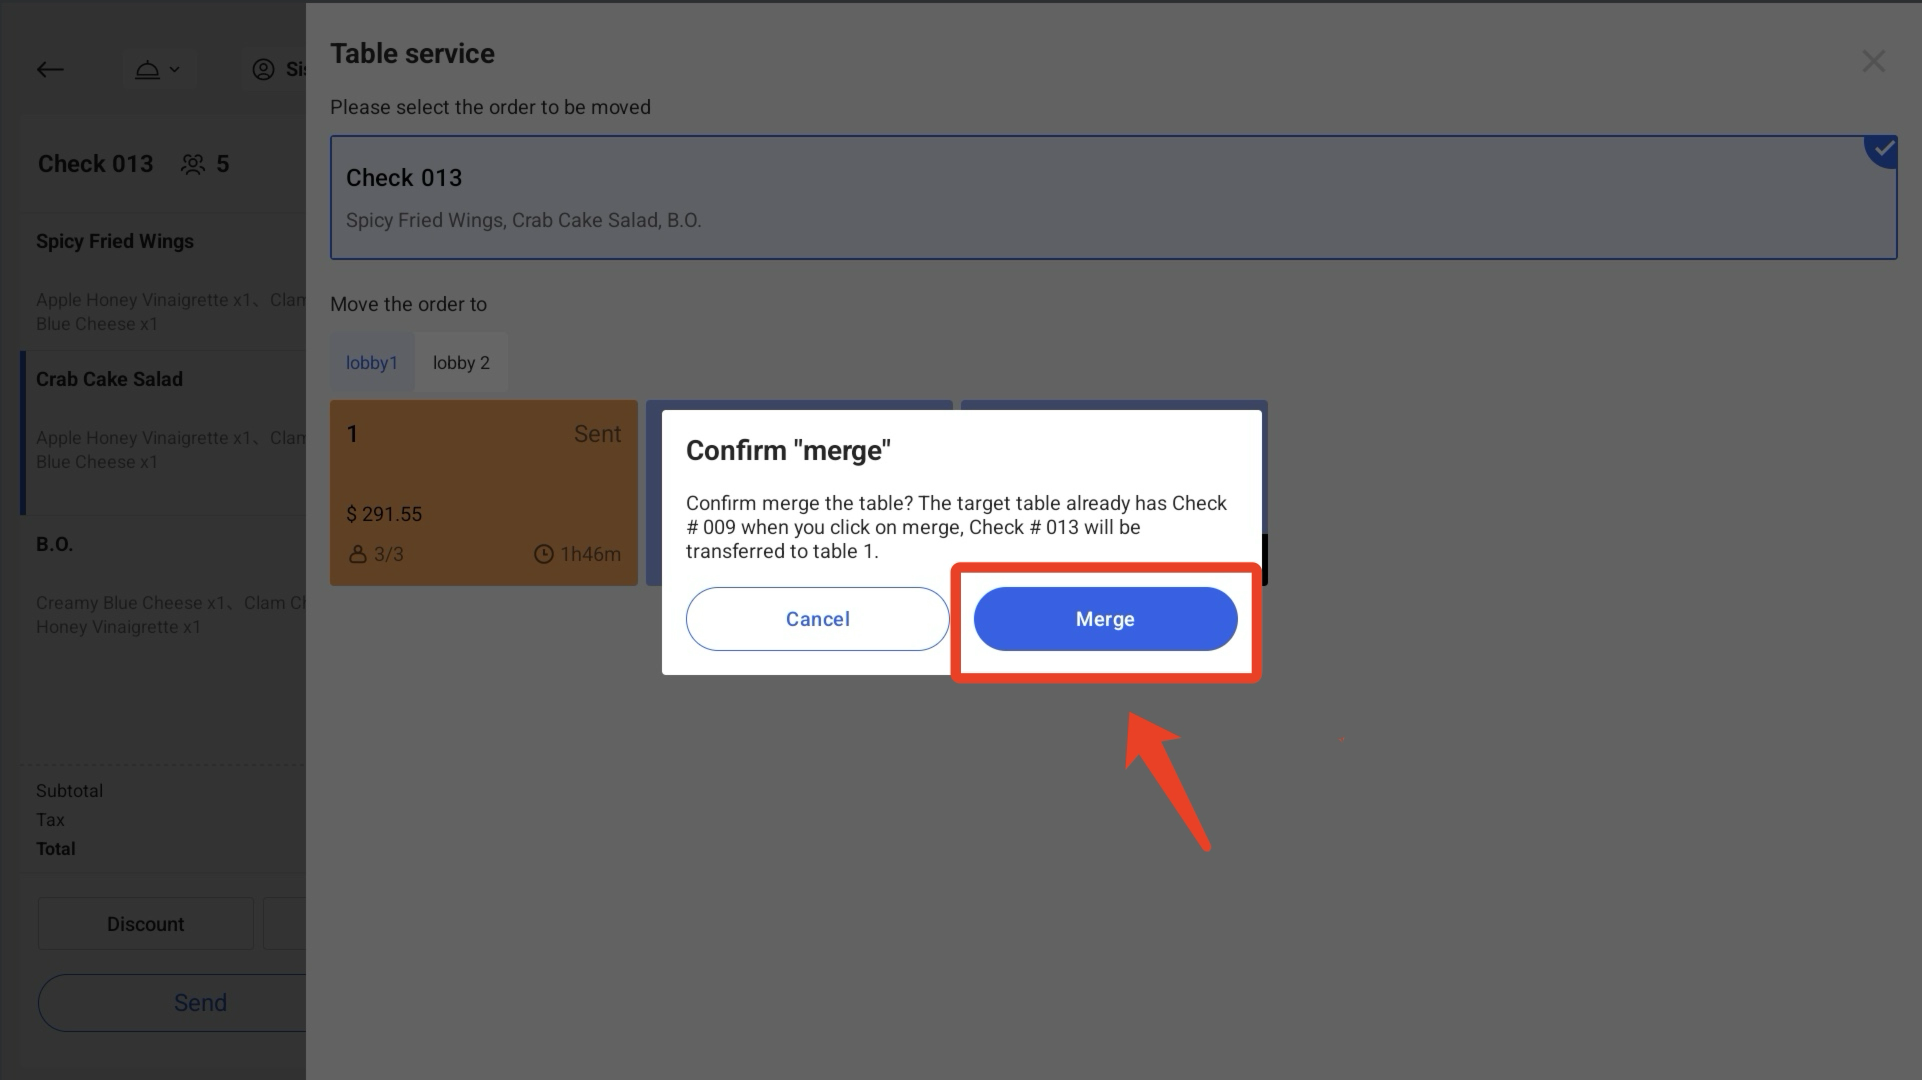
④ After the orders are successfully merged, the orders on the original table will be cleared, and the new orders will be merged onto another table. The page will automatically jump to the table that it merges to.
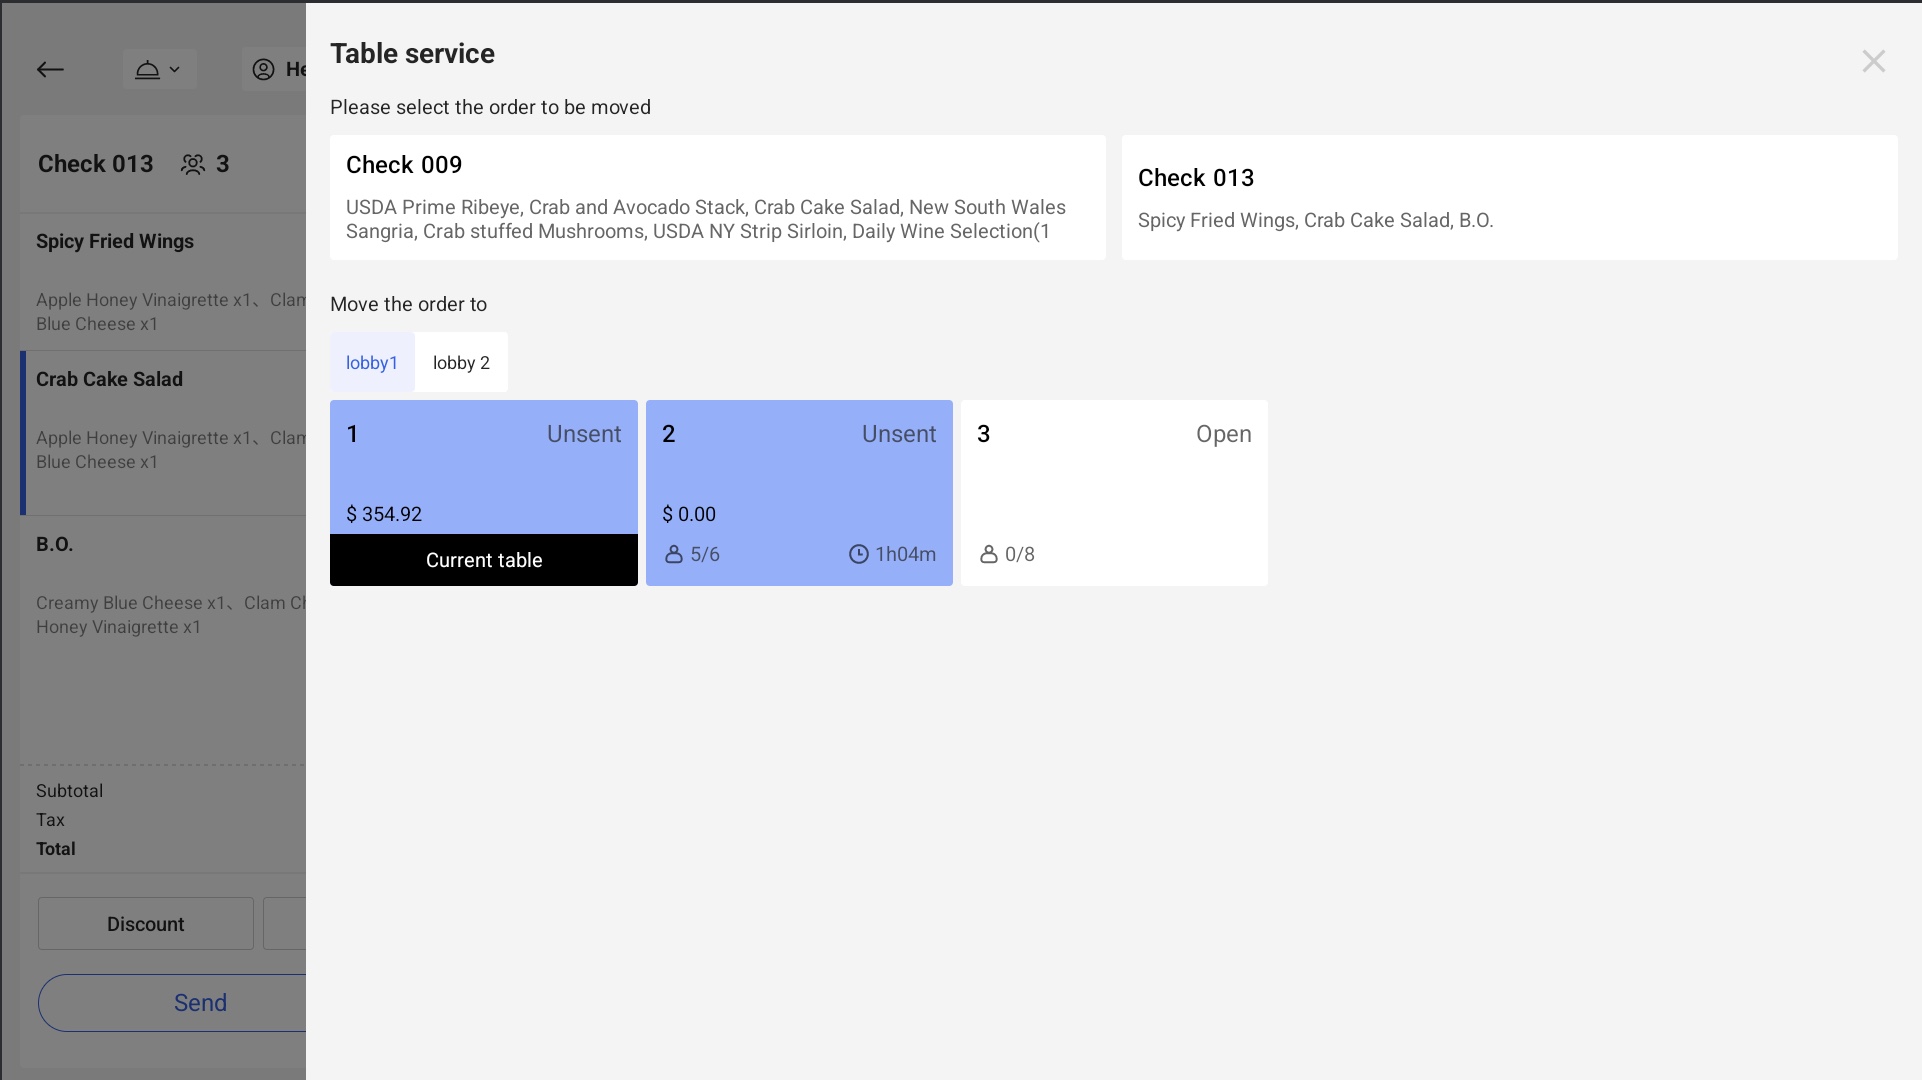
⑤ Swipe the shopping cart bar left and right to view every order on this table.
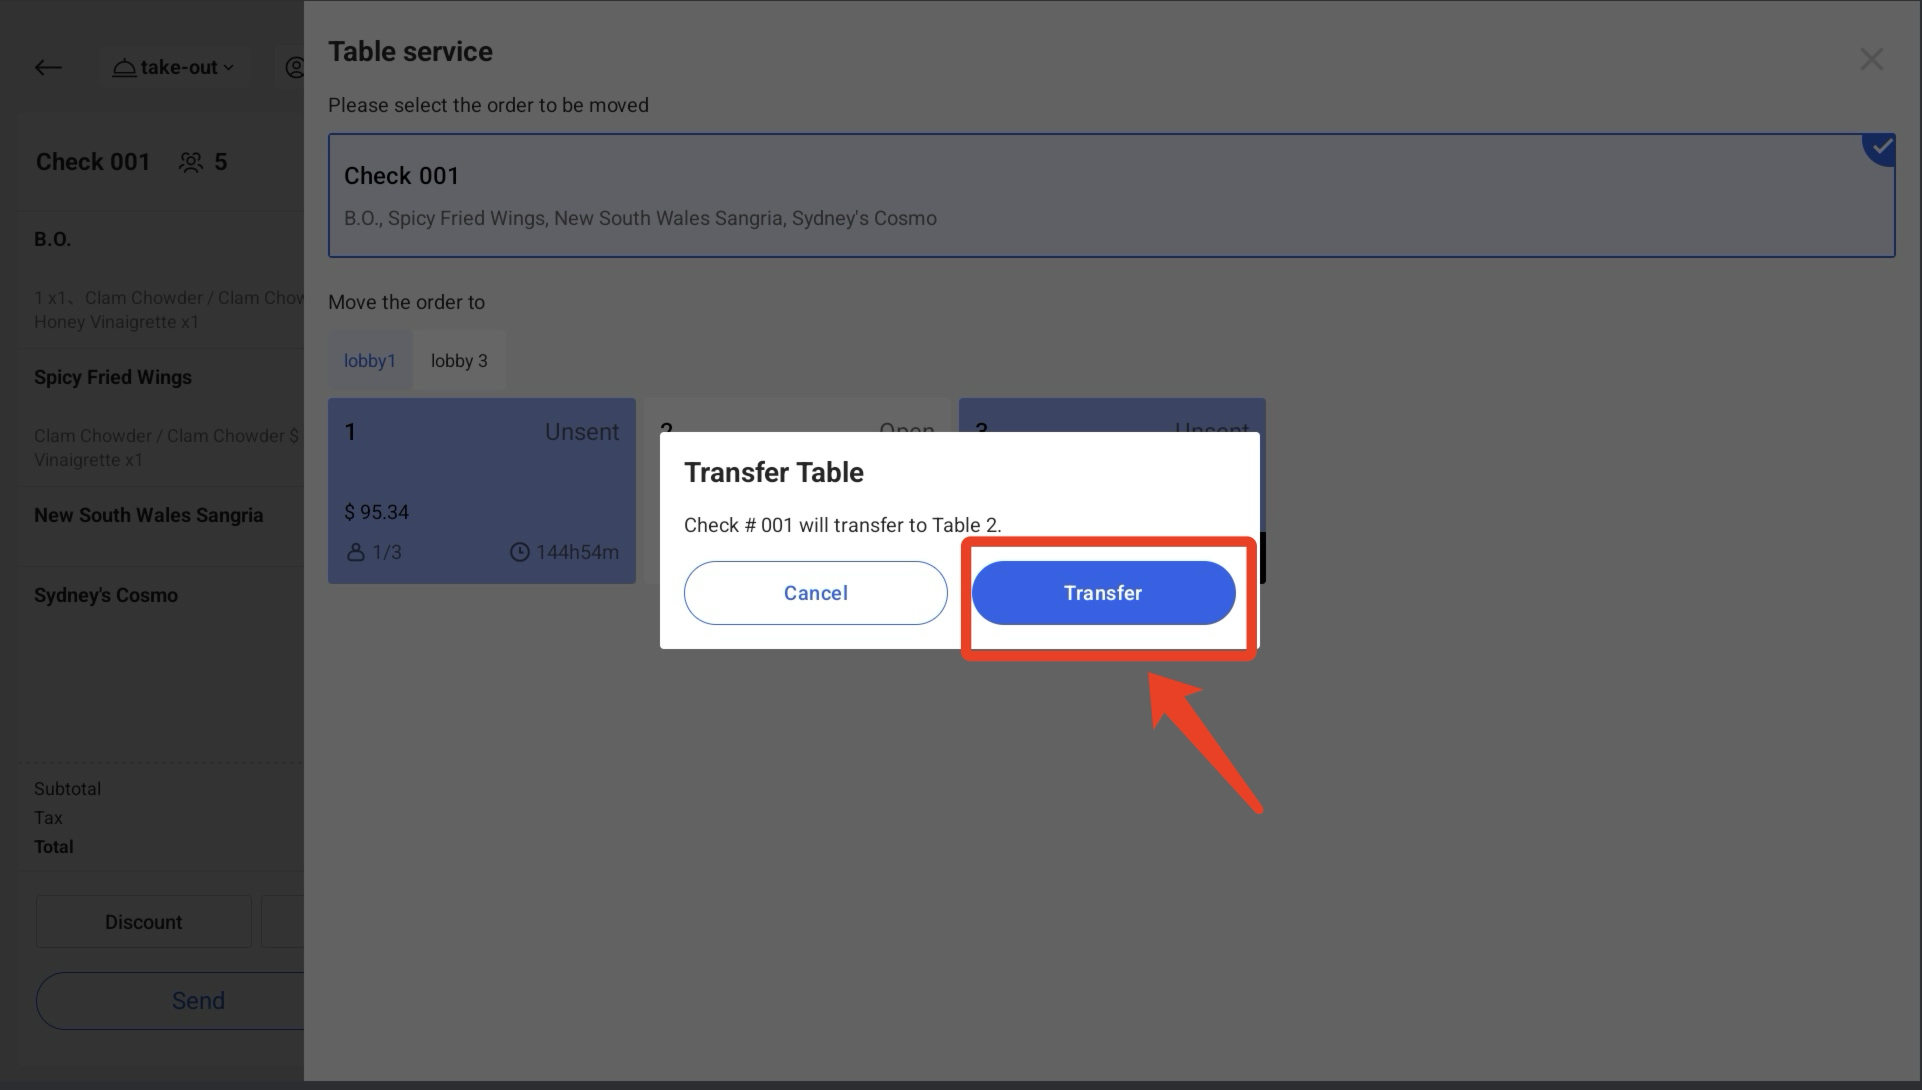
4. Transfer Table
① Click on the table number button at the top left corner of the interface to enter the management page.
② select an empty table that you want to transfer to
③ Tab Transfer to confirm your operation
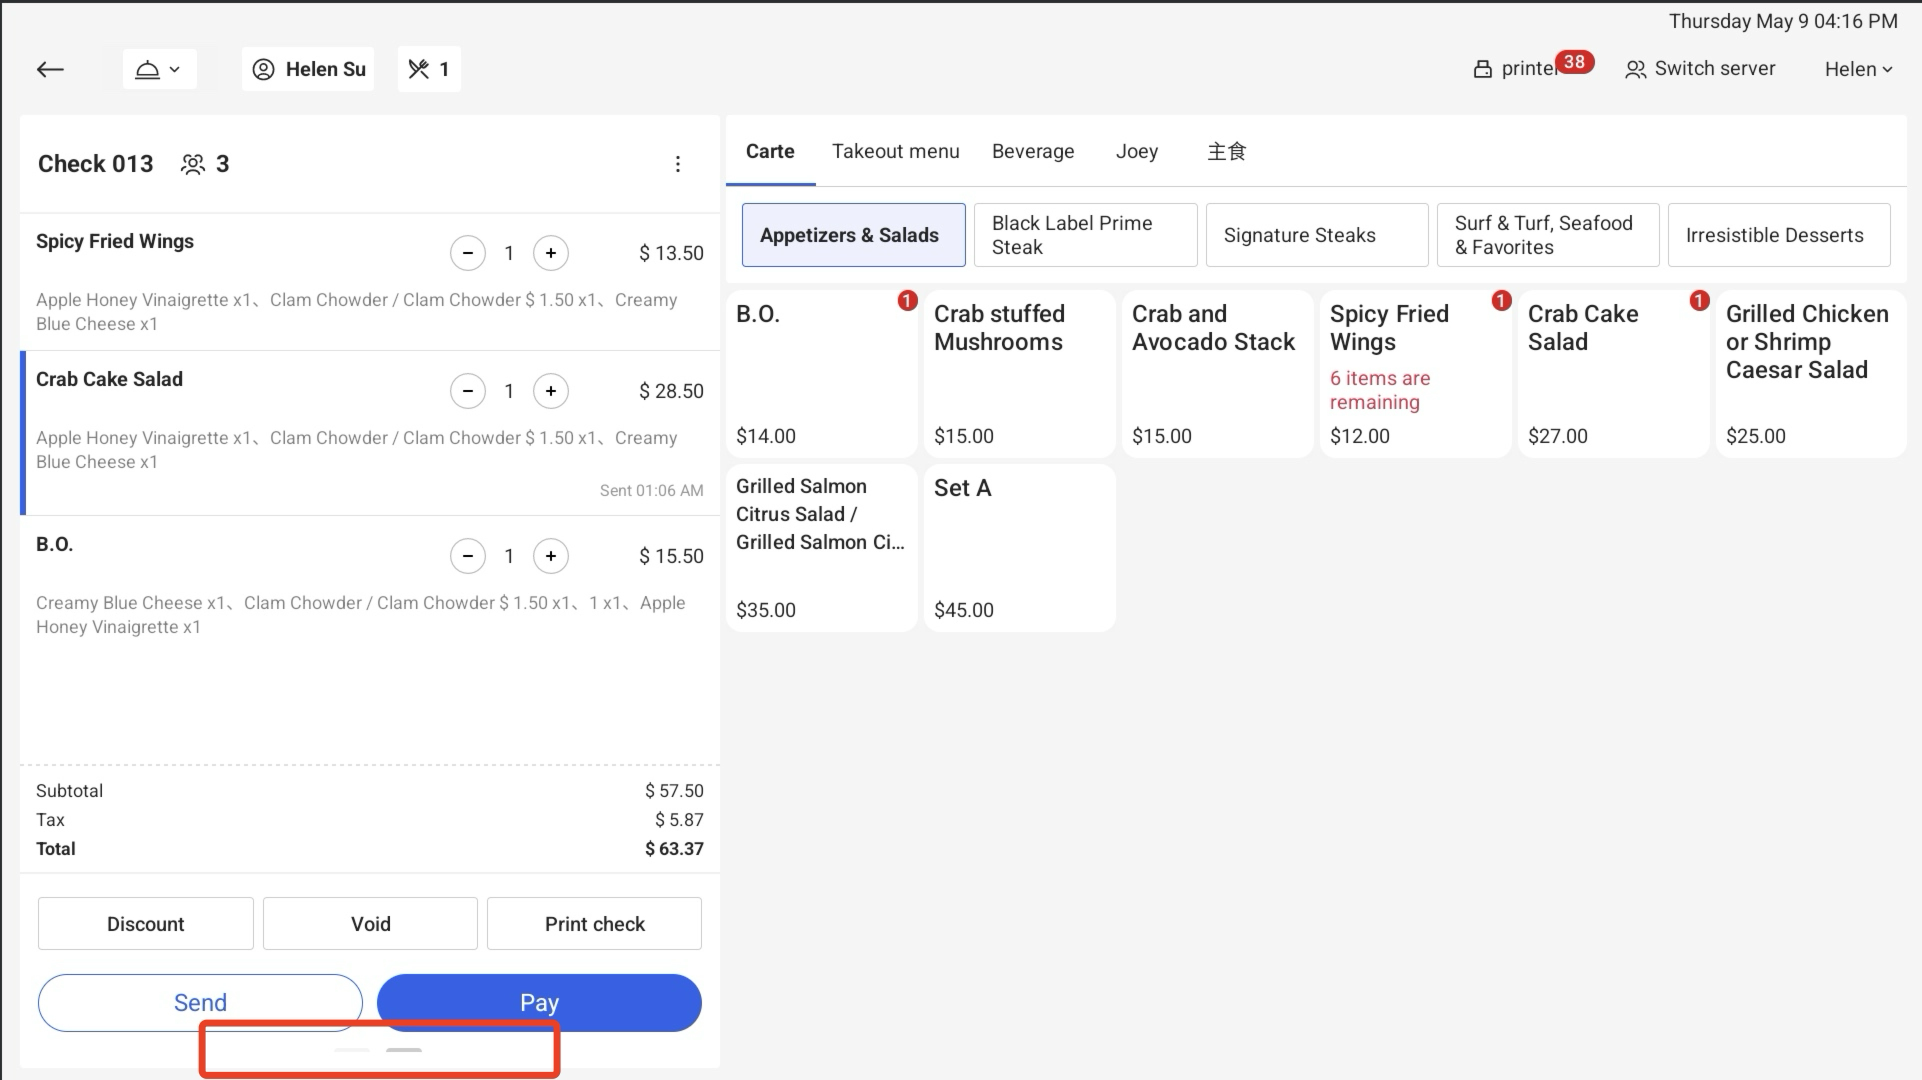
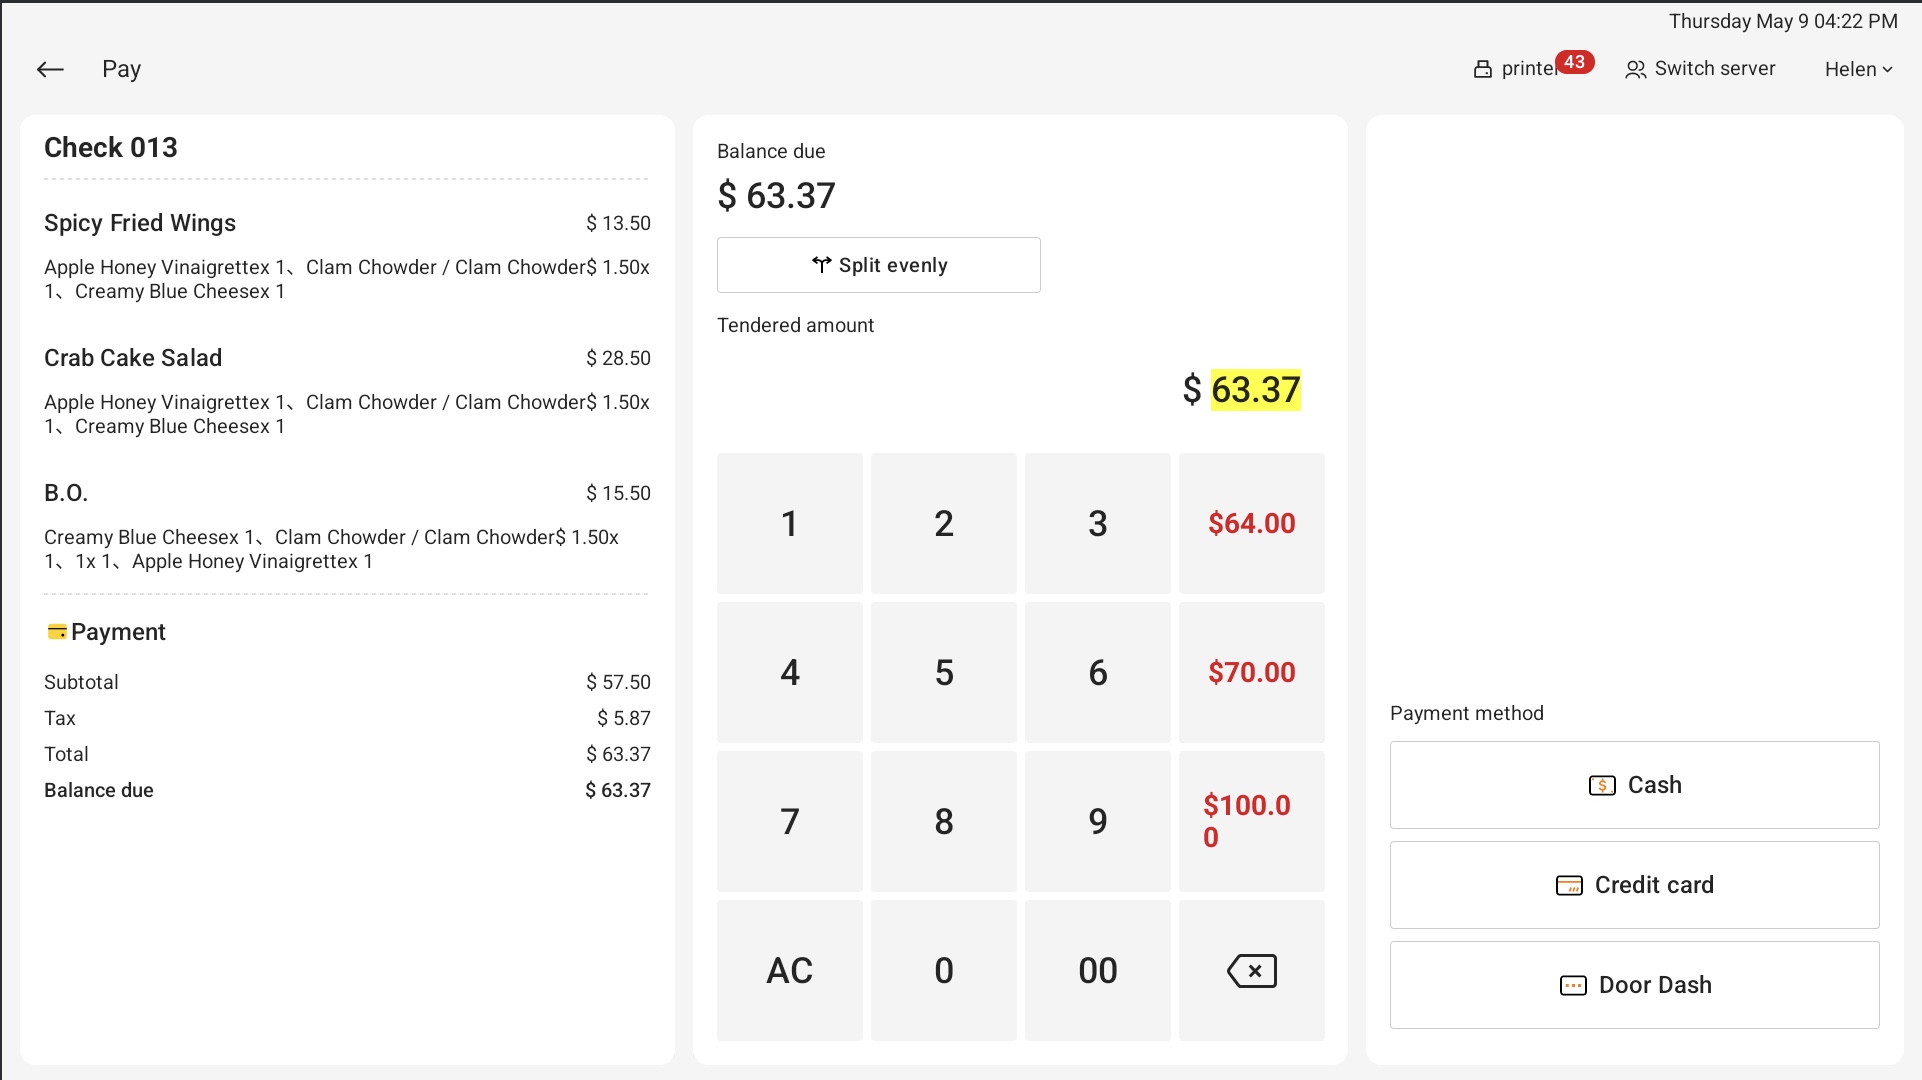
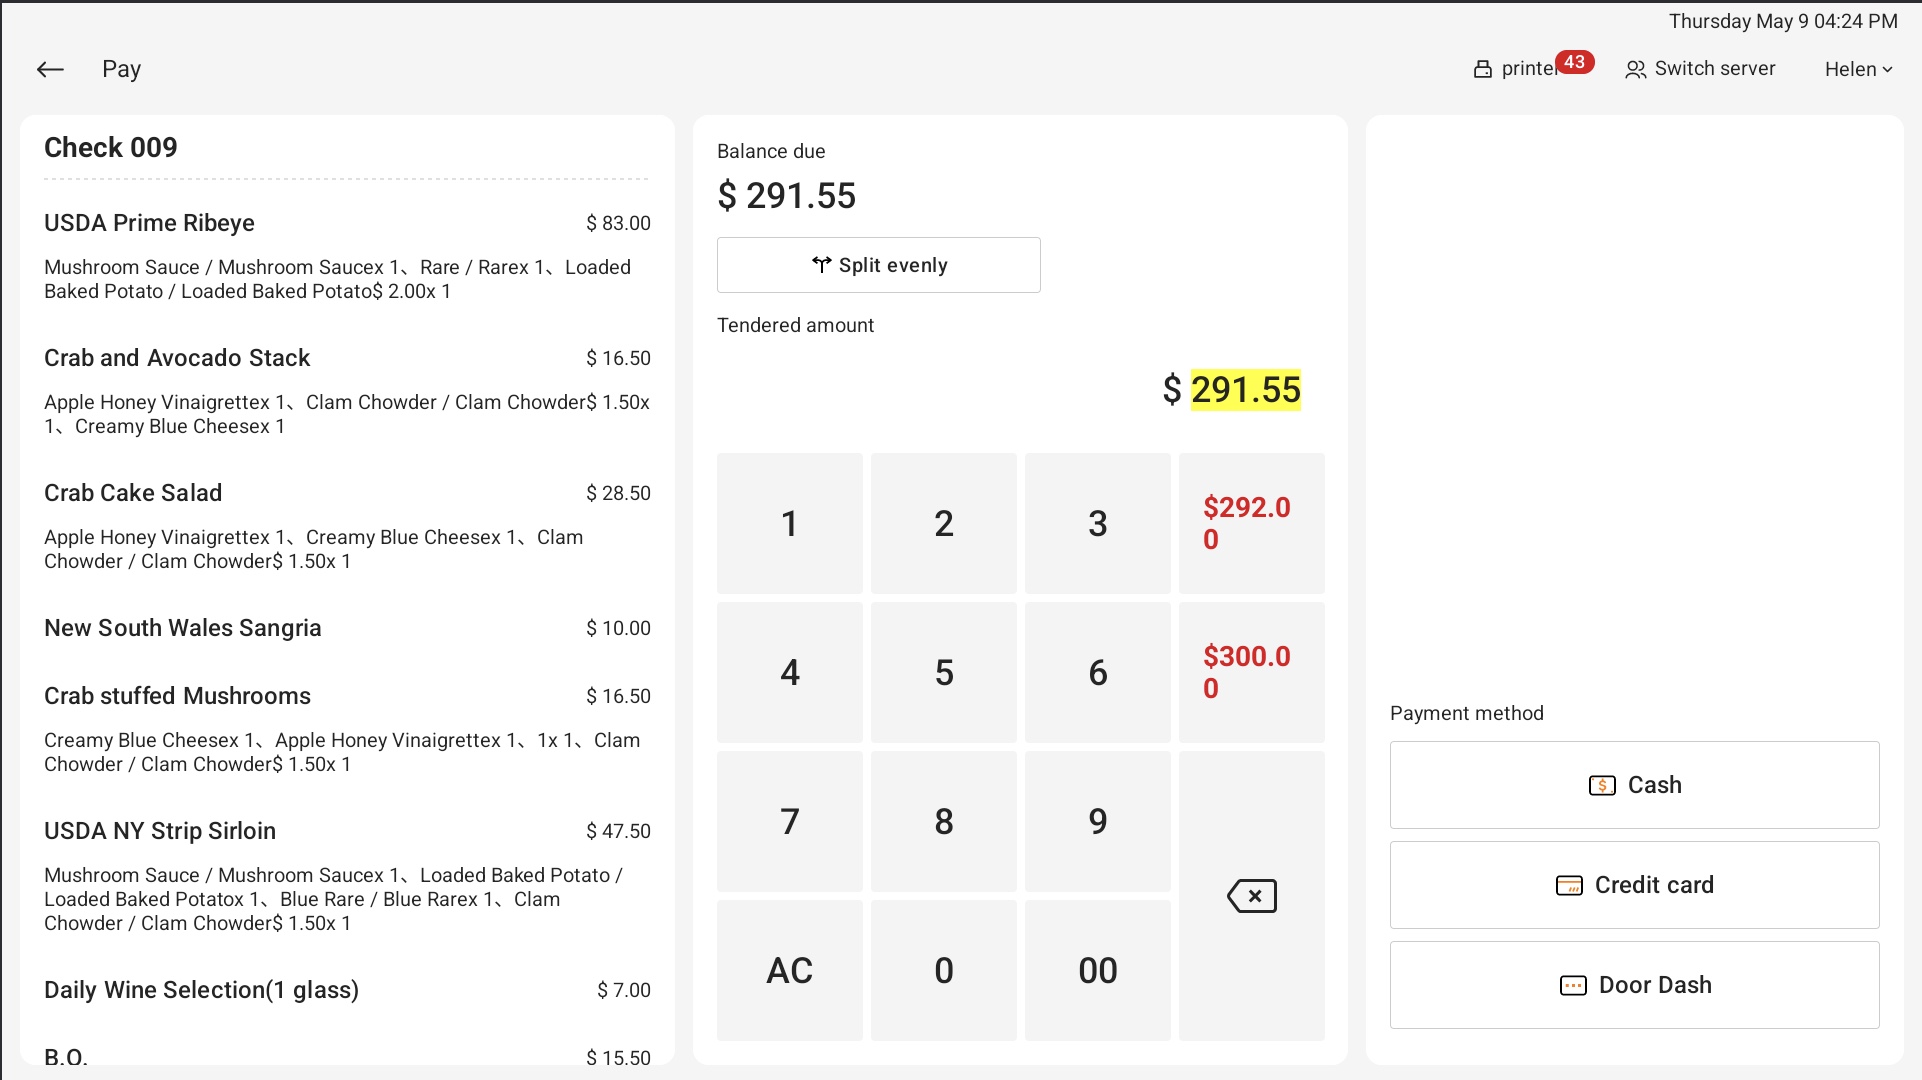
5. Split Check
① Click Split check and enter the order split page to view the order details of this table or split the order.

② Select the items that need to be paid for on another order, and then click the target order that needs to be migrated.

a. Create an new order
① click Add check to create a new order that needs to be paid.

b. Save/cancel an order
i.Click Save when finished
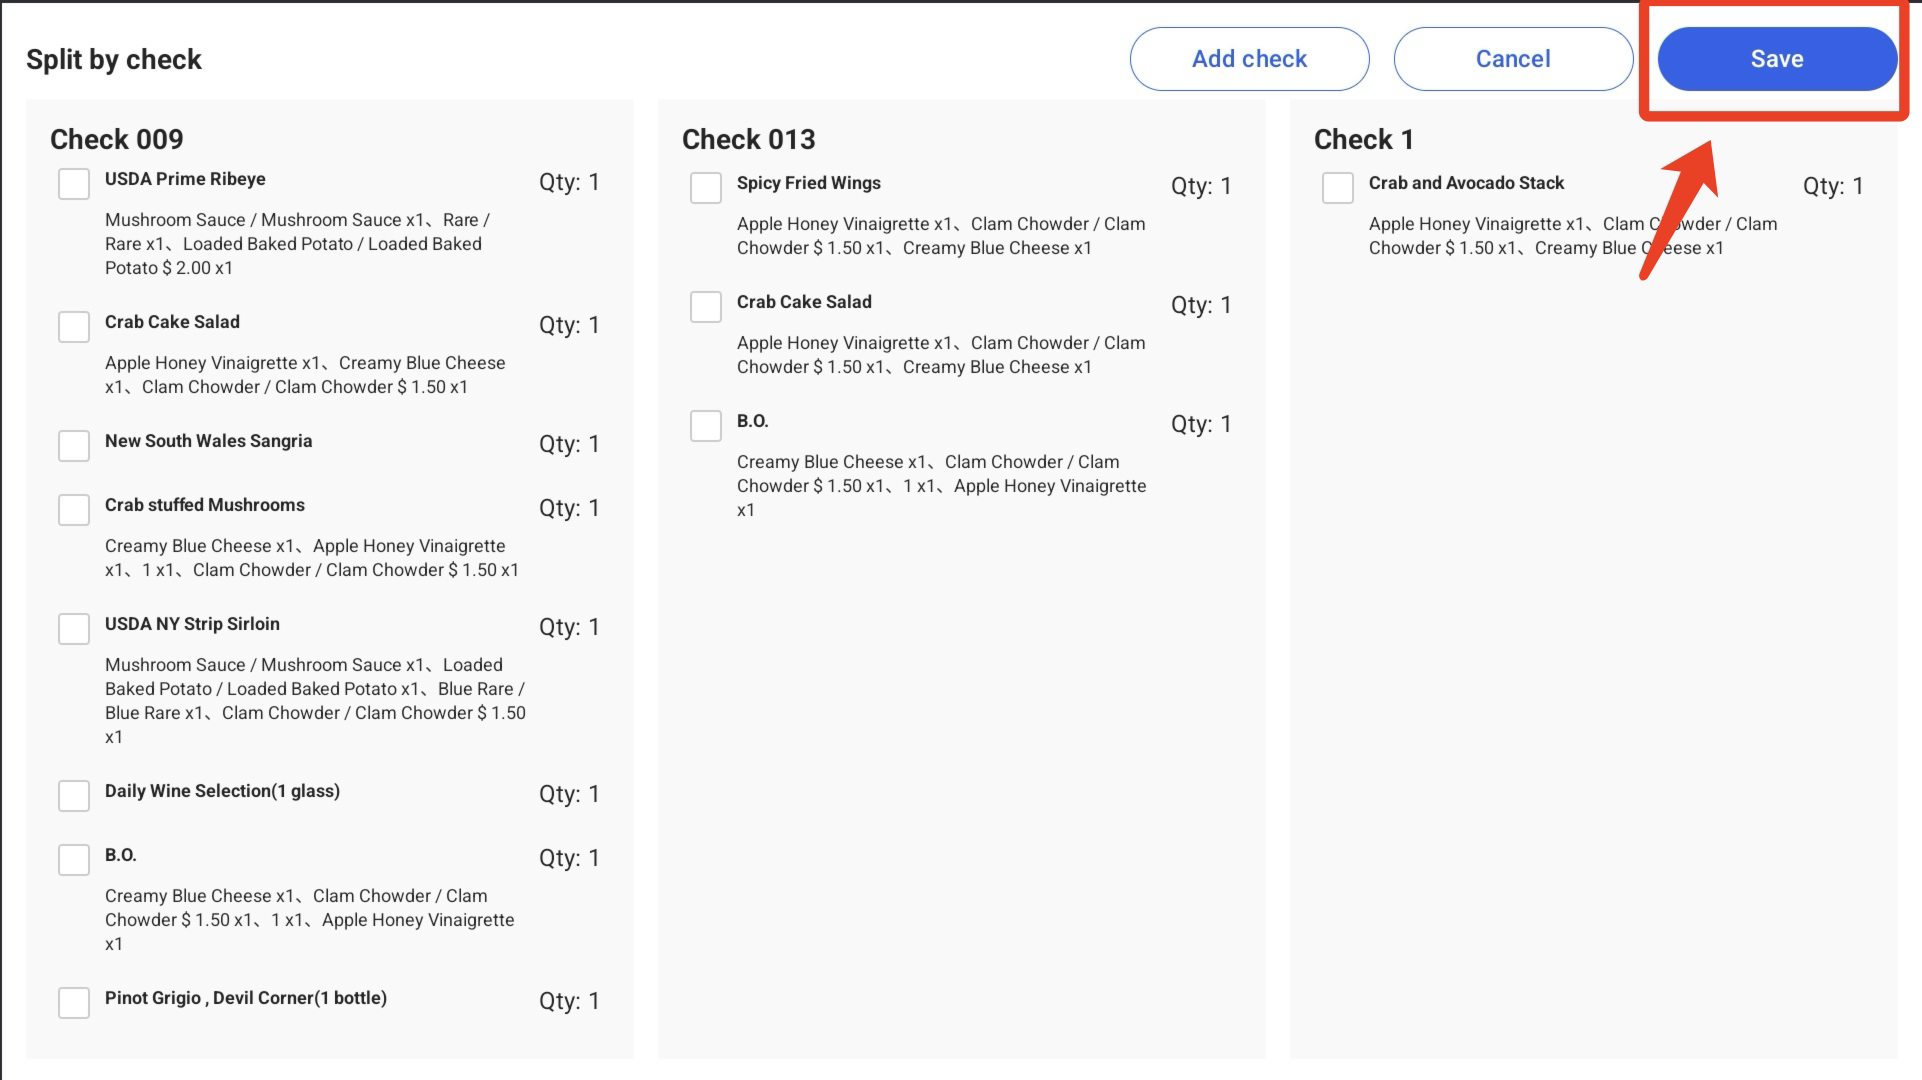
ii. Click the Cancel button to trigger the pop-up and you can click the Discard button to cancel the edit.

6. Edit Guest Number
Click the edit button, enter the new number and click Confirm.